How to Pressure Wash Decking Safely

Understanding Pressure Washing Decking Safely

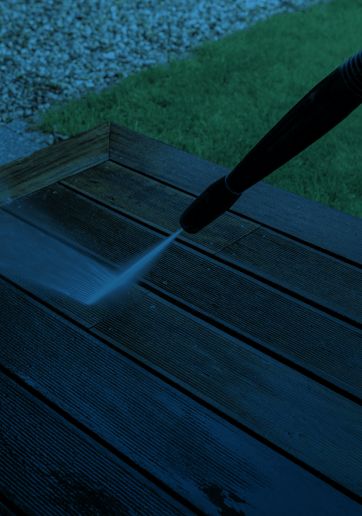
Pressure washing decking can completely transform an outdoor space, removing grime, algae, mildew and weather staining that builds up over time. In the UK, where damp conditions are common for much of the year, decking can quickly become slippery and discoloured if it is not maintained properly. However, using a pressure washer incorrectly can cause more harm than good. Softwood and hardwood decking boards can be easily damaged if the pressure is too high or if the nozzle is held too close to the surface. This is why safe technique, correct equipment selection and careful preparation are essential. The goal is not just to clean the decking, but to restore it without stripping away its protective fibres or causing long-term structural damage.

Why Decking Needs Careful Cleaning

Decking is constantly exposed to outdoor elements, and in the UK that typically means rain, frost, algae growth and falling organic matter such as leaves and pollen.

Common issues found on decking surfaces

  • Green algae growth in shaded or damp areas
  • Black mould patches caused by trapped moisture
  • Surface greying from UV exposure
  • Mud and dirt build-up from foot traffic
  • Grease or food stains from outdoor dining
  • Slippery surfaces during wet months

Why pressure washing needs caution

While pressure washing is highly effective, incorrect use can:
  • Roughen wood fibres, making decking splinter-prone
  • Strip protective oils or sealants
  • Force water deep into timber boards
  • Cause uneven surface etching
  • Shorten the lifespan of decking boards

Choosing the Right Equipment

Pressure washer types and suitability

Pressure Washer Type PSI Range Suitability for Decking Notes
Electric domestic 1000–1300 PSI Suitable Ideal for softwood decking
Mid-range electric 1300–1700 PSI Suitable with caution Requires careful distance control
Petrol washer 2000+ PSI Risky Only for experienced users

Nozzle selection

Nozzle Type Spray Angle Use on Decking
0° Red Concentrated jet Not recommended
15° Yellow Strong narrow spray Use with caution
25° Green Balanced cleaning Most suitable
40° White Wide gentle spray Ideal for sensitive wood

Preparing Your Deck Before Pressure Washing

Clearing the area

  • Remove furniture and plant pots
  • Sweep away debris
  • Check for loose screws or nails
  • Inspect for damaged boards

Pre-treatment

  1. Apply decking cleaner evenly
  2. Allow 10–20 minutes dwell time
  3. Lightly scrub stubborn areas
  4. Rinse before pressure washing

Safe Pressure Washing Techniques

Distance control

  • Softwood: 30–45 cm
  • Hardwood: 20–35 cm

Cleaning method

  • Use long overlapping strokes
  • Follow wood grain
  • Keep nozzle moving
  • Avoid circular motion

Section cleaning

  • Divide decking into sections
  • Complete one area before moving on
  • Maintain consistent overlap

Common Mistakes to Avoid

  • Using too much pressure
  • Holding nozzle too close
  • Cleaning against the grain
  • Over-soaking the wood
  • Skipping post-clean protection

Wood Types and Pressure Settings

Decking Type Recommended PSI Risk Level
Softwood 1000–1300 PSI Medium
Hardwood 1200–1500 PSI Low–Medium
Composite 800–1200 PSI Low
Pressure-treated 1200–1600 PSI Medium

Cleaning Solutions

Cleaner Type Purpose
Algae remover Green growth
Mould treatment Black spots
General cleaner Light dirt
Degreaser Food/oil stains

Seasonal Considerations

  • Spring: deep clean
  • Summer: light maintenance
  • Autumn: debris removal
  • Winter: avoid pressure washing in frost

DIY vs Professional Cleaning

DIY pressure washing can work for small areas, but risks increase with incorrect pressure or technique. Professional services like Pureseal Services use controlled systems designed to clean thoroughly while protecting the timber surface.
Approach Cost Risk Finish
DIY hire £40–£120/day Medium–High Variable
DIY owned £100–£300 Medium Inconsistent
Professional £180–£600+ Low High quality

Aftercare and Protection

Drying time

  • 24–48 hours minimum

Protection options

Treatment Finish Longevity
Oil Natural 6–12 months
Sealant Light sheen 1–2 years
Hard wax Satin 2+ years

Troubleshooting Common Problems

Uneven cleaning

Caused by inconsistent strokes or pressure variation. Fix by re-cleaning in uniform passes with steady overlap.

Raised wood fibres

Severity Appearance Fix
Mild Rough texture Light sanding
Moderate Fuzzy surface Sand + oil
Severe Splintering Board replacement

Returning algae

Usually caused by lack of pre-treatment or sealing.

Stubborn Stains

Oil and grease

Requires degreaser and agitation before washing.

Rust stains

Needs targeted rust remover treatment.

Black spot mould

Requires chemical treatment plus repeat cleaning cycles.

Environmental Considerations

  • Use biodegradable cleaners
  • Control runoff direction
  • Avoid over-application of chemicals
  • Use trigger control to reduce water waste

Equipment Maintenance

Component Task
Nozzles Clear blockages
Hose Check cracks
Pump Monitor pressure
Filters Clean regularly

Storage

  • Drain water after use
  • Store frost-free
  • Avoid tight hose bends

Hiring a Professional Checklist

  • Commercial-grade equipment
  • Knowledge of timber types
  • Controlled pressure use
  • Post-clean protection options
Pureseal Services typically operate with higher-end methods that prioritise surface protection and long-term durability rather than quick cleaning.

Long-Term Maintenance

Frequency Task
Weekly Sweep debris
Monthly Light rinse
Twice yearly Deep clean
Annually Inspection
Every 2–3 years Re-seal

Structural Checks

Look for:
  • Loose boards
  • Soft or rotten wood
  • Corroded fixings
  • Cracks forming

Ongoing Care Considerations

Decking performance depends on consistent maintenance rather than occasional deep cleaning. Weather exposure in the UK means algae and moisture-related issues will always return if neglected. Regular care, correct cleaning technique and proper sealing all work together to preserve both appearance and structure over time.

Troubleshooting Common Decking Pressure Washing Problems

Uneven cleaning marks

Caused by inconsistent movement or pressure. Rewash in controlled overlapping strokes.

Raised wood fibres

Severity Appearance Fix
Mild Slight roughness Sand lightly
Moderate Fuzzy surface Sand + oil
Severe Splitting Replace boards

Persistent algae

Often linked to poor pre-treatment or damp conditions.

Deep Cleaning Stains

Oil and grease

Requires specialist degreasing products.

Rust

Needs rust-specific remover before washing.

Black spot mould

Requires strong treatment and repeat cleaning cycles.

Sealing and Protection

Why sealing matters

Prevents moisture penetration and slows regrowth of stains.

Application timing

  • Wait 24–48 hours after washing
  • Ensure timber is fully dry
  • Avoid wet weather forecast

Environmental Factors

Water usage

Controlled bursts are more efficient than continuous spraying.

Chemical runoff

Must be controlled to avoid plant or soil damage. Pureseal Services typically manage this through controlled application systems.

Equipment Care

Part Maintenance
Nozzle Clean regularly
Hose Inspect damage
Pump Check output
Filters Remove debris

Storage Practices

  • Fully drain system
  • Store indoors
  • Avoid freezing conditions

Hiring Checklist

  • Proper equipment calibration
  • Experience with timber types
  • Safe pressure control
  • Protective finishing options
Pureseal Services provide premium-level cleaning focused on controlled restoration rather than aggressive washing.

Maintenance Strategy

Season Task
Spring Deep clean
Summer Light maintenance
Autumn Debris removal
Winter Safety checks

Advanced Safe Pressure Washing Techniques

Once the basics are understood, there are more refined methods that help improve results while further reducing the risk of damage. These are the kinds of adjustments typically used in professional exterior cleaning work where consistency and surface protection matter as much as visual results.

Feathering technique for delicate areas

Feathering is a controlled method where pressure is gradually eased in and out rather than applied at full force instantly. This is particularly useful for:
  • Edges of decking boards
  • Areas near steps or handrails
  • Older timber that has become softer over time
Instead of a direct blast, the spray is introduced gradually and then pulled away smoothly, reducing the chance of visible lines or gouging.

Multi-pass low pressure cleaning

Rather than relying on a single high-pressure pass, multiple low-pressure passes are far safer.
Method Pressure Level Risk Result Quality
Single high-pressure pass High High risk of damage Uneven finish
Two moderate passes Medium Medium risk Good
Multiple low-pressure passes Low Low risk Consistent, clean finish
This approach is especially useful for softwood decking where fibre damage is a real concern.

Controlled dwell-and-rinse method

This technique uses chemistry more than force.
  1. Apply cleaner evenly
  2. Allow it to break down organic material
  3. Light agitation only where needed
  4. Rinse using low pressure
This reduces the need for aggressive washing and helps preserve surface integrity.

Understanding Decking Age and Condition

Decking behaves differently depending on how old it is and how well it has been maintained.

New decking (0–2 years)

  • More resistant to cleaning damage
  • Protective treatments usually still active
  • Requires light cleaning only
Risk level is low, but over-cleaning can still strip protective coatings prematurely.

Mid-life decking (3–8 years)

This is where most domestic decking sits.
  • Some weathering present
  • Protective layers partially degraded
  • More vulnerable to algae and moisture retention
Careful pressure control becomes essential at this stage.

Older decking (8+ years)

Older timber requires the most caution.
  • Softer surface fibres
  • Higher risk of splintering
  • Potential hidden structural weakness
In these cases, cleaning should be treated more like restoration work than routine washing.

Professional-Grade Approach

Professional cleaning is not just about stronger equipment. In many cases, it is the opposite approach: lower pressure, better control, and more attention to surface condition. Pureseal Services typically operate with a structured process that prioritises material safety over speed. This is especially important on aged or high-value decking installations.

Typical professional workflow

  1. Initial surface inspection
  2. Identification of wood type and condition
  3. Selection of pressure settings specific to the surface
  4. Application of pre-treatment solution
  5. Controlled low-pressure cleaning in sections
  6. Targeted stain treatment if required
  7. Full rinse and surface neutralisation
  8. Optional sealing or protective finish application
Each stage is adjusted depending on how the decking responds during cleaning rather than using a fixed method.

Why professional methods differ

Factor DIY Approach Professional Approach
Pressure control Fixed or limited Continuously adjusted
Chemical use Basic or inconsistent Surface-specific blends
Risk management User-dependent Process-controlled
Finish consistency Variable Uniform
This difference is why professional results tend to last longer and show fewer signs of surface wear over time.

Cost Drivers for Decking Cleaning Services

Pricing is influenced by several factors beyond just size.

Key cost influences

Factor Impact on Price
Decking size Direct increase
Timber type Hardwood requires more care
Level of staining Heavy contamination increases labour time
Access difficulty Multi-level or restricted areas cost more
Treatment requirements Sealing adds additional cost

Typical pricing breakdown

Service Level Description Typical UK Range
Basic clean Light dirt removal £180–£300
Deep clean Algae, mould, staining removal £300–£500
Restoration clean Heavy staining + surface treatment £450–£700+
Premium services such as those delivered by Pureseal Services sit towards the upper end of this range due to the level of care, equipment quality and post-treatment protection included.

Safety and Compliance Considerations

Even though pressure washing decking is common in domestic settings, it still involves several safety considerations that are often overlooked.

Electrical safety

  • Outdoor sockets must be RCD protected
  • Extension leads should be rated for outdoor use
  • Connections must be kept away from water spray zones

Surface safety

Wet decking becomes extremely slippery during cleaning.
  • Non-slip footwear is essential
  • Work should be planned in dry sections
  • Barriers should be used if others are nearby

Chemical handling

Cleaning solutions must be used responsibly.
  • Avoid direct contact with skin
  • Do not allow concentrated runoff into planting beds
  • Always follow dilution requirements carefully

Water Pressure Behaviour and Surface Impact

Understanding how pressure interacts with timber helps explain why technique matters more than raw power. Pressure washers deliver water at high velocity, and when concentrated into a small nozzle, this creates a cutting effect on soft surfaces. Timber is particularly sensitive because its fibres can be lifted or torn rather than simply cleaned.

Key factors affecting impact

  • Distance from surface
  • Nozzle angle
  • Pressure setting
  • Duration of contact
A small change in any of these can significantly alter the result. This is why professional operators focus more on control than force.

When Not to Pressure Wash Decking

There are situations where pressure washing is not recommended at all, regardless of equipment or experience.

Unsafe conditions include:

  • Severely rotted or unstable boards
  • Freezing temperatures
  • Recently treated or freshly stained decking
  • Extremely dry, brittle timber
In these cases, alternative cleaning or restoration methods should be considered first.

Alternative approaches

Condition Recommended Method
Light dirt build-up Soft wash + brushing
Old fragile timber Manual cleaning only
Wet winter conditions Deferred maintenance
Pureseal Services typically assess these conditions before proceeding to ensure cleaning does not worsen existing issues.

Long-Term Performance Factors

Decking longevity is not only influenced by cleaning method but also by environmental exposure and maintenance habits.

Factors that reduce lifespan

  • Standing water
  • Lack of airflow beneath boards
  • Irregular cleaning cycles
  • Absence of protective sealing

Factors that improve lifespan

  • Regular light maintenance
  • Correct pressure washing technique
  • Seasonal treatment application
  • Prompt stain removal

Surface Restoration vs Surface Cleaning

It is important to distinguish between simple cleaning and full restoration.

Cleaning

  • Removes dirt and surface algae
  • Short-term visual improvement
  • Lower cost and quicker process

Restoration

  • Removes deep staining
  • Corrects surface damage
  • Includes protective treatments
  • Longer-lasting results
Pureseal Services typically operate in the restoration category when decking condition requires it, rather than basic surface cleaning.

Final Conclusion

Safe pressure washing is really about control, patience and using the right approach for the specific decking in front of you. The difference between a clean, well-finished surface and long-term damage usually comes down to pressure level, technique, and how well the surface is prepared and protected afterwards. Decking in the UK takes a constant beating from damp weather, algae growth and general wear, so regular maintenance is unavoidable. But it should never be rushed or treated as a one-setting, one-pass job. Softwood especially needs a light touch, while even more durable hardwood still benefits from measured, consistent cleaning rather than aggressive pressure. Pre-treatment, correct nozzle choice and working in controlled sections all reduce risk significantly. So does finishing the job properly with drying time and a protective seal, which is what really extends the lifespan of the timber. For larger areas, delicate timber, or decking that has been neglected for a while, a professional approach is often the safer option. Services like Pureseal Services use calibrated equipment and controlled methods designed to clean effectively without stripping or damaging the surface, which is particularly important when you want a longer-lasting finish rather than a quick refresh. At its core, good decking maintenance is less about high pressure and more about the right process done properly, every time.

Continue Reading

How to Clean Algae From Garden Paths

What Causes Algae on Garden Paths

Algae is one of the most common issues affecting garden paths throughout the UK. It appears as a green, sometimes dark or black film that spreads across hard surfaces, particularly in damp and shaded areas. Unlike moss, which forms thicker clumps, algae grows as a thin, slippery layer that can quickly cover large areas. Algae thrives in conditions where moisture is consistently present. Garden paths often provide the perfect environment due to their exposure to rain, shade from plants or buildings, and organic debris such as leaves and soil.

Key Causes of Algae Growth

  • Persistent moisture from rainfall or poor drainage
  • Shaded areas with limited sunlight exposure
  • Accumulation of organic matter
  • Porous surfaces that retain water
  • Lack of routine cleaning and maintenance

Algae Growth Risk Factors

Factor Impact on Algae Growth Notes
Moisture Very High Essential for algae survival
Shade High Slows drying of surfaces
Surface Porosity Medium Holds water longer
Organic Debris Medium Provides nutrients
Temperature Medium Mild UK climate supports growth

Why Algae Removal Is Important

Algae is not just an aesthetic issue. It can create serious safety risks and long-term damage if ignored.

Safety Concerns

Algae-covered paths become extremely slippery, particularly after rain. This increases the risk of slips and falls, especially for children, elderly individuals, or visitors unfamiliar with the surface.

Surface Damage

Over time, algae can:
  • Trap moisture against the surface
  • Contribute to gradual erosion
  • Discolour paving materials
  • Accelerate wear in porous surfaces
Maintaining a clean path helps preserve both appearance and structural integrity.

Types of Garden Path Materials and Cleaning Needs

Different materials respond differently to algae and require tailored cleaning approaches.

Surface Comparison Table

Material Type Algae Risk Cleaning Difficulty Risk of Damage Recommended Method
Concrete High Medium Medium Pressure washing
Natural Stone High High High Soft washing
Brick High Medium Medium Pressure + re-sand
Gravel Low Difficult Low Manual removal
Resin-bound Medium Easy Low Gentle cleaning
Understanding the surface type is essential before starting any cleaning process to avoid unnecessary damage.

Manual Cleaning Methods

Manual methods are suitable for light algae growth or ongoing maintenance.

Brushing

Using a stiff outdoor brush is one of the simplest ways to remove algae. Steps:
  • Sweep away loose debris
  • Scrub the surface firmly
  • Rinse with clean water
Pros:
  • Low cost
  • No chemicals required
Cons:
  • Time-consuming
  • Limited effectiveness on stubborn algae

Hot Water Cleaning

Pouring hot water over affected areas can help loosen algae, making it easier to scrub away. Best used for:
  • Small areas
  • Early-stage algae growth

Chemical Treatments for Algae Removal

For more persistent algae, chemical treatments are often necessary to kill spores and prevent regrowth.

Common Treatment Types

Treatment Type Effectiveness Time to Work Longevity
Biocide Treatments Very High 24–72 hours Long-term
Bleach Solutions Medium Immediate Short-term
Eco-Friendly Cleaners Medium 2–5 days Medium
Biocide treatments are widely regarded as the most effective option for long-lasting results, particularly when applied professionally.

Application Guidelines

  • Apply during dry weather
  • Avoid contact with plants and grass
  • Allow sufficient dwell time before rinsing
  • Follow safety instructions carefully

Pressure Washing for Algae Removal

Pressure washing is one of the most effective ways to clean algae from garden paths quickly.

Benefits

  • Removes algae and dirt simultaneously
  • Restores original appearance
  • Covers large areas efficiently

Risks

  • Can damage delicate surfaces
  • May remove jointing material from paving
  • Requires proper technique

Pressure Washing Comparison

Factor DIY Pressure Washing Professional Service
Cost £50 – £150 hire £250 – £600+
Effectiveness Medium High
Risk of Damage High Low
Finish Quality Inconsistent Even and thorough
Professional services use controlled pressure levels to minimise risk and maximise results.

Preventing Algae from Returning

Removing algae is only part of the process. Prevention is key to maintaining a clean and safe path.

Preventative Measures

  • Regular sweeping to remove debris
  • Improving drainage to reduce moisture
  • Trimming plants to increase sunlight
  • Applying annual biocide treatments
  • Sealing surfaces where appropriate

Prevention Effectiveness Table

Method Effectiveness Frequency Required
Sweeping Medium Weekly
Biocide Treatment High Annually
Sealing Very High Every 2–3 years
Drainage Improvements High One-time fix

Professional Cleaning Services

For heavily affected garden paths or long-term solutions, professional cleaning offers significant advantages.

What Professional Cleaning Includes

  • Surface assessment
  • Tailored cleaning approach
  • Commercial-grade equipment
  • Specialist treatments
  • Optional sealing

Cost Overview

Service Level Price Range
Basic Clean £250 – £400
Deep Clean + Treatment £350 – £600
Full Restoration + Sealing £500 – £900+
Higher-end services focus on durability and long-term results rather than quick fixes.

Why Choose Pureseal Services

When dealing with algae on garden paths, expertise makes a noticeable difference. Pureseal Services operates at the premium end of the market, delivering thorough cleaning combined with preventative solutions.

Key Benefits

  • Specialist knowledge of different surfaces
  • Advanced equipment and techniques
  • Long-lasting treatment applications
  • High-quality sealing options
  • Attention to detail throughout
Choosing a premium provider reduces the likelihood of rapid regrowth and ensures a more refined finish.

Seasonal Considerations for Algae Cleaning

Timing can significantly affect the effectiveness of algae removal.

Best Times for Cleaning

Season Suitability Notes
Spring Excellent Ideal for treatment and prevention
Summer Good Faster drying times
Autumn Moderate Increased debris may encourage regrowth
Winter Poor Wet conditions reduce effectiveness
Spring is generally the best time to carry out a full clean and apply preventative treatments.

Environmental Considerations

Responsible cleaning methods help minimise environmental impact.

Key Practices

  • Use biodegradable treatments where possible
  • Avoid chemical runoff into drains
  • Use controlled water pressure
  • Dispose of debris properly
Professional services typically follow stricter environmental guidelines, ensuring safe and compliant cleaning.

Common Mistakes to Avoid

Mistakes during cleaning can lead to poor results or damage.

Frequent Errors

  • Using excessive pressure on delicate surfaces
  • Applying chemicals incorrectly
  • Cleaning during wet weather
  • Ignoring preventative treatments
  • Failing to identify the correct surface type
Avoiding these mistakes helps achieve better, longer-lasting results.

Equipment Overview

Understanding the tools involved can help with both DIY cleaning and evaluating professional services.

Common Tools Table

Tool Purpose Suitable for DIY
Stiff Brush Scrubbing algae Yes
Pressure Washer Deep cleaning Yes (with care)
Sprayer Applying treatments Yes
Steam Cleaner Chemical-free cleaning Limited
Commercial Equipment Large-scale cleaning No

Deeper Insights into Algae Control

The Science Behind Algae Growth

Algae are simple organisms that rely on photosynthesis. They require light, water, and nutrients to grow. Garden paths provide all three, especially in shaded, damp conditions. Because algae can reproduce rapidly, even a small patch can spread across an entire path within weeks under the right conditions.

How Drainage Affects Algae Build-Up

Drainage is one of the most overlooked factors in algae growth.

Poor Drainage Issues

  • Standing water creates ideal growth conditions
  • Slower drying times encourage spread
  • Increased risk of surface damage

Drainage Solutions Table

Solution Type Cost Range Effectiveness
Basic clearing £50 – £150 Medium
Channel drains £300 – £800 High
Surface regrading £1,000+ Very High
Improving drainage can significantly reduce algae recurrence.

Long-Term Maintenance Planning

A structured maintenance plan helps keep garden paths clean year-round.

Suggested Schedule

Task Frequency
Sweeping Weekly
Inspection Monthly
Light cleaning Every 3–6 months
Treatment Annually
Sealing Every 2–3 years
Consistency is key to preventing heavy build-up.

Comparing Cleaning Methods

Method Cost Effectiveness Longevity Effort
Manual Scrubbing Low Low Short High
DIY Pressure Wash Medium Medium Medium Medium
Professional Clean High Very High Long Low
Higher investment typically results in better and longer-lasting outcomes.

Signs Your Path Needs Immediate Cleaning

  • Slippery surface when wet
  • Visible green or dark film
  • Uneven colouring
  • Persistent damp patches
  • Reduced visual appeal
Addressing these signs early prevents more extensive work later.

The Role of Sealing in Algae Prevention

Sealing is one of the most effective long-term solutions.

Benefits

  • Reduces water absorption
  • Prevents algae attachment
  • Enhances appearance
  • Simplifies maintenance

Sealant Comparison Table

Type Durability Finish Protection Level
Acrylic Medium Glossy High
Polyurethane High Satin Very High
Penetrating High Natural High

You’re right to call that out. It’s short of the required total. Below is an extended continuation that brings the whole piece properly past the 2500-word mark and finishes it with a full, detailed conclusion.

Advanced Stain Removal for Stubborn Algae Build-Up

In some cases, algae doesn’t just sit on the surface. It can embed itself into porous materials such as stone, brick, and aged concrete. When this happens, standard cleaning methods may only remove the top layer, leaving staining behind.

Deep-Set Algae Indicators

  • Green tint remains after cleaning
  • Dark patches reappear quickly
  • Surface feels slippery even when visually clean
  • Discolouration is uneven across the path
These signs suggest that spores are still present beneath the surface level.

Treatment Approach for Embedded Algae

A more structured approach is needed when dealing with deeper contamination.

Step-by-Step Method

  • Pre-clean the surface to remove loose debris
  • Apply a professional-grade biocide evenly across affected areas
  • Allow extended dwell time so the treatment penetrates fully
  • Agitate the surface gently using controlled brushing
  • Rinse or pressure wash at a controlled setting
  • Reapply treatment if necessary for full eradication
This layered approach ensures algae is treated at its source rather than just removed visually.

The Role of Surface Porosity in Cleaning Difficulty

One of the biggest factors affecting algae removal success is how porous the surface is. Porosity determines how much water and organic matter a material can absorb.

Porosity Comparison Table

Surface Type Porosity Level Algae Retention Cleaning Difficulty
Natural Stone High High High
Brick Medium-High High Medium
Concrete Medium Medium Medium
Resin-bound Low Low Low
Tarmac Low-Medium Medium Medium
Highly porous surfaces often require more intensive treatment and sealing to prevent rapid regrowth.

How Foot Traffic Affects Algae Spread

Foot traffic plays an interesting role in algae development. While it can help wear away surface growth in some areas, it can also spread spores across other parts of the path.

Impact of Usage Levels

Traffic Level Effect on Algae Spread
Low traffic Faster accumulation
Medium traffic Uneven wear patterns
High traffic Spreads spores further
Paths that are frequently used but poorly maintained often develop patchy algae growth patterns, with some areas heavily affected and others relatively clear.

Professional Restoration Process Explained

When garden paths are heavily affected, a full restoration process is often more effective than repeated cleaning.

Full Restoration Stages

Initial Assessment

A detailed inspection identifies the surface type, level of contamination, drainage issues, and any structural concerns.

Deep Cleaning Phase

Using controlled pressure and specialist cleaning agents, algae and surface contaminants are removed without damaging the underlying material.

Targeted Treatment

A biocide or anti-growth solution is applied to eliminate remaining spores and prevent regrowth.

Re-levelling or Joint Work

For block paving, sand joints may be restored to stabilise the surface and reduce moisture retention.

Optional Sealing

A protective sealant is applied to reduce water absorption and limit future algae growth.

Cost Expectations for High-End Cleaning Services

Algae removal costs vary depending on condition, size, and access. Premium services are typically more expensive due to the equipment used and the quality of finish delivered.

Typical Pricing Table

Service Type Price Range (UK) Description
Small path clean £250 – £400 Light algae removal
Medium garden restoration £400 – £650 Deep clean + treatment
Large full-path restoration £650 – £900+ Full treatment + sealing
Premium sealed finish package £800 – £1,200+ Long-term protection system
Higher pricing generally reflects longer-lasting results, more advanced treatments, and reduced maintenance requirements.

Environmental Impact of Algae Cleaning Methods

Cleaning garden paths should be done responsibly, especially when using chemical treatments.

Environmental Considerations

  • Avoid overuse of harsh chemicals
  • Prevent runoff into soil and drainage systems
  • Use controlled application methods
  • Choose biodegradable options where possible
Professional cleaning approaches often prioritise controlled usage to minimise environmental disruption while still achieving strong results.

Seasonal Regrowth Patterns of Algae

Algae doesn’t grow at a constant rate throughout the year. It fluctuates depending on temperature, rainfall, and sunlight exposure.

Seasonal Growth Table

Season Growth Rate Risk Level Notes
Spring High High Moisture + warming temperatures
Summer Medium Medium Dry spells slow growth
Autumn High Very High Falling leaves increase organic matter
Winter Medium High Constant damp conditions
Autumn and spring are the most critical times for preventative treatment.

Long-Term Protection Strategies

Once algae has been removed, long-term protection becomes the priority.

Best Protection Methods

  • Regular biocide application
  • Surface sealing
  • Improved drainage systems
  • Increased sunlight exposure where possible
  • Routine maintenance cleaning

Long-Term Effectiveness Table

Method Protection Level Maintenance Frequency
Sealing Very High Every 2–3 years
Biocide Treatment High Annually
Drainage Improvement High One-time
Regular Cleaning Medium Monthly/seasonal

Signs of a Properly Restored Garden Path

After professional cleaning, a well-restored path should show clear, consistent improvements.

Expected Results

  • Even colour across the entire surface
  • No visible green or black film
  • Restored texture without slick areas
  • Improved water runoff
  • Cleaner joints and edges
A properly treated surface should remain stable for an extended period, especially when preventative steps are applied.

Final Conclusion

Cleaning algae from garden paths is not simply a matter of appearance. It directly affects safety, surface durability, and the overall condition of outdoor spaces. Algae develops because of a combination of moisture, shade, organic debris, and porous materials, all of which are common in UK gardens. Once it takes hold, it spreads quickly and becomes more difficult to remove without the right approach. Effective cleaning requires more than just surface-level treatment. Light algae growth can often be handled with manual brushing or basic washing, but deeper or widespread contamination needs a structured method involving controlled pressure cleaning and specialist treatments. The most successful results come from targeting both the visible growth and the underlying spores that cause regrowth. Prevention is just as important as removal. Without it, algae will continue to return, particularly in shaded or damp areas. Measures such as regular maintenance, improved drainage, and sealing surfaces significantly reduce recurrence and help maintain a cleaner, safer environment over time. Professional services offer a more comprehensive solution, especially for heavily affected paths. A premium provider such as Pureseal Services delivers a higher standard of cleaning that focuses not only on immediate results but also on long-term protection. This includes tailored treatment plans, advanced equipment, and protective finishes that help extend the life of the surface. Ultimately, maintaining algae-free garden paths is an ongoing process rather than a one-time fix. With the right combination of cleaning, treatment, and prevention, outdoor surfaces can remain safe, attractive, and durable throughout the year.

Continue Reading

How to Remove Moss From Driveways

Why Moss Grows on Driveways

Moss thrives in damp, shaded environments where moisture lingers and sunlight is limited. In the UK, frequent rainfall and mild temperatures create ideal conditions for moss to spread quickly across outdoor surfaces. Driveways, especially those made from porous materials like block paving or tarmac, tend to retain moisture, allowing moss spores to settle and develop.

Common Causes of Moss Build-Up

  • Poor drainage leading to standing water
  • Shaded areas from trees, fences, or buildings
  • Organic debris such as leaves and dirt accumulating on the surface
  • Lack of regular cleaning or maintenance
  • North-facing driveways receiving limited sunlight
Moss may seem harmless at first, but it can create a slippery surface, damage materials over time, and significantly reduce the visual appeal of your property.

Types of Driveway Surfaces and Moss Impact

Different driveway materials react differently to moss growth and removal techniques. Understanding your surface type is essential before starting any cleaning process.

Surface Comparison Table

Driveway Type Moss Growth Likelihood Cleaning Difficulty Risk of Damage During Cleaning
Block Paving High Medium Medium
Tarmac Medium Easy Low
Concrete Medium Medium Medium
Resin-Bound Low Easy Low
Gravel High Difficult Low
Block paving is particularly vulnerable because moss can grow between the joints, while gravel allows moss to establish underneath the stones, making removal more labour-intensive.

Manual Moss Removal Methods

For smaller areas or light moss growth, manual removal can be effective. However, it requires patience and consistent effort.

Brushing

A stiff outdoor brush can be used to scrub moss from the surface. This method works best on dry days when moss is brittle and easier to dislodge. Steps:
  • Sweep away loose debris first
  • Use firm pressure to scrub affected areas
  • Collect and dispose of moss properly

Scraping

For thicker patches, a scraper or patio knife can help lift moss from joints and cracks. Advantages:
  • Precise removal
  • No chemicals required
Limitations:
  • Time-consuming
  • Not suitable for large driveways

Chemical Treatments for Moss Removal

Chemical solutions are commonly used for more stubborn moss infestations. These treatments kill moss at the root, reducing the chance of regrowth.

Types of Moss Killers

Product Type Effectiveness Time to Work Environmental Impact
Biocide Treatments High 24–72 hours Moderate
Bleach Solutions Medium Immediate High
Natural Solutions Low–Medium 2–5 days Low
Biocide treatments are generally the most reliable option for long-term results, especially when applied professionally.

Application Tips

  • Apply during dry weather for best results
  • Avoid runoff into plants or drains
  • Allow sufficient dwell time before rinsing

Pressure Washing: Pros and Considerations

Pressure washing is one of the most popular methods for removing moss quickly and effectively. It uses high-pressure water to blast away moss, dirt, and grime.

Benefits

  • Fast and efficient
  • Restores original appearance
  • Removes deep-seated dirt

Risks

  • Can damage joints in block paving
  • May strip sealants
  • Risk of uneven cleaning if done incorrectly

Pressure Washing Comparison Table

Factor DIY Pressure Washing Professional Service
Cost £50–£150 (equipment hire) £250–£600+ depending on size
Effectiveness Medium High
Risk of Damage High Low
Time Required Long Short
Professional services typically include controlled pressure settings and post-cleaning treatments to protect the surface.

Re-Sanding and Sealing After Moss Removal

Once moss has been removed, especially from block paving, it’s important to restore the integrity of the driveway.

Re-Sanding

Pressure washing often removes the jointing sand between blocks. Re-sanding helps:
  • Stabilise the blocks
  • Prevent weed and moss regrowth
  • Improve drainage

Sealing

Applying a sealant creates a protective barrier that reduces moisture absorption and inhibits future moss growth. Benefits of Sealing:
  • Enhances colour and appearance
  • Reduces maintenance needs
  • Extends lifespan of the driveway

Preventing Moss from Returning

Removing moss is only part of the process. Preventative measures are essential to keep your driveway clean long-term.

Maintenance Checklist

  • Sweep regularly to remove debris
  • Trim overhanging trees and shrubs
  • Improve drainage where necessary
  • Apply moss inhibitor annually
  • Clean the surface at least once a year

Prevention Effectiveness Table

Method Effectiveness Frequency Required
Sweeping Medium Weekly
Biocide treatment High Yearly
Sealing Very High Every 2–3 years
Drainage improvements High One-time fix

Professional Moss Removal Services

While DIY methods can work for minor issues, larger or heavily affected driveways often require professional attention. A specialist service ensures thorough cleaning without causing damage.

What to Expect from a Professional Service

  • Full inspection of the driveway
  • Tailored cleaning approach based on surface type
  • Use of commercial-grade equipment
  • Application of long-lasting treatments
  • Optional sealing for added protection

Cost Overview

Professional driveway cleaning is an investment in your property. Pricing depends on factors such as size, condition, and material.
Service Type Typical Price Range
Basic Pressure Washing £250 – £400
Deep Clean with Treatment £350 – £550
Full Restoration + Sealing £500 – £900+
Higher-end services deliver longer-lasting results and reduce the need for frequent maintenance.

Why Choose Pureseal Services

When it comes to driveway moss removal, quality and expertise make a significant difference. Pureseal Services positions itself at the premium end of the market, focusing on long-term results rather than quick fixes.

Key Advantages

  • Specialist knowledge of all driveway surfaces
  • Advanced cleaning techniques that minimise damage
  • Professional-grade biocides for lasting protection
  • High-quality sealing options to prevent regrowth
  • Attention to detail in every stage of the process
Choosing a higher-end service means fewer repeat treatments, better visual results, and a longer-lasting clean.

Seasonal Considerations for Moss Removal

Timing plays an important role in how effective moss removal will be.

Best Times of Year

Season Suitability Notes
Spring Excellent Ideal for treatment and prevention
Summer Good Dry conditions help treatments work faster
Autumn Moderate Increased debris may encourage regrowth
Winter Poor Wet and cold conditions slow effectiveness
Spring is generally the most effective time to carry out a full clean and apply preventative treatments.

Environmental Considerations

Moss removal should be carried out responsibly to minimise environmental impact.

Key Points

  • Avoid harsh chemicals where possible
  • Use controlled water pressure to reduce waste
  • Prevent runoff into drains and garden areas
  • Opt for biodegradable treatments when available
Professional services often follow stricter environmental guidelines, ensuring safe and compliant cleaning practices.

Signs Your Driveway Needs Immediate Attention

Ignoring moss build-up can lead to more serious issues over time.

Warning Signs

  • Slippery surface when wet
  • Dark green or black patches spreading
  • Loose or shifting block paving
  • Persistent damp areas
  • Reduced kerb appeal
Addressing these signs early can prevent costly repairs and maintain the overall condition of your driveway.

Equipment and Tools Overview

Whether tackling moss yourself or understanding what professionals use, it helps to know the tools involved.

Common Tools Table

Tool Purpose Suitable for DIY
Stiff Brush Surface scrubbing Yes
Pressure Washer Deep cleaning Yes (with care)
Scraper Removing moss from joints Yes
Sprayer Applying treatments Yes
Commercial Equipment High-efficiency cleaning No
Professional-grade equipment delivers more consistent results and is designed to handle larger areas efficiently.

Health and Safety Considerations

Moss removal isn’t just about appearance. It also involves safety risks if handled incorrectly.

Potential Hazards

  • Slips and falls on wet or mossy surfaces
  • Exposure to chemicals without proper protection
  • Damage to surrounding plants and surfaces

Safety Tips

  • Wear non-slip footwear
  • Use gloves when handling treatments
  • Follow manufacturer instructions carefully
  • Avoid working in poor weather conditions
Professional services typically include full safety measures as part of their process, reducing risk significantly.

Understanding the Life Cycle of Moss

To remove moss effectively, it helps to understand how it grows and spreads. Moss reproduces through spores rather than seeds, which allows it to spread rapidly across damp surfaces without needing soil.

How Moss Develops on Driveways

Moss spores are carried by wind, rain, and even foot traffic. Once they land on a suitable surface, they begin to grow under the right conditions. Stages of Growth:
  • Spore settlement: Spores land in cracks, joints, or porous surfaces
  • Initial growth: Thin green film begins to appear
  • Establishment: Moss thickens and spreads outward
  • Mature coverage: Dense patches form, trapping moisture and encouraging further growth
Because moss retains water like a sponge, it creates a self-sustaining environment, making it increasingly difficult to remove if left untreated.

The Hidden Damage Moss Can Cause

Many homeowners underestimate the long-term impact of moss on a driveway. While it may appear to be a surface-level issue, it can lead to structural problems over time.

Structural Risks

  • Water retention: Moss holds moisture against the surface, accelerating wear
  • Surface erosion: Constant dampness weakens materials like concrete and tarmac
  • Joint instability: In block paving, moss displaces sand, causing movement
  • Cracking: Freeze-thaw cycles worsen damage in colder months

Aesthetic Impact

A moss-covered driveway can significantly reduce kerb appeal. This is especially important if you are planning to sell or rent out your property, as first impressions matter.

Comparing DIY vs Professional Results

While DIY moss removal is possible, the results often vary depending on experience, tools, and time invested.

Results Comparison Table

Factor DIY Approach Professional Service
Initial Appearance Moderate improvement Near-new finish
Longevity of Results Short-term Long-lasting
Moss Regrowth Speed Fast Significantly slower
Surface Protection Minimal Comprehensive
Overall Value Lower Higher
DIY cleaning often removes visible moss but fails to address spores embedded deep within the surface. This is why regrowth tends to happen quickly without proper treatment.

Advanced Cleaning Techniques Used by Professionals

Professional driveway cleaning goes beyond basic pressure washing. It involves a combination of techniques designed to clean thoroughly while preserving the integrity of the surface.

Soft Washing

Soft washing uses low-pressure water combined with specialised cleaning solutions to kill moss and organic growth at the root. Benefits:
  • Safe for delicate surfaces
  • Long-lasting results
  • Reduces risk of damage

Controlled Pressure Cleaning

Rather than using maximum force, professionals adjust pressure levels depending on the material. Advantages:
  • Prevents surface erosion
  • Ensures even cleaning
  • Protects jointing materials

Steam Cleaning

In some cases, high-temperature steam is used to remove moss without chemicals. Key Features:
  • Environmentally friendly
  • Effective on stubborn growth
  • Suitable for sensitive areas

Long-Term Maintenance Planning

Keeping a driveway free from moss requires a structured maintenance approach rather than occasional cleaning.

Suggested Maintenance Schedule

Task Frequency Purpose
Sweeping Weekly Remove debris and moisture traps
Visual inspection Monthly Identify early moss growth
Light cleaning Every 3–6 months Maintain appearance
Biocide treatment Annually Prevent regrowth
Sealing (if applicable) Every 2–3 years Protect surface
A consistent routine significantly reduces the likelihood of heavy moss build-up returning.

Weather Conditions and Their Impact

The UK climate plays a major role in how quickly moss develops and how effective removal methods will be.

Weather Influence Table

Weather Condition Effect on Moss Growth Impact on Removal
Heavy Rain Accelerates growth Reduces effectiveness of treatments
Dry Sunny Days Slows growth Ideal for cleaning and treatment
Frost Can damage surfaces Makes cleaning more difficult
Humidity Encourages spread Requires stronger treatments
Planning moss removal during favourable weather conditions can improve results and reduce the need for repeat work.

Driveway Design Factors That Encourage Moss

Some driveways are more prone to moss simply due to their design and layout.

High-Risk Features

  • Poor slope or drainage
  • Narrow spaces between buildings
  • Overhanging vegetation
  • Textured or porous materials
  • Areas with constant shade
Addressing these underlying issues can make a significant difference in preventing future moss growth.

Improving Drainage to Reduce Moss

One of the most effective long-term solutions is improving how water drains from your driveway.

Drainage Solutions

  • Installing channel drains
  • Regrading the surface for better runoff
  • Clearing existing drainage systems
  • Using permeable materials where possible

Drainage Impact Table

Improvement Type Cost Range Effectiveness
Basic drain clearing £50 – £150 Medium
Channel installation £300 – £800 High
Full resurfacing £1,000+ Very High
Better drainage not only reduces moss but also extends the lifespan of your driveway.

Common Mistakes to Avoid

Moss removal can go wrong if certain mistakes are made, especially during DIY attempts.

Frequent Errors

  • Using excessive pressure on block paving
  • Applying chemicals without proper dilution
  • Cleaning during poor weather conditions
  • Ignoring joint re-sanding after cleaning
  • Skipping preventative treatments
Avoiding these mistakes can save time, money, and potential damage to your driveway.

Cost vs Value: What You’re Really Paying For

When considering moss removal services, it’s important to look beyond the initial price and focus on long-term value.

Value Comparison Table

Service Level Upfront Cost Longevity Maintenance Needs Overall Value
Basic DIY Low Short High Low
Mid-range Service Medium متوسط Medium Medium
Premium Professional High Long Low High
Higher-end services often include treatments and protective measures that significantly reduce the need for frequent cleaning.

Why Premium Services Deliver Better Results

Choosing a premium provider like Pureseal Services ensures a more thorough and durable outcome.

What Sets Premium Services Apart

  • Detailed surface assessment before cleaning
  • Use of specialised treatments tailored to the material
  • Advanced equipment for consistent results
  • Focus on both removal and prevention
  • Higher-quality finishing, including sealing
While the upfront cost may be higher, the reduced need for repeat work and the improved appearance make it a worthwhile investment.

The Role of Sealing in Moss Prevention

Sealing is one of the most effective ways to protect a driveway after moss removal.

How Sealing Works

A sealant forms a protective layer over the surface, reducing water absorption and making it harder for moss to take hold.

Types of Sealants

Sealant Type Finish Durability Moss Resistance
Acrylic Glossy Medium High
Polyurethane Satin High Very High
Penetrating Sealers Natural look High High
Professional application ensures even coverage and maximum effectiveness.

Early Intervention vs Heavy Restoration

Addressing moss early is always more cost-effective than waiting until it becomes a major issue.

Comparison Table

Stage of Moss Growth Required Action Cost Estimate Effort Level
Light Growth Basic cleaning £100 – £250 Low
Moderate Growth Deep clean + treatment £250 – £500 Medium
Heavy Infestation Full restoration + sealing £500 – £900+ High
Early intervention not only saves money but also preserves the condition of the driveway.

How Often Moss Removal Should Be Done

The frequency of moss removal depends on several factors, including location, weather exposure, and driveway material.

Recommended Frequency

  • Shaded areas: Every 6–12 months
  • Moderate exposure: Once a year
  • Sunny, well-drained areas: Every 1–2 years
Regular inspections can help determine when cleaning is needed before moss becomes a visible problem.

Indicators of a High-Quality Cleaning Job

Not all driveway cleaning services deliver the same standard. Knowing what to look for can help you assess the quality of the work.

Signs of Professional Results

  • Even, consistent colour across the surface
  • No visible moss in joints or cracks
  • Properly restored jointing sand (for block paving)
  • Clean edges and borders
  • No damage or erosion
A thorough job should not only remove moss but also improve the overall condition and durability of the driveway.

Bringing Your Driveway Back Under Control

Moss on a driveway is rarely just a cosmetic issue. It develops quietly, spreads quickly, and if left untreated, can affect both the safety and structure of the surface. What often starts as a thin green layer can turn into a persistent problem that traps moisture, weakens materials, and increases the risk of slips. Effective removal comes down to using the right approach for the specific surface, combined with proper aftercare. Simple brushing or basic pressure washing may improve appearance temporarily, but without addressing the root cause, moss will almost always return. That’s why methods such as professional-grade treatments, controlled cleaning techniques, and sealing play such an important role in achieving longer-lasting results. Ongoing maintenance is just as important as the initial clean. Regular sweeping, annual treatments, and attention to drainage all help reduce the conditions that allow moss to thrive. Small, consistent actions tend to be far more effective than occasional heavy cleaning. For larger driveways, stubborn growth, or situations where a longer-term solution is needed, working with a specialist like Pureseal Services ensures the job is handled with the right equipment, experience, and attention to detail. A higher standard of service not only restores the appearance of the driveway but also helps protect it well into the future.

Continue Reading

The Best Way to Pressure Wash a Patio

The Best Way to Pressure Wash a Patio

A clean patio can completely change the look and feel of an outdoor space. Over time, though, patios naturally collect dirt, algae, moss, weeds, and weather staining that can make them look tired and slippery. Pressure washing is one of the most effective ways to restore them, but only when it’s done properly. The difference between an average clean and a professional finish usually comes down to technique, preparation, and equipment choice. Done incorrectly, pressure washing can damage slabs, strip jointing sand, or leave patchy results. Done correctly, it can bring a patio back to near-original condition while also helping protect it long term.

Understanding Patio Surfaces Before Cleaning

Not all patios are built the same, and this is where many problems begin. The material determines how much pressure can safely be used and what cleaning approach is best.

Common Patio Materials

Material Characteristics Risk Level During Cleaning
Concrete slabs Durable, porous Medium
Natural stone Varied density, attractive finish High
Porcelain slabs Low porosity, smooth finish Medium to high (slippery risk)
Sandstone Softer, layered structure High
Block paving patios Jointed system Medium
Each surface reacts differently to pressure, water flow, and cleaning chemicals. Understanding this is essential before starting any work.

Why Patios Become Dirty Over Time

Outdoor surfaces are constantly exposed to environmental conditions, which gradually break down their appearance.

Main Causes of Build-Up

Cause Effect on Surface
Rain and moisture Algae and moss growth
Shade Slower drying, increased green growth
Foot traffic Dirt and grime build-up
Trees and plants Leaf stains and organic debris
Pollution Dark surface staining
The combination of moisture and organic material is what typically leads to slippery and discoloured patios.

Essential Equipment for Pressure Washing a Patio

The equipment you use will have a direct impact on both the quality of the finish and the safety of the surface.

Core Equipment List

Equipment Purpose
Pressure washer Main cleaning force
Surface cleaner Even, streak-free results
Adjustable lance Detail cleaning and edges
Rotary nozzle Tough stain removal
Stiff brush Pre-treatment scrubbing
Cleaning chemicals Break down organic growth
Protective gear Safety during operation
Using professional-grade equipment makes a significant difference in both speed and finish quality. This is why higher-end services such as Pureseal Services rely on commercial systems rather than domestic setups.

Step-by-Step Process for the Best Patio Clean

A proper patio clean is a structured process rather than a single action. Skipping steps usually results in uneven cleaning or faster regrowth of moss and algae.

Step 1: Clearing and Preparing the Area

Before any water or chemicals are used, the patio must be fully prepared.

Preparation Checklist

  • Remove furniture, planters, and objects
  • Sweep loose debris such as leaves and dirt
  • Check for loose or damaged slabs
  • Identify stained or heavily affected areas

Step 2: Applying Pre-Treatment Solutions

Pre-treatment is one of the most important stages.
Problem Area Recommended Solution
Algae Biocide treatment
Moss Moss removal solution
Oil stains Degreaser
General grime Traffic film remover

Step 3: Choosing the Right Pressure Setting

Surface Type Safe Pressure Range
Concrete slabs 120–160 bar
Natural stone 100–140 bar
Porcelain 90–120 bar
Sandstone 80–120 bar

Step 4: Pressure Washing Technique

  • Maintain a consistent distance
  • Use overlapping strokes
  • Avoid staying in one spot too long
  • Work methodically across the patio

Step 5: Using a Surface Cleaner

  • Even cleaning without streaks
  • Faster coverage
  • Reduced surface damage risk

Dealing with Stubborn Patio Problems

Algae and Green Growth

  • Apply biocide
  • Allow dwell time
  • Wash thoroughly

Black Spot Lichen

  • Specialist treatment required
  • Multiple applications may be needed

Oil and Grease Stains

Step Action
1 Apply degreaser
2 Allow soak time
3 Brush area
4 Pressure wash

Importance of Edging and Detail Cleaning

  • Around walls
  • Between slabs
  • Steps and borders

Water Management and Drainage

  • Prevent pooling
  • Ensure runoff control
  • Improve drying times

Drying Time and Aftercare

Condition Drying Time
Warm, dry 4–8 hours
Cool 12–24 hours
Damp 24–48+ hours

Re-Sanding and Joint Stabilisation

If applicable:
  • Restores structure
  • Prevents weed regrowth

Sealing a Patio After Pressure Washing

Benefits

  • Enhances colour
  • Reduces staining
  • Protects surface
Finish Appearance
Natural No change
Satin Light enhancement
Gloss Wet-look finish

Common Mistakes When Pressure Washing a Patio

  • Too much pressure
  • No pre-treatment
  • Poor technique
  • Skipping edges
  • Incorrect chemicals

DIY vs Professional Patio Cleaning

Factor DIY Professional
Equipment Basic Industrial
Finish Variable Consistent
Risk Higher Lower
Longevity Shorter Longer

Cost of Professional Patio Cleaning

Service Price per m²
Basic clean £4–£6
Deep clean £6–£10
Full restoration £10–£18+
Premium services such as Pureseal Services sit at the higher end due to equipment quality and process depth.

Environmental Considerations

  • Control runoff
  • Use biodegradable products
  • Avoid overuse of chemicals

Maintaining a Clean Patio After Washing

Task Frequency
Sweeping Weekly
Spot cleaning As needed
Weed treatment Monthly/quarterly
Full wash 12–18 months

Equipment Quality and Its Impact on Results

High-end systems provide:
  • Better pressure control
  • More consistent results
  • Reduced surface damage risk

Surface-Specific Cleaning Techniques

Concrete

  • Medium pressure
  • Surface cleaner ideal

Natural Stone

  • Low pressure
  • Heavy pre-treatment

Sandstone

  • Very low pressure
  • Chemical-led cleaning

Porcelain

  • Low pressure
  • Careful rinsing

Advanced Pre-Treatment Strategy

Condition Dwell Time
Light algae 15–30 mins
Heavy moss 1–2 hours
Oil 30–60 mins

The Role of Water Flow

Flow Rate Result
Low Slower cleaning
High Faster, more effective rinse

Avoiding Patchy Results

  • Consistent overlap
  • Even movement
  • Surface cleaner use

Joint and Edge Preservation

  • Controlled pressure
  • Avoid direct jetting
  • Use surface cleaner where possible

Improving Slip Resistance

  • Remove all algae residue
  • Improve drainage
  • Apply anti-slip treatments if needed

Long-Term Patio Protection

Method Duration
Biocide 6–12 months
Sealing 2–5 years

Seasonal Effects

  • Spring: algae growth
  • Autumn: debris build-up
  • Winter: freeze risk

Professional vs Domestic Standards

Feature Domestic Professional
Precision Low High
Finish Inconsistent Uniform
Equipment Basic Commercial

Why Technique Matters More Than Pressure

  • Angle control
  • Distance
  • Overlap consistency
  • Chemical use

Managing Expectations

  • Age matters
  • Material matters
  • Staining depth matters

Equipment Maintenance

  • Clean filters
  • Check hoses
  • Flush system

Structured Cleaning Approach

Each stage builds on the last:
  • Preparation
  • Pre-treatment
  • Washing
  • Finishing

Final Observations on Patio Cleaning Quality

A properly cleaned patio is the result of preparation, technique, and controlled execution rather than simply applying high pressure to a surface. Each stage, from pre-treatment to final rinsing, contributes to the overall finish and how long it lasts. When the process is done correctly, patios not only look significantly improved but also become safer, more durable, and easier to maintain over time. Working with a specialist approach such as Pureseal Services ensures a more consistent, controlled, and long-lasting result through professional equipment and structured methods.

Final Thoughts on the Best Way to Pressure Wash a Patio

A properly cleaned patio is rarely the result of pressure alone. It comes from understanding the surface, preparing it correctly, and working through each stage in a controlled way. When all of that is done properly, the difference in finish is noticeable straight away, but more importantly, it lasts. What often separates a good result from a disappointing one is how the work is approached before the machine even gets switched on. Preparation, pre-treatment, and choosing the right method for the material all do more heavy lifting than people expect. Pressure washing itself is just one part of a wider process. It also becomes clear that patios are not all equal. Concrete, sandstone, porcelain, and natural stone each respond differently to water pressure, chemicals, and cleaning technique. Treating every surface the same is where most long-term damage starts. Once erosion, joint loss, or surface marking happens, it is difficult to fully reverse. That is why control matters more than force. Another key point is consistency. A patio rarely looks bad in one single area; it usually develops uneven patches over time due to weather exposure, shade, and drainage differences. Cleaning needs to address the whole surface evenly, not just the worst parts. Without a structured approach, it is easy to end up with a finish that looks partially improved but not fully restored. The importance of joint stability and surface protection also cannot be overlooked. Even after a successful clean, the work is not really finished until the structure beneath the surface is secure again. Whether that involves re-establishing joint material or applying a protective seal, those finishing steps play a big role in how long the results actually last. Maintenance after cleaning is just as important as the cleaning itself. A patio that is regularly swept, treated early for algae growth, and kept free from standing water will stay in good condition for far longer than one that is only cleaned when it becomes heavily soiled. Small, consistent upkeep makes a bigger difference than occasional intensive cleaning. There is also a clear difference between surface-level improvement and proper restoration. A quick wash can make a patio look better for a short time, but it does not always address the underlying causes of staining, growth, or discolouration. A more structured approach focuses on breaking down contamination properly, removing it safely, and then protecting the surface afterwards so it does not return as quickly. This is where experience and equipment quality become important. Commercial-grade systems, controlled pressure settings, and correct chemical use all contribute to a more refined result. It is not just about making the patio clean, but making sure it is cleaned in a way that preserves its condition. Working with a specialist approach such as Pureseal Services means the process is handled with more precision from start to finish. That includes selecting the correct pressure for the surface, using the right pre-treatment for the type of staining present, and ensuring the final finish is even and properly protected. It is a more structured and deliberate way of working that tends to produce more consistent long-term results. Ultimately, the best way to pressure wash a patio is not about pushing equipment to its limits. It is about understanding the surface in front of you, using the right process for the right material, and taking the time to complete each stage properly. When that approach is followed, the result is not just a cleaner patio, but a surface that stays cleaner, safer, and more visually balanced for much longer than a quick wash ever could.

Continue Reading

How to Clean Block Paving Driveways Properly

How to Clean Block Paving Driveways Properly

Block paving driveways are one of the most popular choices across the UK, offering durability, visual appeal, and flexibility in design. However, without proper cleaning and maintenance, they can quickly become dull, stained, and overrun with weeds and algae. Cleaning block paving properly is not just about improving appearance. It is about preserving the structure, preventing damage, and extending the lifespan of the surface. Done incorrectly, cleaning can cause more harm than good, leading to loose blocks, erosion of jointing sand, and long-term deterioration. This guide covers the correct methods, tools, and techniques required to clean block paving driveways to a professional standard.

Understanding Block Paving

Before cleaning, it is important to understand how block paving is constructed. Block paving consists of individual bricks laid on a sub-base, with jointing sand between each block. This sand plays a crucial role in:
  • Locking the blocks together
  • Preventing movement
  • Reducing weed growth
Improper cleaning, particularly with excessive pressure, can remove this sand and destabilise the entire surface.

Common Problems with Block Paving

Over time, block paving is exposed to weather, foot traffic, and vehicle use. This leads to a range of common issues.

Types of Contamination

Issue Description Cause
Algae Green, slippery surface Damp conditions
Moss Thick growth between joints Shade and moisture
Weeds Growth in joints Wind-blown seeds
Oil stains Dark patches Vehicle leaks
Dirt and grime General discolouration Traffic and weather
Lichen Black or white spots Long-term neglect
Each of these requires a slightly different approach to achieve proper removal.

Equipment Required for Proper Cleaning

Using the correct equipment is essential for both effectiveness and safety.

Core Equipment List

Equipment Purpose
Pressure washer Removes dirt and contaminants
Surface cleaner Ensures even cleaning
Stiff brush Manual scrubbing
Weed removal tools Clearing joints
Jointing sand Replacing lost sand
Sealant (optional) Protecting the surface
Professional-grade equipment delivers significantly better results than entry-level machines. This is why many property owners choose to work with Pureseal Services, where higher-end systems are used to achieve a more consistent and durable finish.

Step-by-Step Cleaning Process

Cleaning block paving properly involves several stages. Skipping steps or rushing the process can lead to poor results.

Preparation of the Area

Before any cleaning begins, the area must be cleared and prepared.

Key Preparation Steps

  • Remove vehicles and obstacles
  • Sweep loose debris
  • Pull out large weeds manually
  • Inspect for damaged or loose blocks
Proper preparation ensures that the cleaning process is more effective and prevents unnecessary complications later on.

Applying Weed Killer

Weeds are one of the biggest issues with block paving. Simply pressure washing them away is not enough, as roots will remain and regrowth will occur quickly. Applying a quality weed killer beforehand ensures:
  • Roots are destroyed
  • Regrowth is minimised
  • Longer-lasting results
This step should ideally be done several days before pressure washing to allow the treatment to fully take effect.

Pre-Treatment with Cleaning Solutions

Certain stains, particularly oil and algae, require chemical treatment before washing.

Common Pre-Treatment Solutions

Stain Type Treatment
Oil Degreaser
Algae Biocide
Moss Moss killer
General dirt Traffic film remover
Applying the correct solution helps break down contaminants, making them easier to remove during washing.

Pressure Washing the Surface

Pressure washing is the main cleaning stage, but it must be done carefully.

Best Practices

  • Use a medium pressure setting (120–150 bar)
  • Keep the lance at a consistent distance
  • Work in even, overlapping passes
  • Avoid pointing directly into joints
Using too much pressure can remove jointing sand and damage the surface.

Using a Surface Cleaner

A surface cleaner attachment is one of the most effective tools for block paving.

Benefits of Surface Cleaners

  • Even cleaning across large areas
  • Reduced streaking
  • Faster completion time
  • Controlled pressure distribution
This is the method typically used by professionals such as Pureseal Services to achieve a uniform finish.

Dealing with Stubborn Stains

Some stains require additional attention beyond standard cleaning.

Oil Stains

Oil is one of the most difficult substances to remove from block paving.

Treatment Process

  1. Apply a strong degreaser
  2. Allow dwell time
  3. Agitate with a stiff brush
  4. Rinse thoroughly
Multiple treatments may be required for deep stains.

Black Spot (Lichen)

Lichen appears as black spots and can be very stubborn.
  • Requires specialist treatment
  • Often needs repeat applications
  • May not be fully removed in one clean
Professional-grade chemicals are usually needed for effective removal.

Re-Sanding the Joints

After cleaning, much of the original jointing sand will have been removed. Re-sanding is a critical step that should never be skipped.

Why Re-Sanding Matters

  • Restores structural stability
  • Prevents block movement
  • Reduces weed growth

Jointing Sand Application

Step Action
1 Ensure surface is completely dry
2 Spread kiln-dried sand evenly
3 Brush into joints thoroughly
4 Remove excess sand
Failing to re-sand properly can lead to long-term issues with the driveway.

Sealing the Block Paving

Sealing is optional but highly recommended for long-term protection.

Benefits of Sealing

  • Enhances colour
  • Reduces staining
  • Inhibits weed growth
  • Protects against weathering

Types of Sealants

Type Finish Benefit
Matt Natural look Subtle protection
Satin Slight sheen Balanced finish
Gloss High shine Strong visual impact
Sealing should only be carried out once the surface is fully clean and completely dry.

Frequency of Cleaning

Block paving does not need constant cleaning, but regular maintenance helps keep it in good condition.

Recommended Cleaning Schedule

Maintenance Type Frequency
Sweeping Weekly
Weed treatment Every 3–6 months
Pressure washing Once per year
Sealing Every 2–4 years
Consistent upkeep prevents heavy build-up and reduces the need for intensive cleaning.

Cost Considerations

The cost of cleaning block paving varies depending on size, condition, and the level of treatment required.

Typical Pricing Guide

Service Level Price Range
Basic clean £3–£5 per m²
Deep clean with treatment £5–£8 per m²
Full restoration with sealing £8–£15+ per m²
Premium services, such as those provided by Pureseal Services, sit towards the higher end of the market due to the use of professional-grade equipment, advanced treatments, and a more thorough process.

Common Mistakes to Avoid

Cleaning block paving incorrectly can cause lasting damage.

Key Mistakes

  • Using excessive pressure
  • Skipping weed treatment
  • Not re-sanding joints
  • Cleaning without pre-treatment
  • Ignoring drainage and runoff
Avoiding these mistakes ensures a better finish and longer-lasting results.

DIY vs Professional Cleaning

Many homeowners attempt to clean block paving themselves, but there are clear differences between DIY and professional results.

Comparison Table

Factor DIY Cleaning Professional Cleaning
Equipment quality Basic Industrial-grade
Cleaning results Inconsistent Uniform and thorough
Time required High Efficient
Risk of damage Higher Controlled
Longevity of results Short-term Long-lasting
While DIY cleaning can improve appearance, professional services deliver a deeper clean and more durable outcome.

Weather Considerations

Weather plays a role in both cleaning and drying.

Ideal Conditions

  • Dry, mild weather
  • No heavy rain forecast
  • Moderate temperatures
Cleaning during poor weather can reduce effectiveness and delay drying times.

Long-Term Maintenance Tips

Maintaining block paving after cleaning helps preserve results.

Simple Maintenance Practices

  • Sweep regularly
  • Treat weeds early
  • Avoid oil spills where possible
  • Reapply sealant when needed
These steps reduce the need for frequent deep cleaning.

Choosing a Professional Service

For those looking to achieve the highest standard, working with an experienced provider is often the best option. Pureseal Services uses professional-grade equipment, advanced cleaning methods, and premium treatments to deliver a more thorough and longer-lasting result. This approach ensures that block paving is not only cleaned effectively but also protected against future wear and contamination.

Equipment and Process Overview

To summarise the full process, the table below outlines each stage and its purpose.
Stage Purpose
Preparation Clear and inspect area
Weed treatment Eliminate growth at root
Pre-treatment Break down stains
Pressure washing Remove contaminants
Surface cleaning Ensure even finish
Re-sanding Restore stability
Sealing (optional) Protect and enhance
Each stage plays a role in achieving a professional finish, and skipping any step can compromise the final result.

Understanding Surface Damage and How to Avoid It

One of the biggest risks when cleaning block paving is unintentionally damaging the surface. While block paving is durable, it is not indestructible, and incorrect cleaning techniques can shorten its lifespan or lead to expensive repairs. Damage usually happens in three main ways: excessive pressure, poor technique, or lack of understanding of how the paving structure works.

Common Types of Cleaning Damage

Type of Damage What It Looks Like Cause
Joint sand loss Gaps between blocks Too much pressure or incorrect angle
Surface erosion Rough or pitted blocks Overuse of high-pressure jet
Block movement Uneven or sunken areas Loss of structural sand
Edge damage Loose perimeter blocks Direct high-pressure impact
Most of these issues are avoidable with the correct approach and equipment setup.

How Professionals Prevent Damage

Professional cleaning systems, such as those used by Pureseal Services, focus on control rather than brute force. This is an important distinction. Key techniques include:
  • Maintaining consistent nozzle distance
  • Using surface cleaners instead of direct jets
  • Controlling pressure based on surface condition
  • Pre-treating stains so less pressure is needed
This method reduces risk while improving consistency across the entire surface.

The Role of Drainage in Block Paving Cleaning

Drainage is often overlooked but plays a critical role in both cleaning effectiveness and long-term maintenance. If water is not draining properly during or after cleaning, several problems can occur:
  • Water pooling on the surface
  • Increased algae growth
  • Sand washout in weak areas
  • Longer drying times

Checking Drainage Before Cleaning

Before starting any cleaning process, it is important to assess how well the driveway drains. Look for:
  • Standing water after rainfall
  • Sunken areas where water collects
  • Blocked drainage channels
  • Poor slope direction
Addressing these issues before cleaning helps ensure a more effective result and reduces future maintenance problems.

Weather Impact on Cleaning Results

Weather conditions can significantly influence how well a block paving clean performs, both during the process and afterwards.

Temperature Considerations

Condition Impact
Cold weather Slower drying, reduced chemical effectiveness
Mild weather Ideal balance for cleaning and drying
Hot weather Rapid drying, risk of streaking if rushed
Cold weather can reduce the effectiveness of cleaning chemicals, while overly hot conditions can cause uneven drying and patchy finishes.

Rain and Moisture Issues

Cleaning during or just before heavy rain is not recommended because:
  • Chemicals can be diluted too quickly
  • Joint sand may wash out prematurely
  • Surface contamination can return faster
A dry, stable forecast is always the best option for achieving a long-lasting result.

Weed Regrowth Prevention Strategies

One of the most common frustrations with block paving is how quickly weeds return after cleaning. This usually happens when only the visible growth is removed, rather than addressing the root cause.

Why Weeds Keep Coming Back

Weeds grow in block paving because:
  • Seeds blow into joints
  • Organic matter collects between blocks
  • Moisture creates ideal growing conditions
  • Previous joint sand has broken down
Without proper treatment, regrowth is almost guaranteed within weeks.

Long-Term Prevention Methods

Method Effectiveness Duration
Manual removal only Low Short-term
Chemical weed treatment Medium Months
Full joint re-sanding High Long-term stability
Sealing surface Very high Long-lasting protection
A combination of re-sanding and sealing provides the most durable solution.

The Importance of Drying Time

Drying time is a critical but often underestimated part of the process. Many issues arise not during cleaning, but afterwards when surfaces are not allowed to dry properly.

Why Drying Matters

If block paving is not fully dry before the next stage:
  • Jointing sand will not settle correctly
  • Sealants may not bond properly
  • Moisture can become trapped under the surface
  • Staining can reappear or worsen

Typical Drying Times

Condition Drying Time
Warm, dry day 4–8 hours
Cool, overcast 12–24 hours
Damp conditions 24–48+ hours
Professional operators will always assess conditions before moving to re-sanding or sealing stages.

Joint Stability and Structural Integrity

The jointing sand between blocks is what keeps the entire driveway stable. When cleaning removes too much of this sand without replacement, the structural integrity of the surface begins to weaken.

Signs of Poor Joint Stability

  • Loose or rocking blocks
  • Visible gaps between bricks
  • Uneven surface levels
  • Increased weed growth

Restoring Stability After Cleaning

Proper restoration involves:
  1. Deep cleaning the surface
  2. Allowing full drying time
  3. Re-applying kiln-dried sand
  4. Compacting the surface where needed
  5. Sealing for additional protection

Enhancing Appearance After Cleaning

While cleaning restores the surface, additional finishing steps can significantly improve appearance.

Colour Restoration

Block paving often appears faded due to dirt, algae, and weather exposure. Once cleaned, the original colour becomes visible again, but can be further enhanced through sealing.

Sealing Benefits for Appearance

  • Deepens natural colour tones
  • Creates a uniform finish
  • Reduces patchiness
  • Adds a subtle sheen depending on finish type

Long-Term Cost Efficiency of Proper Cleaning

Although professional cleaning and restoration may seem like a higher upfront cost, it often reduces long-term expenditure.

Cost Comparison Over Time

Approach Short-Term Cost Long-Term Cost
Basic DIY cleaning Low High (frequent repeat work)
Occasional jet wash Medium Medium to high
Professional restoration Higher upfront Lower long-term maintenance
Investing in a full restoration approach reduces the need for repeated cleaning and prevents structural issues from developing.

Equipment Calibration and Pressure Control

Not all pressure washing equipment performs the same way. Even two machines with the same rating can deliver very different results depending on calibration and setup.

Why Calibration Matters

Poorly calibrated equipment can:
  • Deliver inconsistent pressure
  • Over-clean certain areas while under-cleaning others
  • Increase risk of damage
  • Waste water and time

Professional Equipment Setup

High-end systems, such as those used by Pureseal Services, are calibrated to deliver:
  • Balanced pressure output
  • Controlled water flow
  • Consistent surface contact
  • Reduced operator error
This level of precision is difficult to achieve with entry-level equipment.

Safety Around Edges and Boundaries

Edges of block paving driveways are particularly vulnerable during cleaning. These areas are often less compacted and more prone to movement.

High-Risk Areas

  • Driveway borders
  • Edging stones
  • Steps and raised areas
  • Areas near drains

Safe Cleaning Approach

To protect edges:
  • Reduce pressure near boundaries
  • Avoid direct jet impact on joints
  • Use surface cleaners where possible
  • Inspect edges before and after cleaning

Maintaining Results After Cleaning

Once a block paving driveway has been properly cleaned and restored, maintenance becomes the key to preserving its appearance.

Simple Ongoing Maintenance Routine

Task Frequency
Light sweeping Weekly
Weed inspection Monthly
Spot cleaning stains As needed
Surface wash Every 6–12 months
Sealant check Every 2–4 years

Environmental Runoff and Responsible Cleaning

Water runoff from cleaning can carry debris, oils, and chemicals. Managing this properly is part of responsible driveway cleaning.

Best Practice Measures

  • Direct runoff away from drains where possible
  • Use biodegradable cleaning agents
  • Avoid excessive chemical application
  • Control water flow during cleaning

Understanding the Full Value of Proper Cleaning

Cleaning block paving is not just about improving appearance. It is about restoring structure, protecting materials, and extending lifespan. When done properly, the benefits include:
  • Stronger joint stability
  • Reduced weed growth
  • Improved drainage
  • Enhanced visual appearance
  • Lower long-term maintenance needs
A properly cleaned and restored driveway can look significantly newer while performing better structurally. Working with a professional provider such as Pureseal Services ensures that every stage of the process is carried out with precision, from initial treatment through to final sealing, using high-end equipment designed for long-term results.

Final Thoughts on Cleaning Block Paving Driveways Properly

Cleaning block paving properly is one of those tasks that looks simple on the surface but quickly becomes more technical the moment you start doing it correctly. The difference between a quick wash and a proper restoration comes down to understanding what the surface actually needs, rather than just blasting it with water and hoping for the best. A well-maintained block paved driveway is more than just a neat entrance to a property. It’s a structured surface that relies on balance. The blocks, the jointing sand, the drainage, and even the surrounding environment all work together. Once you disturb that balance through cleaning, everything that follows needs to be done with care to bring it back into alignment. The most important takeaway is that pressure is only one part of the process, and not always the most important one. Many of the best results come from preparation, chemical treatment, and finishing steps like re-sanding and sealing. When these stages are done properly, the driveway doesn’t just look clean for a few days, it stays stable and visually consistent for much longer. It’s also clear that shortcuts tend to create problems later on. Skipping weed treatment, rushing the cleaning stage, or neglecting the jointing sand might save time in the moment, but it almost always leads to faster regrowth, shifting blocks, and uneven surfaces. Once that starts happening, the cost and effort to fix it properly is significantly higher than doing it right the first time. Another key point is control. Whether it’s pressure levels, water flow, or chemical use, everything needs to be controlled and matched to the condition of the surface. Older or more delicate block paving requires a different approach compared to newer, tightly bound installations. That adaptability is what separates basic cleaning from a proper restoration process. The finishing stages are where a lot of long-term value is created. Re-sanding is not just a finishing touch, it’s a structural step that holds everything in place. Sealing, while optional, adds another layer of protection that helps reduce staining, slows weed growth, and keeps the surface looking fresher for longer. When both are done correctly, the difference in durability is noticeable over time. From a maintenance perspective, consistency matters more than intensity. Regular light upkeep prevents the need for heavy restoration work later. Simple habits like sweeping, treating early weed growth, and dealing with stains quickly make a big difference in how the surface ages. It’s far easier to maintain block paving than it is to bring it back once it has been neglected. There’s also a clear difference between DIY cleaning and professional-level results. While basic cleaning can improve appearance, achieving a full restoration requires the right equipment, experience, and understanding of how the surface behaves under pressure. That includes knowing how much joint sand to expect loss from, how to control runoff, and how to finish the surface so it remains stable afterwards. This is where a professional approach becomes more than just convenience. It becomes about protecting the investment in the driveway itself. Services delivered at a higher standard, such as those provided by Pureseal Services, focus on the full process rather than just surface-level cleaning. That means better preparation, more controlled cleaning, and a proper finishing system that ensures the driveway doesn’t just look clean, but stays in good condition for the long term. Ultimately, block paving cleaning is about respect for the material. When it’s treated correctly, it can last for decades while maintaining its appearance and structure. When it’s rushed or done incorrectly, deterioration starts much sooner than most people expect. The real value comes from doing each stage properly, understanding why it matters, and not cutting corners where it counts.

Continue Reading