How to Clean Brick Walls With a Pressure Washer

Understanding Brick Walls and Why They Need Cleaning

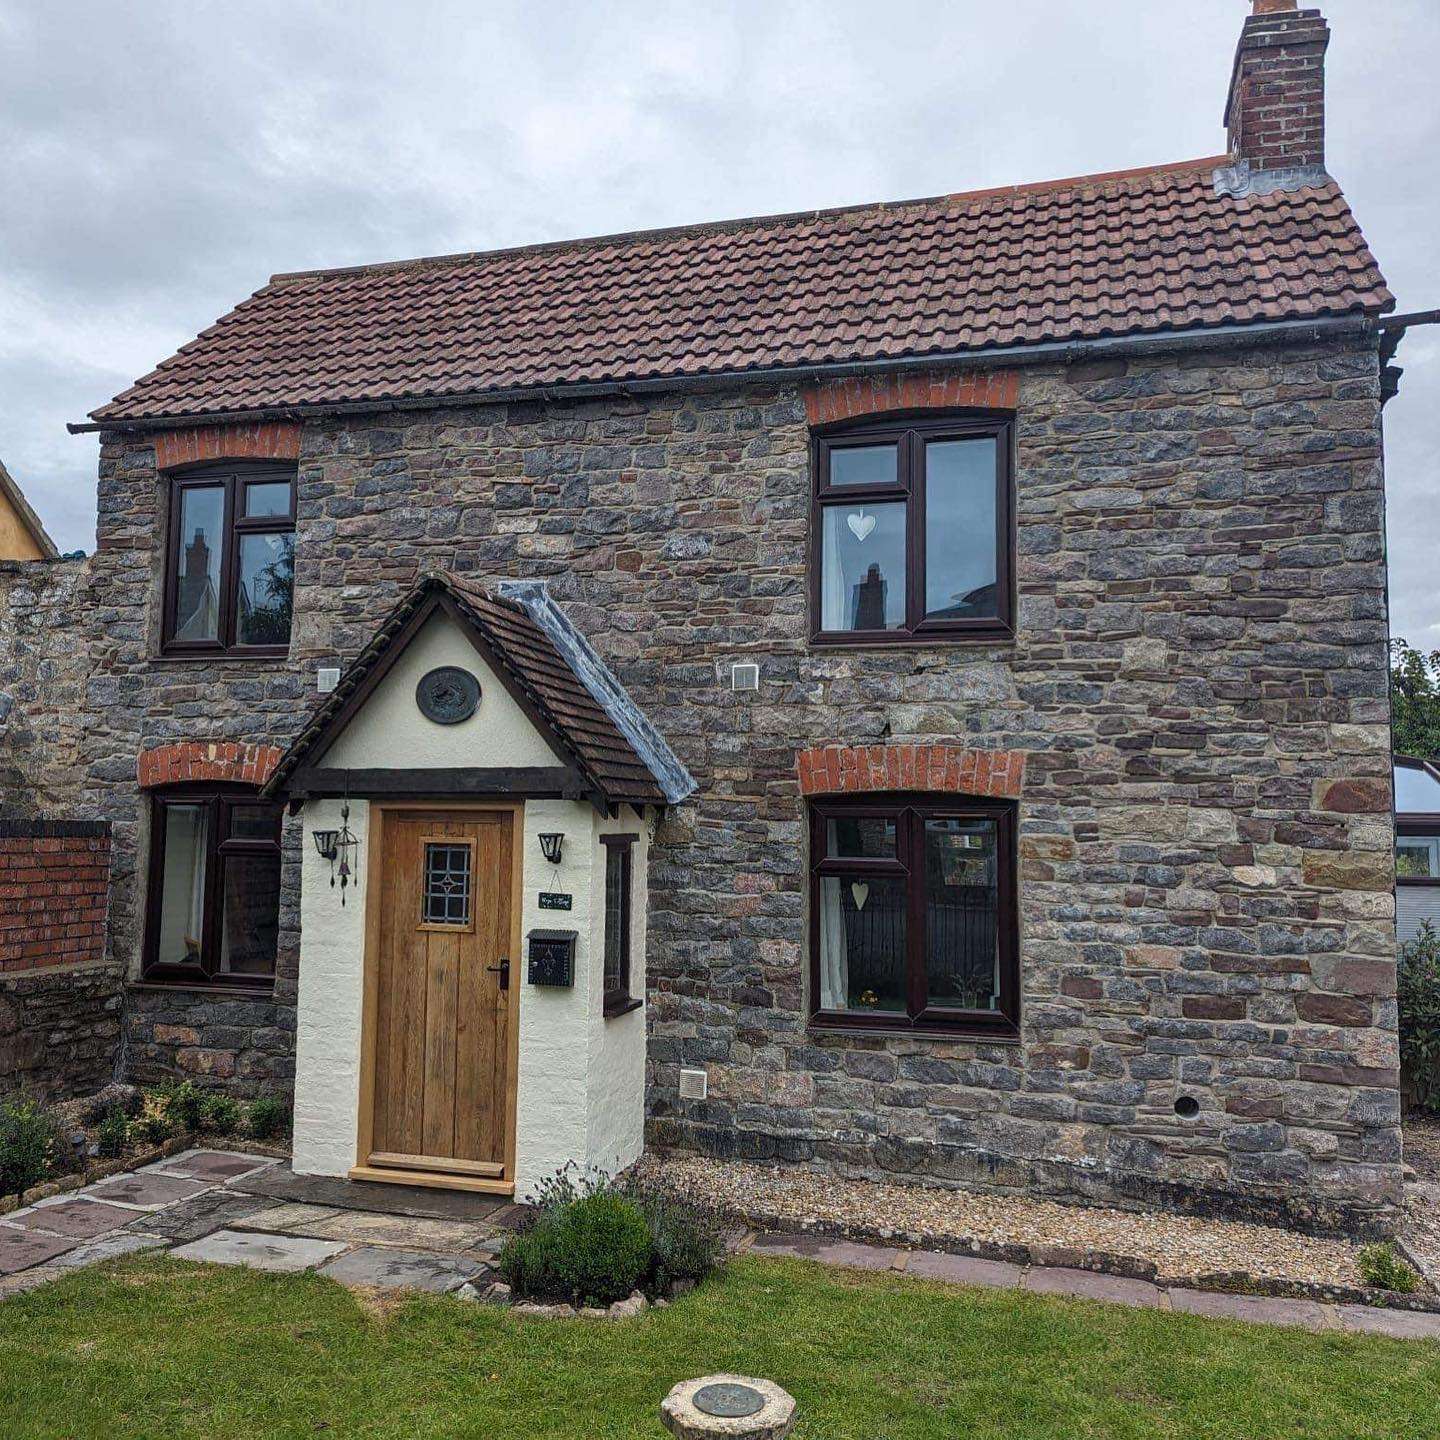
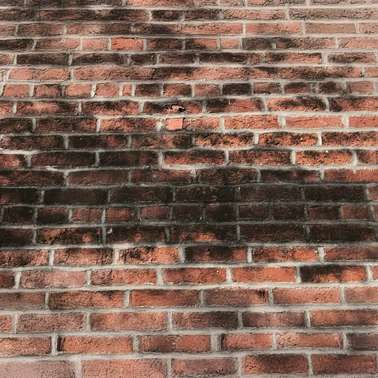
Brick walls are one of the most common exterior features across UK homes and commercial buildings. They are known for their strength, character, and long lifespan. However, while brick is durable, it is not maintenance free. Over time, dirt, algae, moss, pollution, and weather exposure all start to affect the surface. In many parts of the UK, constant rain and damp conditions accelerate organic growth on brickwork. You often see green staining on shaded walls, black streaks from pollution, and general dulling of the original brick colour. Left untreated, this build-up can start to affect not just appearance but also the condition of the mortar joints. Pressure washing is one of the most effective ways to clean brick walls, but it needs to be done correctly. Brick is porous, and using the wrong pressure or technique can cause permanent damage.

Why Cleaning Brick Walls Matters

Cleaning brick walls is not just about making a property look better. It also plays a role in preserving the structure itself.

Common Problems Caused by Dirty Brickwork

Issue Cause Impact
Algae and moss growth Moist, shaded areas Slippery surfaces and staining
Black staining Air pollution and soot Dull and aged appearance
Efflorescence Salt deposits from moisture White powdery residue
Dirt build-up Rain and environmental exposure Loss of original brick colour
Mortar erosion Long-term moisture retention Weakening of wall structure
A clean brick surface helps maintain both the appearance and longevity of the building exterior.

Understanding Different Types of Brick

Not all bricks react the same way to pressure washing. Some are dense and highly resistant, while others are softer and more porous.

Brick Type Comparison

Brick Type Density Cleaning Sensitivity Recommended Pressure
Engineering brick Very high Low sensitivity Higher pressure suitable
Facing brick Medium Moderate sensitivity Controlled pressure
Handmade brick Low to medium High sensitivity Low pressure required
Reclaimed brick Variable High sensitivity Very cautious approach
Knowing the type of brick is essential before starting any cleaning work.

Choosing the Right Pressure Washer Settings

Using a pressure washer on brick is not about maximum force. It is about control, consistency, and the right balance between pressure and cleaning solution.

Recommended Pressure Levels

Condition Pressure Range
Light dirt 50–100 bar
General cleaning 100–150 bar
Heavy staining 150–200 bar (carefully controlled)
Delicate brickwork Under 100 bar
Higher pressure does not always mean better results. In many cases, lower pressure combined with specialist detergents gives a far cleaner and safer finish.

Preparing Brick Walls for Pressure Washing

Preparation is one of the most important stages of cleaning brickwork. Skipping this step often leads to uneven results or unnecessary damage.

Step 1: Inspect the Wall

Before any cleaning begins, the wall should be checked for:
  • Cracked or loose bricks
  • Weak or crumbling mortar
  • Existing repairs or patchwork
  • Heavy biological growth
Any structural issues should be addressed before cleaning starts.

Step 2: Protect Surrounding Areas

Pressure washing creates runoff and spray. Surrounding areas need to be protected, including:
  • Windows and frames
  • Doors
  • Electrical fittings
  • Plants and landscaping

Step 3: Dry Brushing

Loose dirt, cobwebs, and surface debris should be removed using a stiff brush. This improves the effectiveness of the pressure wash and prevents dirt from spreading unevenly.

Step-by-Step Process for Cleaning Brick Walls With a Pressure Washer

Cleaning brick properly is a structured process that balances pressure, water flow, and cleaning solutions.

Applying a Cleaning Solution

A specialist brick-safe detergent is applied first. This helps break down algae, moss, and embedded dirt before pressure washing begins. The solution is left to soak into the surface for a set dwell time, usually between 10 and 20 minutes depending on conditions.

Controlled Pressure Washing Technique

The pressure washer should be used in steady, even passes. Spraying too close to the wall or holding the nozzle in one place can damage the surface.

Best Practice Guidelines

  • Keep nozzle at least 30–50 cm from surface
  • Use wide spray patterns, not narrow jets
  • Work from top to bottom to control runoff
  • Avoid concentrating on mortar joints

Removing Stubborn Stains

Some stains require additional attention, especially:
  • Oil marks
  • Deep algae growth
  • Smoke or soot stains
These are treated with repeat applications of cleaning solution rather than increasing pressure.

Final Rinse

Once cleaning is complete, the entire wall is rinsed thoroughly. This removes any remaining detergent and lifted debris. The wall is then left to dry naturally, which can take between 24 and 72 hours depending on weather conditions.

Cleaning Products Used on Brickwork

Using the right cleaning solution is just as important as the pressure washer itself.

Types of Cleaning Solutions

Solution Type Purpose Suitability
Alkaline cleaners General dirt removal Most brick types
Biocide treatments Algae and moss removal Damp environments
Acid-based cleaners Heavy staining removal Specialist use only
Neutral cleaners Light maintenance cleaning Delicate brickwork
Incorrect chemical use can cause discolouration or long-term damage.

Common Mistakes When Pressure Washing Brick Walls

Many issues with brick cleaning come from incorrect technique rather than equipment failure.

Using Too Much Pressure

Excess pressure can erode the brick face and damage mortar joints. This is one of the most common and costly mistakes.

Holding the Jet Too Close

This can create visible striping or uneven cleaning marks on the surface.

Ignoring Mortar Condition

Weak mortar can be washed away if not carefully treated, leading to structural concerns over time.

Skipping Pre-Treatment

Without detergent pre-treatment, pressure washing alone often fails to remove deep staining.

Safety Considerations

Pressure washing brick walls involves working with high-pressure water systems, which can be hazardous if not handled correctly.

Key Safety Risks

  • High-pressure water injury
  • Slipping from wet surfaces
  • Electrical hazards near external fittings
  • Falling debris from older walls
Proper protective equipment and controlled working methods are essential.

Cost of Cleaning Brick Walls in the UK

Pricing depends on wall size, condition, access, and level of staining. Pureseal Services operates at the higher end of the market, focusing on detailed, careful cleaning rather than quick low-cost washes.

Typical Price Guide

Service Type Estimated Cost (UK £)
Small wall section clean £200 – £400
Full house exterior clean £600 – £1,500
Heavily stained brick restoration £1,200 – £2,500
Large commercial brick cleaning £2,000+
Higher pricing reflects the level of care required to protect brick integrity while achieving a high-quality finish.

Professional Cleaning vs DIY Pressure Washing

While DIY pressure washers are widely available, they are not always suitable for brick cleaning.

Comparison Table

Factor DIY Cleaning Professional Cleaning
Equipment quality Basic consumer units Industrial systems
Risk of damage High if inexperienced Controlled and low
Cleaning results Inconsistent Even and thorough
Knowledge of brick types Limited Experienced assessment
Time required High Efficient process
Professional cleaning reduces the risk of irreversible surface damage.

Why Brick Walls Require a Gentle but Effective Approach

Brick is strong but also absorbent. This means it can take in moisture, dirt, and cleaning chemicals if not handled properly. A balanced approach ensures:
  • Surface dirt is removed effectively
  • Brick face remains intact
  • Mortar joints are preserved
  • No long-term water retention issues develop
This balance is what separates basic cleaning from proper restoration work.

The Role of Weather in Brick Cleaning

Weather conditions significantly impact both the cleaning process and results.

Ideal Conditions

  • Dry weather
  • Mild temperatures between 10°C and 20°C
  • No strong wind
  • No rain during or immediately after cleaning
Cleaning in poor weather can reduce effectiveness and extend drying time.

Maintenance After Pressure Washing

Once brickwork has been professionally cleaned, maintaining it becomes much easier.

Recommended Maintenance Routine

  • Inspect walls annually for moss or algae
  • Light washdowns every 12–24 months
  • Treat shaded areas with preventative biocide
  • Keep gutters and drainage systems clear

Signs Brick Walls Need Cleaning

It is not always obvious when brickwork needs attention. Some early signs include:
  • Dark streaks running down walls
  • Green patches in shaded areas
  • White powdery residue forming on surfaces
  • General dullness compared to untreated sections
Addressing these early prevents deeper staining.

Long-Term Benefits of Proper Brick Cleaning

A correctly cleaned brick wall does more than improve appearance. It helps preserve the material and reduces long-term maintenance costs. Over time, regular professional cleaning helps:
  • Extend brick lifespan
  • Maintain structural integrity
  • Reduce moisture retention
  • Improve overall property appearance
For properties where presentation matters, especially in competitive housing markets, clean brickwork makes a noticeable difference in overall kerb appeal.

Understanding Brick Walls and Why They Need Cleaning

Brick walls are one of the most common exterior finishes across homes and commercial buildings in the UK. They’re valued for their durability, natural appearance, and ability to last for decades with relatively low maintenance. That said, “low maintenance” doesn’t mean “no maintenance”. Over time, brickwork is constantly exposed to rain, wind, pollution, algae spores, moss, and general airborne dirt. In shaded or north-facing areas, this build-up happens even faster. What starts as a slight darkening of the surface can develop into green algae growth, black staining, or a patchy, neglected appearance. Pressure washing is one of the most effective ways to restore brickwork, but it needs to be handled carefully. Brick is porous, and the mortar between bricks is often even more vulnerable. Incorrect technique or excessive pressure can lead to long-term damage rather than improvement.

Why Cleaning Brick Walls Is Important

Cleaning brickwork is not just about appearance. It also plays a role in maintaining the condition of the structure over time.

Common Issues on Unclean Brickwork

Problem Cause Effect
Algae growth Damp conditions and shade Slippery, green surface and staining
Black staining Pollution and soot Dull, aged appearance
Moss build-up Moisture retention Surface deterioration over time
Efflorescence Salt deposits from moisture White powdery marks on bricks
Dirt accumulation Weather exposure Loss of original brick colour
If left untreated, these issues can become more stubborn and harder to remove, often requiring stronger treatments or repeated cleaning.

Choosing the Right Approach for Pressure Washing Brick

Not all brickwork can be cleaned in the same way. The age of the building, type of brick, and condition of the mortar all influence how pressure washing should be carried out.

Brick Type Sensitivity Guide

Brick Type Strength Cleaning Risk Recommended Approach
Engineering brick High density Low risk Higher pressure can be used safely
Facing brick Medium density Moderate risk Controlled pressure required
Handmade brick Softer structure High risk Low pressure only
Older or reclaimed brick Variable Very high risk Specialist careful cleaning
Older properties in particular require a much more cautious approach due to weakened mortar and more absorbent brick surfaces.

Preparing Brick Walls Before Pressure Washing

Preparation is a key part of achieving a clean, even finish without causing damage.

Step 1: Full Inspection

Before any cleaning starts, the entire wall should be checked for:
  • Cracked or missing mortar
  • Loose or damaged bricks
  • Existing repairs or patching
  • Heavy biological growth
Any structural issues should be addressed before water pressure is applied.

Step 2: Protect Surrounding Areas

Pressure washing creates spray and runoff that can affect nearby surfaces. Proper protection should be put in place for:
  • Windows and doors
  • Electrical fittings
  • Painted surfaces
  • Plants and landscaping
This prevents unwanted staining or water ingress.

Step 3: Dry Surface Cleaning

Loose dirt, cobwebs, and debris should be removed with a stiff brush before washing begins. This helps the pressure washer work more effectively and prevents smearing.

Step-by-Step Brick Cleaning Process

Cleaning brickwork properly is about control, not force. The best results come from combining specialist cleaning solutions with carefully managed pressure washing.

Applying a Pre-Treatment Solution

A brick-safe cleaning solution is applied across the surface before pressure washing begins. This helps break down:
  • Algae and moss
  • General grime
  • Atmospheric pollution
  • Organic staining
The solution is left to dwell for around 10–20 minutes, depending on the level of contamination.

Controlled Pressure Washing Technique

Once the treatment has had time to work, pressure washing begins. The key is consistency and distance.

Recommended Practice

  • Keep nozzle 30–50 cm from the surface
  • Use a wide fan spray, not a concentrated jet
  • Work in even, overlapping passes
  • Clean from top to bottom to control runoff

Pressure Guidelines

Condition Pressure Level
Light dirt 50–100 bar
General cleaning 100–150 bar
Heavy staining Up to 200 bar (carefully controlled)
Delicate brickwork Under 100 bar
Increasing pressure is not always the answer. In many cases, better chemical treatment reduces the need for force.

Treating Stubborn Stains

Some stains require additional attention, especially older or deep-set marks. Common difficult stains include:
  • Oil marks
  • Long-term algae growth
  • Smoke and soot staining
These are treated with repeated applications of specialist cleaning products rather than excessive pressure, which could damage the surface.

Final Rinse and Drying

Once cleaning is complete, a full rinse is carried out to remove any remaining residue. The wall is then left to dry naturally. Drying times vary depending on weather conditions, typically ranging from 24 to 72 hours.

Cleaning Products Used on Brickwork

The type of cleaning solution used is just as important as the pressure washer itself.

Types of Cleaning Solutions

Solution Type Purpose Suitable For
Alkaline cleaners General dirt removal Most modern brickwork
Biocides Algae and moss treatment Damp or shaded walls
Specialist detergents Deep cleaning Heavily soiled surfaces
Mild neutral cleaners Delicate surfaces Older brickwork
Using the wrong product can lead to discolouration or long-term surface damage.

Common Mistakes When Cleaning Brick Walls

Brick cleaning is often done incorrectly when approached without experience.

Using Too Much Pressure

Excessive pressure can damage the brick face and erode mortar joints, leading to long-term structural concerns.

Holding the Nozzle Too Close

This can leave visible marks or strip patterns across the surface.

Skipping Pre-Treatment

Without chemical pre-treatment, pressure washing alone often fails to fully remove deep staining.

Ignoring Mortar Condition

Weak mortar can be washed away, especially in older properties.

Safety Considerations During Pressure Washing

Pressure washing brickwork involves both height work and high-pressure equipment.

Key Risks

  • High-pressure water injury
  • Slips from wet surfaces
  • Damage to nearby fittings
  • Falling debris from weakened areas
Proper handling and control are essential to avoid accidents.

Cost of Brick Wall Cleaning in the UK

Pricing varies depending on size, condition, and accessibility. Pureseal Services operates at the higher end of the market, focusing on detailed cleaning and long-lasting results rather than quick surface washes.

Typical Pricing Guide

Service Type Price Range (UK £)
Small wall section £200 – £400
Full house exterior £600 – £1,500
Heavy restoration cleaning £1,200 – £2,500
Large commercial walls £2,000+
Higher pricing reflects the level of care required to clean brick safely without causing damage.

Professional vs DIY Pressure Washing

While DIY pressure washers are widely available, brickwork is one of the more difficult surfaces to clean safely without experience.

Comparison Table

Factor DIY Professional Service
Equipment quality Consumer-grade Industrial systems
Risk of damage High Controlled and low
Finish quality Inconsistent Even and detailed
Knowledge of materials Limited Experienced assessment
Time efficiency Slow Efficient process
Professional cleaning reduces the risk of permanent damage and delivers a more consistent finish.

Weather Conditions and Their Impact

Weather plays a major role in both cleaning effectiveness and drying time.

Ideal Conditions

  • Dry weather
  • Mild temperatures between 10°C and 20°C
  • Low wind conditions
  • No rain during or immediately after cleaning
Poor weather can dilute cleaning products and extend drying times significantly.

Maintenance After Cleaning

Once brickwork has been professionally cleaned, ongoing maintenance becomes much easier.

Recommended Routine

  • Inspect walls annually for moss or algae
  • Light cleaning every 12–24 months
  • Treat shaded areas with preventative solutions
  • Keep gutters clear to prevent overflow staining
Regular maintenance helps preserve the appearance for longer and reduces the need for intensive cleaning in the future.

Signs Brick Walls Need Cleaning

Brickwork does not always look obviously dirty at first glance. Subtle signs include:
  • Gradual darkening of colour
  • Green patches forming in shaded areas
  • White powdery deposits
  • Uneven surface staining
Addressing these early helps maintain a cleaner finish and avoids deeper staining becoming permanent.

Final Conclusion

Cleaning brick walls with a pressure washer can deliver excellent results, but only when it’s done with the right balance of control, preparation, and technique. Brickwork is tougher than it looks, yet still vulnerable to damage if too much pressure is used or if unsuitable products are applied. The key is understanding that effective cleaning is not about force. It comes from proper pre-treatment, careful washing, and respecting the condition and age of the brick and mortar. When these steps are followed correctly, the surface can be restored to a much cleaner, more consistent finish without compromising its structure. Ongoing maintenance also plays a big part in keeping brickwork looking its best. Regular light cleaning, managing moisture exposure, and dealing with early signs of algae or staining all help prevent the need for more intensive restoration work later on. For properties where appearance and long-term protection matter, professional cleaning provides a more controlled and reliable approach. Pureseal Services focuses on delivering that level of care, using methods designed to clean effectively while protecting the integrity of the brickwork itself.

Continue Reading

The Best Way to Clean Tarmac Driveways

Understanding Tarmac Driveways

Tarmac driveways are a popular choice across the UK for good reason. They are durable, cost-effective to install, and provide a clean, smooth finish that suits both modern and traditional properties. However, while tarmac is resilient, it is not maintenance-free. Over time, exposure to weather, oil spills, moss, algae, and general wear can leave it looking tired and worn. Unlike block paving or concrete, tarmac is slightly porous and softer in structure. This means it requires a more careful approach when cleaning. Using the wrong techniques or excessive pressure can cause permanent damage, leading to cracks, pitting, or surface erosion. Proper cleaning not only improves appearance but also extends the lifespan of the driveway, helping homeowners avoid costly repairs or premature replacement.

Why Regular Cleaning Matters

Neglecting a tarmac driveway leads to more than just cosmetic issues. Dirt and organic growth can slowly break down the surface, especially during colder months when moisture freezes and expands.

Common Issues Caused by Poor Maintenance

Issue Cause Impact on Driveway
Moss and algae growth Damp conditions and shade Slippery surface and gradual deterioration
Oil stains Vehicle leaks Deep staining and weakening of surface
Dirt build-up Lack of cleaning Dull, aged appearance
Weed growth Cracks and edges Structural damage over time
Fading colour UV exposure Loss of visual appeal
Regular cleaning helps prevent these issues from escalating and keeps the driveway looking well-maintained.

The Best Time to Clean a Tarmac Driveway

Timing plays a bigger role than most people realise. Cleaning under the wrong conditions can reduce effectiveness or even damage the surface.

Ideal Conditions

  • Mild, dry weather
  • Temperature between 10°C and 20°C
  • No immediate rain forecast
  • Surface completely dry before treatment
Cleaning during warmer months, particularly spring and early autumn, tends to produce the best results. Winter cleaning is not recommended due to moisture retention and freezing risks.

Step-by-Step Process for Cleaning Tarmac Driveways

Cleaning tarmac properly requires a structured approach. Skipping steps or rushing the process often leads to poor results.

Initial Inspection

Before starting, the driveway should be assessed for:
  • Cracks or weak areas
  • Heavy staining
  • Moss or algae coverage
  • Drainage issues
This determines the safest cleaning method.

Surface Preparation

Preparation is essential for effective cleaning.
  1. Remove loose debris such as leaves and dirt
  2. Sweep the entire surface thoroughly
  3. Treat visible weeds with a suitable solution
  4. Allow time for weed killer to take effect

Applying a Cleaning Solution

A specialised cleaning solution is applied to break down dirt, oil, and organic growth. Standard household detergents are not suitable, as they often lack the strength needed and may damage the surface. Professional-grade treatments penetrate the tarmac, lifting contaminants without harming the material.

Gentle Pressure Washing

This is where many homeowners go wrong. High-pressure washing can strip the surface and cause irreversible damage. A controlled, low-pressure wash is used instead. The aim is to rinse away contaminants without disturbing the structure of the tarmac.

Pressure Guidelines

Surface Condition Recommended Pressure
Light dirt 50–100 bar
Moderate staining 100–150 bar
Heavy contamination Specialist treatment required

Stain Treatment

Oil and tyre marks often require targeted treatment. These stains penetrate deeply and cannot always be removed with standard cleaning alone. Professional solutions are used to draw out the oils, improving the overall finish without discolouration.

Rinsing and Drying

After cleaning, the driveway must be thoroughly rinsed to remove any residue. It is then left to dry completely before any further treatment. Drying time varies depending on weather conditions but typically takes between 24 and 48 hours.

The Importance of Sealing Tarmac

Cleaning alone is only part of the process. Sealing is what protects the driveway and enhances its appearance long-term. A high-quality sealant restores the rich black finish of tarmac and creates a protective barrier against:
  • Water penetration
  • Oil spills
  • UV damage
  • Moss and algae regrowth

Benefits of Sealing

Benefit Description
Enhanced appearance Restores colour and gives a fresh finish
Increased lifespan Protects against wear and weather
Easier maintenance Prevents dirt from embedding
Cost savings Reduces need for repairs

Professional vs DIY Cleaning

Many homeowners consider cleaning their driveway themselves. While this can be effective for light maintenance, it often falls short when dealing with deeper issues.

Comparison Table

Factor DIY Cleaning Professional Cleaning
Equipment quality Limited Industrial-grade
Cleaning results Surface-level Deep, long-lasting
Risk of damage High if inexperienced Minimal
Time required High Efficient
Sealant application Rarely included Included as standard
DIY methods often miss underlying issues, which means problems return quickly.

Why Choose Pureseal Services

When it comes to cleaning and restoring tarmac driveways, Pureseal Services focuses on delivering a premium finish rather than competing on price. Their process is tailored to each driveway, ensuring the correct pressure, treatments, and sealing methods are used. This attention to detail is what separates a basic clean from a full restoration.

What Sets Pureseal Services Apart

  • Advanced cleaning systems designed specifically for tarmac
  • Professional-grade sealants for long-term protection
  • Experienced technicians who understand surface limitations
  • Consistent, high-end results
Rather than offering quick, low-cost cleans, the emphasis is on durability and quality.

Typical Costs for Tarmac Driveway Cleaning

Pricing can vary depending on the size of the driveway, its condition, and whether sealing is included.

Average Price Guide

Service Type Estimated Cost (UK £)
Basic clean (small driveway) £150 – £250
Deep clean with treatment £250 – £450
Full clean and seal £450 – £900+
Large driveway restoration £900 – £1,500+
Pureseal Services typically operates at the higher end of this scale due to the quality of materials and the thoroughness of their work.

Common Mistakes to Avoid

Cleaning tarmac may seem straightforward, but several common mistakes can cause long-term damage.

High Pressure Washing

Using excessive pressure is one of the most damaging errors. It strips away the binding agents in the tarmac, leading to a rough, weakened surface.

Using Harsh Chemicals

Some cleaning products contain acids or solvents that degrade the surface. Only specialised, tarmac-safe solutions should be used.

Ignoring Small Repairs

Cracks and minor damage should be addressed before cleaning. Water penetration during cleaning can worsen these issues.

Skipping Sealing

Cleaning without sealing leaves the surface exposed, meaning dirt and moisture will quickly return.

Maintenance Tips After Cleaning

Keeping a tarmac driveway in good condition does not require constant effort, but regular care makes a noticeable difference.

Simple Maintenance Routine

  • Sweep regularly to remove debris
  • Clean minor spills immediately
  • Trim surrounding plants to reduce shade and moisture
  • Apply moss treatment annually if needed

Recommended Maintenance Schedule

Task Frequency
Sweeping Weekly
Light cleaning Every 3–6 months
Moss treatment Annually
Resealing Every 2–4 years

Weather Impact on Tarmac Driveways

The UK climate plays a significant role in driveway wear. Rain, frost, and temperature fluctuations all contribute to deterioration.

Seasonal Effects

Season Impact
Winter Freeze-thaw cycles cause cracks
Spring Increased moss and algae growth
Summer UV exposure leads to fading
Autumn Leaf build-up causes staining
Regular cleaning helps counteract these seasonal effects.

Signs Your Driveway Needs Cleaning

It is not always obvious when a driveway needs attention. Some signs are subtle but indicate deeper issues.

Key Indicators

  • Surface appears dull or grey
  • Slippery areas after rain
  • Visible moss or algae patches
  • Oil stains that do not fade
  • Small cracks becoming more noticeable
Addressing these early prevents more extensive damage.

The Long-Term Value of Professional Cleaning

While professional cleaning may seem like a higher upfront investment, it often proves more cost-effective over time. A well-maintained tarmac driveway can last significantly longer than one that is neglected. Regular cleaning and sealing reduce the likelihood of:
  • Major repairs
  • Resurfacing
  • Complete replacement
Given the cost of replacing a driveway can run into several thousand pounds, proper maintenance becomes a practical decision rather than a luxury.

Tarmac vs Other Driveway Surfaces

Understanding how tarmac compares to other materials highlights why its cleaning approach must be different.

Comparison Table

Surface Type Durability Maintenance Cleaning Difficulty
Tarmac High Moderate Medium
Block paving High High High
Concrete Very high Low Low
Gravel Medium High Low
Tarmac sits in the middle, offering durability but requiring careful maintenance to retain its appearance.

How Often Should You Use Professional Services

The frequency of professional cleaning depends on usage and environmental factors.

Recommended Intervals

  • Light use, low exposure: every 2–3 years
  • Moderate use: every 1–2 years
  • Heavy use or shaded areas: annually
Properties surrounded by trees or with poor drainage may require more frequent attention.

The Role of Drainage

Drainage is often overlooked but plays a major role in driveway condition. Poor drainage leads to standing water, which accelerates moss growth and weakens the surface.

Drainage Issues to Watch For

  • Puddles forming after rain
  • Water flowing towards the property
  • Soft or spongy areas in the tarmac
Addressing these issues improves both cleaning results and long-term durability.

Oil and Chemical Stains

Driveways are particularly vulnerable to vehicle-related stains. Oil, brake fluid, and fuel can all penetrate the surface.

Stain Removal Effectiveness

Stain Type Removal Difficulty
Mud and dirt Easy
Moss and algae Moderate
Oil stains Difficult
Paint or chemicals Very difficult
Professional cleaning significantly improves removal rates, although some deep stains may leave slight discolouration.

Safety Considerations

Cleaning a driveway involves more than just aesthetics. Safety is a key factor. Slippery surfaces caused by algae and moss increase the risk of falls, particularly in wet conditions. Proper cleaning restores grip and reduces hazards.

Environmental Considerations

Modern cleaning methods aim to minimise environmental impact while maintaining effectiveness. This includes:
  • Controlled water usage
  • Biodegradable cleaning solutions
  • Responsible waste management
Professional services are better equipped to meet these standards compared to DIY approaches.

Restoring the Appearance of Aged Tarmac

Older driveways often look beyond repair, but in many cases, a full clean and seal can dramatically improve their appearance. The sealing process darkens the surface, evens out colour variations, and gives the driveway a refreshed look without the need for replacement. This is particularly beneficial for properties preparing for sale or simply wanting to improve kerb appeal.

Commercial vs Residential Driveways

Cleaning requirements differ between domestic and commercial properties.

Key Differences

Factor Residential Commercial
Traffic levels Low to moderate High
Stain frequency Occasional Frequent
Cleaning frequency Every 1–3 years Regular maintenance required
Surface wear Gradual Accelerated
Commercial spaces often require more frequent and intensive cleaning due to heavier usage.

Understanding Tarmac Driveways

Tarmac driveways are widely used across the UK thanks to their durability, smooth finish, and relatively straightforward installation. They suit a range of properties, from modern new builds to older homes, and can handle regular vehicle traffic without major issues. However, while tarmac is robust, it is not immune to wear and tear. Over time, exposure to the elements, oil spills, dirt, and organic growth such as moss and algae can cause the surface to deteriorate. Without proper care, a once clean and deep-black driveway can become faded, patchy, and even hazardous underfoot. Unlike harder surfaces such as concrete, tarmac is slightly softer and more porous. This means cleaning needs to be done carefully to avoid damaging the surface while still achieving a deep and lasting result.

Why Cleaning Tarmac Properly Matters

A neglected driveway is not just an aesthetic issue. Dirt and organic growth can gradually weaken the surface, especially when combined with the UK’s damp climate.

Common Problems from Poor Maintenance

Issue Cause Effect
Moss and algae Damp, shaded conditions Slippery and unsafe surface
Oil stains Vehicle leaks Permanent dark patches
Dirt build-up Lack of cleaning Dull, worn appearance
Weed growth Cracks and edges Structural damage over time
Regular and correct cleaning prevents these issues from developing into more serious and costly problems.

The Best Method to Clean a Tarmac Driveway

Cleaning tarmac is not about blasting it with high pressure and hoping for the best. The process needs to be controlled and suited to the material.

Inspection First

Every effective clean starts with a proper inspection. This involves identifying:
  • Cracks or weak spots
  • Areas with heavy staining
  • Moss or algae build-up
  • Drainage concerns
This step ensures the correct cleaning approach is used without risking damage.

Preparation of the Surface

Before any washing begins, the driveway should be properly prepared:
  • Sweep away loose debris
  • Remove leaves and dirt
  • Treat weeds in cracks or edges
  • Allow weed treatments time to work
Preparation helps the cleaning process work more effectively and prevents unnecessary mess.

Applying a Specialist Cleaning Solution

Tarmac should never be cleaned with generic household products. These can either be too weak to work properly or too harsh and damaging. Professional-grade cleaning solutions are designed to:
  • Break down dirt and grime
  • Remove organic growth
  • Loosen oil-based contaminants
These treatments soak into the surface and lift dirt without harming the tarmac.

Controlled Pressure Washing

Pressure washing is often misunderstood when it comes to tarmac. Using too much force can strip away the top layer, leaving the surface rough and permanently damaged. Instead, a controlled and low-pressure approach is used.

Recommended Pressure Levels

Condition Pressure Range
Light dirt 50–100 bar
General cleaning 100–150 bar
Heavy staining Specialist treatment required
The goal is to rinse and clean, not to erode the surface.

Dealing with Stubborn Stains

Oil stains are one of the biggest challenges for tarmac driveways. These penetrate deep into the material and cannot always be removed with standard cleaning alone. Specialist treatments are applied to draw out the oil and improve the overall appearance. While complete removal is not always possible, professional methods can significantly reduce visibility.

Rinsing and Drying

Once cleaning is complete, the surface must be thoroughly rinsed to remove any residue. The driveway is then left to dry completely, which usually takes between 24 and 48 hours depending on weather conditions. Proper drying is essential before any further treatment, particularly sealing.

Why Sealing is Essential

Cleaning alone improves the look of a driveway, but sealing is what protects it long-term. A high-quality sealant restores the deep black finish of tarmac and forms a protective barrier against future damage.

Key Benefits of Sealing

Benefit Description
Restores colour Revives faded surfaces
Protects from water Reduces moisture penetration
Prevents staining Slows oil absorption
Reduces maintenance Keeps surface cleaner for longer
Without sealing, the driveway will quickly begin to deteriorate again after cleaning.

Professional vs DIY Cleaning

Many homeowners attempt to clean their driveway themselves, often using rented pressure washers or shop-bought chemicals. While this can work for light dirt, it rarely delivers long-lasting results.

Comparison

Factor DIY Professional
Equipment Basic Industrial-grade
Results Short-term Long-lasting
Risk of damage High Low
Time required Significant Efficient
DIY cleaning also carries a higher risk of causing damage, especially when incorrect pressure or unsuitable chemicals are used.

Why Pureseal Services Stands Out

Pureseal Services focuses on delivering a high-quality finish rather than competing on low pricing. Their approach is centred on long-term results and proper surface care. Each driveway is treated individually, with the correct cleaning methods, pressure levels, and sealing products chosen based on its condition.

What You Can Expect

  • Specialist cleaning tailored for tarmac surfaces
  • Careful pressure control to avoid damage
  • Premium sealants for lasting protection
  • A consistent, high-end finish
This level of service places Pureseal Services towards the higher end of the pricing scale, reflecting the quality of materials and workmanship involved.

Typical Costs in the UK

The cost of cleaning a tarmac driveway depends on its size, condition, and whether sealing is included.

Average Pricing Guide

Service Price Range
Basic clean £150 – £250
Deep clean £250 – £450
Clean and seal £450 – £900+
Large or heavily soiled areas £900 – £1,500+
Pureseal Services generally operates within the upper end of these ranges, focusing on delivering a premium result rather than a quick, low-cost clean.

Common Mistakes to Avoid

Cleaning tarmac incorrectly can do more harm than good. Some of the most common mistakes include:

Using Too Much Pressure

High-pressure washing can strip away the top layer of tarmac, leading to permanent damage and a rough finish.

Using the Wrong Chemicals

Harsh or acidic products can break down the surface and cause discolouration.

Ignoring Repairs

Cleaning over cracks without addressing them first allows water to seep in, making the problem worse.

Skipping Sealing

Failing to seal the driveway leaves it exposed to the elements, meaning dirt and damage will return much quicker.

Ongoing Maintenance Tips

Once a driveway has been properly cleaned and sealed, keeping it in good condition becomes much easier.

Simple Maintenance Routine

  • Sweep regularly to remove debris
  • Clean spills as soon as possible
  • Keep surrounding areas tidy to reduce moss growth

Suggested Maintenance Schedule

Task Frequency
Sweeping Weekly
Light wash Every 3–6 months
Moss treatment Once a year
Resealing Every 2–4 years
Regular maintenance helps preserve both the appearance and durability of the surface.

Weather and Its Impact

The UK climate plays a major role in how quickly a tarmac driveway deteriorates.

Seasonal Effects

Season Impact
Winter Freeze-thaw damage
Spring Moss and algae growth
Summer Fading from UV exposure
Autumn Leaf staining and moisture
Understanding these factors helps in planning cleaning and maintenance at the right time of year.

Signs Your Driveway Needs Attention

It is not always obvious when a driveway needs cleaning, but there are clear indicators to look out for:
  • Faded or grey appearance
  • Slippery patches when wet
  • Visible moss or algae
  • Persistent stains
  • Small cracks becoming more noticeable
Addressing these early prevents more serious damage and keeps the driveway looking its best.

Final Conclusion

A well-maintained tarmac driveway comes down to using the right methods at the right time, rather than simply cleaning it occasionally when it starts to look tired. The surface responds best to a controlled approach that removes dirt, tackles organic growth, and avoids anything too aggressive that could weaken the material. Regular upkeep makes a noticeable difference, but the real change happens when cleaning is done properly and followed with sealing. That combination restores the surface, protects it from weather and staining, and slows down the natural ageing process that tarmac goes through in the UK climate. Choosing a professional approach also helps avoid the common mistakes that often shorten the life of a driveway, such as excessive pressure washing or unsuitable cleaning products. With the right treatment, even older or heavily weathered surfaces can be brought back to a much better condition. For homeowners who want a longer-lasting finish and a more consistent result, Pureseal Services provides a higher-end, detail-focused approach that prioritises protection as much as appearance.

Continue Reading

How to Remove Oil Stains From Driveways

Understanding Oil Stains on Driveways

Oil stains on driveways are one of the most common and frustrating types of surface contamination for homeowners in the UK. Whether caused by vehicle leaks, accidental spills during maintenance, or small drips over time, oil quickly penetrates porous surfaces and becomes increasingly difficult to remove the longer it is left untreated. Driveways are particularly vulnerable because most UK homes use concrete, block paving, tarmac or resin-bound surfaces. These materials are designed for durability, but they are also slightly porous, which allows oil to soak in and bond with the surface. Once this happens, simple washing is rarely enough.

Why Oil Stains Are So Difficult to Remove

Oil behaves differently from water-based dirt. Instead of sitting on the surface, it penetrates deeply and binds with the material.

Key reasons oil stains persist

  • Oil is hydrophobic, so it repels water-based cleaning alone
  • It penetrates porous materials quickly
  • It binds with dust and debris, creating a darker stain
  • It spreads horizontally beneath the surface
  • Heat from tyres can drive oil deeper into the driveway

How quickly oil penetrates different surfaces

Surface Type Absorption Speed Stain Severity Over Time
Tarmac Very fast High within hours
Concrete Fast High within 1–2 days
Block paving Moderate Medium but spreads between joints
Resin-bound Slow Lower but still visible if untreated
The longer oil is left, the more it bonds with the surface structure, making removal significantly harder.

Types of Oil Stains Found on Driveways

Not all oil stains are the same. The type of oil affects how it should be treated.

Common oil types

Oil Type Source Difficulty to Remove
Engine oil Vehicle leaks High
Diesel Spills during refuelling Medium–High
Petrol Small spills Medium
Hydraulic oil Machinery leaks High
Cooking oil Outdoor spills Medium
Engine oil is typically the most stubborn due to its thickness and chemical composition.

First Response: What to Do Immediately After a Spill

The first few minutes after an oil spill are critical. Quick action can significantly reduce staining severity.

Immediate steps to take

  1. Prevent further spread by blocking the area if possible
  2. Blot excess oil using absorbent material
  3. Avoid rubbing, which pushes oil deeper
  4. Apply absorbent granules if available
  5. Leave to soak before any water-based cleaning

Common absorbent materials

Material Effectiveness
Cat litter High
Sawdust Medium
Sand Medium
Commercial absorbent granules Very high
Early intervention can reduce long-term staining by up to 70 percent in some cases.

Cleaning Methods for Oil Stain Removal

There are several methods used to remove oil stains depending on severity and surface type.

Overview of methods

Method Best Use Case Effectiveness
Absorbent treatment Fresh spills High
Detergent washing Light staining Medium
Degreasing chemicals Moderate stains High
Hot water pressure cleaning Heavy staining Medium–High
Steam treatment Embedded oil High
Surface restoration Severe long-term stains Very high
Each method becomes progressively more intensive depending on how long the stain has been present.

Degreasing Chemicals and How They Work

Degreasers are one of the most effective tools for oil stain removal. They break down the molecular structure of oil, allowing it to be lifted from the surface.

How degreasers function

  • Break down oil into smaller particles
  • Separate oil from porous surfaces
  • Allow emulsification with water
  • Lift contaminants to the surface for removal

Application process

  1. Apply degreaser evenly over stain
  2. Allow dwell time for chemical reaction
  3. Light agitation with brush if needed
  4. Rinse using controlled water pressure
  5. Repeat for stubborn stains if required

Hot Water Pressure Cleaning for Oil Stains

Hot water pressure washing is more effective than cold water because heat helps break down oil molecules.

Why heat improves cleaning

  • Softens hardened oil deposits
  • Reduces surface tension of oil
  • Improves effectiveness of detergents
  • Speeds up emulsification process

Typical temperature ranges used

Method Water Temperature Effectiveness
Cold water washing Ambient Low–Medium
Warm water washing 40–60°C Medium
Hot water pressure washing 70–90°C High
However, excessive pressure must still be avoided, especially on block paving and resin-bound surfaces.

Surface-Specific Cleaning Methods

Different driveway materials require different approaches to avoid damage.

Concrete driveways

Concrete is highly porous and absorbs oil quickly.
  • Best treated with strong degreasers
  • Hot water pressure washing recommended
  • Multiple treatments often required

Block paving

Block paving presents a unique challenge because oil can settle into joints.
Issue Treatment
Joint staining Deep chemical soak
Surface staining Degreaser + brushing
Old stains Repeated treatment cycles
Care must be taken not to dislodge jointing sand during cleaning.

Tarmac driveways

Tarmac is highly absorbent and can darken permanently if oil is not treated quickly.
  • Immediate absorbent treatment is essential
  • Chemical degreasing required for older stains
  • Over-cleaning can damage binder structure

Resin-bound driveways

Resin-bound surfaces are less porous but still vulnerable.
  • Avoid high pressure cleaning
  • Use gentle degreasers
  • Spot treatment recommended
  • Rinse carefully to avoid surface disruption

Deep Stain Removal for Long-Standing Oil Marks

Older oil stains that have been present for months or years require more intensive treatment.

Stages of deep removal

  1. Heavy degreaser application
  2. Extended dwell period
  3. Mechanical agitation if safe
  4. Hot water rinse
  5. Repeat cycles if necessary
  6. Optional surface restoration treatment

Expected results by stain age

Stain Age Expected Outcome
Less than 1 week Near complete removal
1–4 weeks High improvement
1–6 months Moderate improvement
6+ months Partial removal with shadowing
1+ years Permanent staining likely

Common Mistakes When Cleaning Oil Stains

Many homeowners unintentionally make stains worse by using incorrect methods.

Frequent errors

  • Using only water without degreaser
  • Scrubbing aggressively on dry oil
  • Applying bleach (which is ineffective on oil)
  • Using excessive pressure on soft surfaces
  • Leaving treatment too long without rinsing
These mistakes often spread the stain or push it deeper into the surface.

Professional Oil Stain Removal Services

Severe or long-standing oil stains often require professional treatment to achieve noticeable improvement. Professional cleaning involves:
  • Industrial-grade degreasers
  • Controlled hot water systems
  • Surface-specific treatment plans
  • Multi-stage cleaning cycles
  • Optional sealing after treatment
Pureseal Services typically operate at the higher end of the market, offering detailed restoration-level cleaning rather than quick surface washing. This reflects the use of specialist equipment, extended treatment time and more precise chemical application methods.

Typical professional pricing in the UK

Service Level Description Estimated Cost
Light stain removal Fresh or minor oil marks £200–£400
Moderate restoration Multi-spot treatment £400–£800
Heavy stain recovery Deep embedded oil removal £700–£1,500+
Pricing varies depending on driveway size, material type and stain severity.

Preventing Future Oil Stains

Prevention is often more cost-effective than removal.

Preventative measures

  • Regular vehicle maintenance to prevent leaks
  • Using drip trays during car servicing
  • Applying driveway sealant
  • Prompt cleaning of spills
  • Avoiding long-term parking on untreated surfaces

Driveway Sealing for Protection

Sealing creates a protective barrier that reduces oil penetration.

Benefits of sealing

Benefit Effect
Water resistance Slows oil absorption
Easier cleaning Stains remain on surface
Improved appearance Enhances colour and finish
Long-term protection Reduces maintenance needs

Types of sealers

  • Penetrating sealers
  • Film-forming sealers
  • Resin-specific protective coatings
Sealing is especially recommended after professional cleaning.

Environmental Considerations During Oil Removal

Oil removal must be carried out responsibly to avoid environmental contamination.

Good practices

  • Prevent runoff entering drains
  • Use absorbent materials for containment
  • Dispose of contaminated waste properly
  • Avoid excessive chemical use
  • Use controlled rinsing methods
Professional services typically manage runoff carefully to ensure compliance with environmental standards.

Signs That Oil Has Permanently Damaged a Driveway

In some cases, oil staining cannot be fully removed.

Indicators of permanent staining

  • Dark shadowing remains after treatment
  • Surface texture has changed
  • Oil has penetrated deep into material
  • Repeated cleaning shows diminishing returns
In these situations, full restoration may be required rather than standard cleaning.

Maintenance Schedule for Driveways

Regular maintenance reduces long-term staining risk.

Recommended routine

Frequency Task
Weekly Visual inspection
Monthly Light cleaning or rinse
After spills Immediate treatment
Every 1–2 years Deep clean
Every 3–5 years Sealing or surface protection

Long-Term Driveway Care Strategy

Oil stain management is most effective when approached as part of ongoing driveway care rather than a reactive process. Once oil penetrates deeply into porous materials, removal becomes progressively more difficult, so early intervention and preventative maintenance are key to maintaining appearance and surface integrity. Regular inspections, prompt spill response and the application of protective sealants all contribute to reducing the impact of future staining. For properties with frequent vehicle use or heavier traffic, professional cleaning support can help maintain a consistent finish and prevent long-term deterioration. Pureseal Services typically focus on this type of structured maintenance approach, using specialist cleaning systems and controlled application methods designed to restore driveways while also improving resistance to future oil absorption.

Advanced Oil Stain Breakdown Techniques

Once standard degreasing and pressure cleaning methods have been used, some oil stains still leave behind shadowing or faint discolouration. This is especially common on older concrete or tarmac where oil has been sitting for long periods and has already bonded with the surface structure. At this stage, the focus shifts from simple removal to chemical breakdown and surface recovery.

Oxidation-assisted cleaning

Oxidation treatments help break down the darker residue that remains after the bulk of the oil has been removed. How it works:
  • Targets remaining carbon-based staining
  • Breaks down dark pigment left in pores
  • Lightens shadowing over time rather than instantly
This is particularly useful for older engine oil stains where full removal is not immediately possible.

Enzyme-based degreasers

Enzyme cleaners are a more advanced solution used for deep organic breakdown.
Feature Benefit
Biological action Breaks oil down at molecular level
Slow release Continues working after application
Surface safe Low risk to most driveway materials
Deep penetration Reaches oil embedded in pores
These are often used when chemical degreasers alone are not achieving full results.

Poultice extraction method

For severe stains, a poultice system is sometimes used. This involves:
  • Applying a thick absorbent paste over the stain
  • Sealing it to the surface for extended dwell time
  • Allowing it to draw oil out of the material
  • Removing and repeating if necessary
It is one of the most effective methods for long-standing oil contamination but requires time and precision.

Heat-Assisted Restoration Cleaning

Heat plays a major role in advanced oil removal, especially for hardened or weathered stains.

Why heat improves oil extraction

  • Softens thickened oil deposits
  • Reduces adhesion to porous surfaces
  • Enhances chemical reaction speed
  • Helps release embedded residue

Combined hot water + chemical method

Stage Process
1 Apply degreaser to stain
2 Allow controlled dwell time
3 Apply hot water rinse
4 Agitate if required
5 Repeat if shadowing remains
This combination is often used in professional-grade driveway restoration systems.

Oil Stain Behaviour in Different UK Weather Conditions

Weather has a significant influence on both how oil stains form and how they are treated.

Cold weather conditions

In colder temperatures:
  • Oil becomes thicker and less mobile
  • Penetration slows but residue hardens
  • Cleaning chemicals work more slowly
  • Heat-assisted methods become more important

Warm weather conditions

In warmer temperatures:
  • Oil spreads more quickly into porous surfaces
  • Cleaning chemicals activate faster
  • Dwell time must be carefully controlled
  • Risk of evaporation before full reaction increases

Wet conditions

Condition Impact on Cleaning
Light rain Dilutes chemicals, reduces effectiveness
Heavy rain Washes away treatment entirely
Damp surfaces Improves chemical penetration slightly
Standing water Prevents proper adhesion of treatments
Professional cleaning schedules are often adjusted around weather windows to maximise effectiveness.

Driveway Material Restoration After Oil Removal

Once oil has been removed, some surfaces require additional restoration to return them to a uniform appearance.

Surface reinstatement techniques

  • Re-sanding block paving joints
  • Colour enhancement treatments for faded areas
  • Surface retexturing on concrete
  • Tarmac rejuvenation coatings
These steps help blend treated areas with surrounding surfaces.

Tarmac rejuvenation process

Tarmac is particularly prone to permanent dark staining.
Step Purpose
Cleaning Remove surface contamination
Degreasing Break down oil residue
Repair treatment Restore binder flexibility
Seal coating Improve uniform appearance
This process can significantly improve older, patchy driveways.

Preventing Oil Penetration at the Surface Level

One of the most effective strategies is stopping oil from entering the surface in the first place.

Surface sealing options

Sealer Type Best For Protection Level
Penetrating sealers Concrete & block paving Medium
Film-forming sealers Decorative surfaces High
Resin-enhancing sealers Resin-bound driveways Medium–High
Sealants create a barrier that slows absorption, giving more time to clean spills before they stain.

Reapplication frequency

Surface Type Sealing Interval
Concrete Every 2–3 years
Block paving Every 3–5 years
Tarmac Every 2–4 years
Resin-bound Every 3–6 years
Regular sealing reduces long-term maintenance costs significantly.

Commercial vs Residential Oil Stain Challenges

Oil stains behave differently depending on usage intensity.

Residential driveways

  • Usually isolated incidents
  • Smaller stain areas
  • Easier to manage with early treatment
  • Lower overall contamination levels

Commercial or high-traffic areas

Factor Impact
Frequent vehicle movement Repeated oil exposure
Heavy machinery use Larger spills
Delayed cleaning response Deeper penetration
Larger surface area More complex treatment
Commercial surfaces often require scheduled maintenance rather than reactive cleaning.

Health and Safety Considerations

Oil removal involves chemicals and potentially slippery surfaces, so safety is important during treatment.

Key risks

  • Slipping on wet treated areas
  • Skin contact with degreasers
  • Fume exposure from concentrated cleaners
  • Improper disposal of oil-contaminated waste

Safe working practices

  • Wearing protective gloves and footwear
  • Using controlled chemical dilution
  • Keeping children and pets away during treatment
  • Ensuring proper ventilation in enclosed areas
  • Containing runoff water safely
Professional services typically manage these risks as part of the process.

Environmental Responsibility in Oil Removal

Oil is a pollutant, so its removal must be handled carefully to avoid environmental damage.

Environmental risks

  • Contaminated runoff entering drains
  • Soil contamination from untreated spills
  • Chemical overuse affecting surrounding vegetation
  • Improper disposal of absorbent materials

Responsible practices

  • Using absorbent materials for initial containment
  • Preventing wash water entering storm drains
  • Applying chemicals in controlled quantities
  • Collecting contaminated residues for proper disposal
Pureseal Services typically operate with controlled application systems designed to minimise environmental impact while maintaining effective cleaning performance.

Long-Term Driveway Maintenance Planning

Oil stain management becomes far easier when incorporated into regular driveway maintenance.

Preventative maintenance schedule

Timeframe Action
Weekly Visual inspection for leaks or stains
Monthly Light surface cleaning
After spills Immediate absorbent treatment
Every 12–24 months Deep professional clean
Every 3–5 years Sealing and protection renewal
This structured approach prevents oil from becoming a long-term problem.

Indicators That Professional Intervention Is Needed

Not all oil stains can be effectively treated with household methods.

Signs professional cleaning is required

  • Stains have been present for more than 6 months
  • Previous cleaning attempts have failed
  • Large or repeated oil contamination areas
  • Surface discolouration has become permanent-looking
  • Oil has spread beneath surface layers
In these cases, professional restoration techniques become more effective and often more cost-efficient in the long term.

Professional Restoration Approach

Professional driveway restoration is not just about cleaning, but about reversing surface damage where possible. Services such as those provided by Pureseal Services typically include:
  • Multi-stage degreasing systems
  • Hot water extraction equipment
  • Targeted stain breakdown treatments
  • Surface blending and restoration techniques
  • Optional sealing for long-term protection
These services sit at the premium end of the market, often reflecting the complexity of restoring heavily stained or long-neglected surfaces. Depending on driveway size and severity, full restoration work can range from £500 for smaller areas to £2,000+ for large or heavily contaminated surfaces requiring multiple treatment cycles.

Cost vs Outcome Considerations

Oil stain removal can be approached in different ways depending on expectations and budget.

Cost comparison over time

Approach Initial Cost Longevity of Result Overall Value
DIY cleaning Low Short-term Low
Basic professional clean Medium Medium Moderate
Full restoration service Higher Long-term High
Higher-end treatments often deliver better long-term value because they reduce the likelihood of repeat staining and surface deterioration.

Final Operational Perspective

Oil stain removal from driveways is rarely a single-step process. It is a layered treatment approach that combines immediate absorption control, chemical breakdown, heat-assisted cleaning and sometimes surface restoration. The complexity increases significantly with stain age, surface type and environmental exposure. The most effective outcomes come from early intervention, correct material-specific treatment and consistent maintenance. Once oil has fully penetrated a driveway surface, removal becomes progressively more difficult, which is why structured cleaning strategies and protective measures play such an important role in long-term driveway care.

Final Conclusion

Removing oil stains from driveways is rarely a quick fix, especially once the stain has had time to soak into porous materials like concrete, block paving or tarmac. The key difference between a light surface mark and a long-term stubborn stain is time. The longer oil is left untreated, the deeper it bonds with the surface and the more complex the removal process becomes. In most cases, success comes down to using the right method for the right stage of staining. Fresh spills respond well to absorbent materials and immediate treatment, while older stains require a combination of degreasers, heat, dwell time and sometimes multiple cleaning cycles. There is no single product or technique that works for every situation, which is why a layered approach is often needed. Surface type also plays a major role. Block paving allows for more targeted treatment between joints, while tarmac is more vulnerable to permanent darkening if oil is not dealt with quickly. Concrete sits somewhere in between but can still hold deep staining that requires intensive restoration methods. Resin-bound surfaces are more resistant, but not immune, especially if contamination is left untreated. Where DIY methods reach their limit, professional intervention becomes the more reliable option. Advanced cleaning systems, controlled hot water extraction and specialist degreasing treatments can achieve a much deeper level of stain removal than standard domestic equipment. Services such as Pureseal Services typically work at the higher end of the market, focusing on full surface restoration rather than surface-level improvement, which is particularly important for older or heavily stained driveways. Prevention remains just as important as removal. Regular maintenance, quick response to leaks, and protective sealing can dramatically reduce the likelihood of permanent staining. A sealed surface gives more time to react to spills and reduces the rate at which oil is absorbed, making future cleaning far easier and more effective. Ultimately, oil stain management is about combining fast action, correct treatment methods and ongoing surface protection. When these elements work together, driveways stay cleaner for longer, require less intensive restoration work, and maintain a more consistent appearance over time.

Continue Reading

Soft Washing Explained for Homeowners

What Soft Washing Actually Means for Homeowners

Soft washing is a low-pressure exterior cleaning method that uses specialist cleaning solutions rather than force to remove dirt, algae, mould, lichen and other organic growth from exterior surfaces. It is widely used on delicate materials where high-pressure washing would cause damage. For homeowners, the main benefit is simple. You get a deep, long-lasting clean without risking damage to your property’s surfaces. Unlike pressure washing, which relies on force, soft washing relies on chemistry and controlled application. The cleaning solution breaks down biological growth at its root level, meaning results tend to last longer and surfaces are less likely to be damaged or etched.

How Soft Washing Works in Practice

Soft washing is not just spraying water with a cleaning agent. It follows a structured process designed to treat the surface safely and effectively.

The basic soft washing process

  1. Inspection of the surface and material type
  2. Application of a specialist cleaning solution
  3. Allowing a controlled dwell time for the solution to work
  4. Gentle rinsing using low-pressure water
  5. Optional protective treatment to slow regrowth
Each stage is carefully controlled depending on the surface being cleaned.

Why Soft Washing Is Different From Pressure Washing

Many homeowners assume all exterior cleaning methods are the same. In reality, soft washing and pressure washing are completely different approaches.

Key differences

Feature Soft Washing Pressure Washing
Cleaning method Chemical-based Force-based
Pressure level Very low Medium to high
Surface damage risk Low Medium to high
Cleaning depth Deep biological removal Surface-level cleaning
Result longevity Longer-lasting Shorter-lasting
Soft washing is designed for sensitive materials and long-term protection, not just immediate visual improvement.

Surfaces Suitable for Soft Washing

Soft washing is not limited to one type of exterior surface. It is used across many areas of residential and commercial properties.

Common surfaces treated with soft washing

Surface Suitability Notes
Render Very high Ideal for algae and mould removal
Roof tiles Very high Removes moss and lichen safely
Cladding High Suitable for PVC, metal and composite
Brickwork High Works well on porous brick
Painted surfaces Medium Requires careful chemical selection
Fencing High Restores weathered timber
Each surface requires a slightly different chemical mix and application technique.

Why Homes in the UK Need Soft Washing

The UK climate creates ideal conditions for organic growth on exterior surfaces. Damp, shaded environments combined with mild temperatures encourage algae and moss to thrive.

Common issues faced by UK homeowners

  • Green algae on north-facing walls
  • Black mould on rendered surfaces
  • Moss growth on roofs and gutters
  • Staining from rainwater runoff
  • Organic debris build-up from trees
  • General discolouration over time

Environmental factors that increase growth

Factor Effect on property
High rainfall Moisture retention on surfaces
Low sunlight Slower drying, more algae growth
Tree coverage Increased organic debris
Urban pollution Black staining and residue
Coastal air Salt deposits and surface breakdown
Soft washing addresses these issues at their root rather than just cleaning the surface.

The Chemistry Behind Soft Washing

Soft washing relies on specially formulated cleaning solutions designed to kill organic growth rather than simply remove it.

Types of cleaning agents used

Solution Type Purpose Effect
Biocidal wash Kills algae and mould spores Long-term prevention
Surfactant cleaner Breaks down surface dirt Improved cleaning coverage
Stain remover Targets stubborn marks Restores appearance
Neutraliser Balances surface after cleaning Prevents residue build-up
The key difference is that these solutions continue working after application, even before rinsing takes place.

How Dwell Time Affects Results

Dwell time refers to how long the cleaning solution is left on the surface before rinsing.

Typical dwell times by surface type

Surface Dwell Time
Render 15–30 minutes
Roof tiles 20–40 minutes
Brickwork 10–25 minutes
Cladding 10–20 minutes
Leaving the solution too long can cause marking, while rinsing too early reduces effectiveness. Timing is critical.

Why Soft Washing Lasts Longer Than Pressure Washing

One of the main advantages of soft washing is longevity. Because it kills biological growth rather than simply removing it, regrowth takes much longer.

Comparison of longevity

Method Average Clean Duration
Pressure washing 6–12 months
Soft washing 2–5 years
Soft wash with protective treatment 3–7 years
This makes soft washing more cost-effective over time, even if the initial price is higher.

Soft Washing Equipment Explained

Soft washing uses specialised equipment designed for controlled chemical application.

Key equipment used

  • Low-pressure pump systems
  • Adjustable chemical injectors
  • Extension poles for high reach areas
  • Controlled spray nozzles
  • Rinse systems with regulated flow
Unlike pressure washers, the emphasis is on control rather than force.

Safety Considerations in Soft Washing

Although soft washing is low pressure, it still involves chemicals and working at height, so safety is important.

Safety measures followed

  • Controlled dilution of chemicals
  • Protective clothing and gloves
  • Eye protection during application
  • Safe ladder or access platform use
  • Controlled runoff management

Risk comparison

Activity Risk Level
High-pressure washing High
DIY chemical cleaning Medium–High
Professional soft washing Low
Professional systems reduce exposure and ensure safe handling of chemicals.

Soft Washing Roofs

Roof cleaning is one of the most common applications of soft washing in the UK.

Why roofs need soft washing

  • Moss traps moisture and damages tiles
  • Lichen roots can lift roof surfaces
  • Blocked gutters lead to water overflow
  • Staining reduces property appearance

Typical roof cleaning process

  1. Roof inspection and condition assessment
  2. Application of biocide treatment
  3. Controlled dwell period
  4. Gentle rinse or natural weathering process
  5. Optional preventative treatment
In many cases, roofs are not aggressively rinsed, allowing the biocide to continue working over time.

Soft Washing Render and Walls

Render is one of the most sensitive exterior surfaces and benefits greatly from soft washing.

Common render issues

  • Algae streaking
  • Black mould patches
  • Damp discolouration
  • Pollution staining
Soft washing allows these issues to be treated without damaging the surface texture.

Soft Washing Driveways and Paths

While not always associated with soft washing, some driveway surfaces benefit from a gentler chemical-based approach.

Suitable driveway types

  • Block paving
  • Resin-bound surfaces
  • Decorative stone
  • Older porous paving
Soft washing helps remove organic growth from joints and surface pores without dislodging material.

Cost of Soft Washing in the UK

Soft washing is generally considered a premium exterior cleaning service due to the materials, expertise and time involved.

Typical pricing ranges

Property Type Service Level Estimated Cost
Small terrace Basic soft wash £350–£600
Semi-detached Full exterior clean £600–£1,000
Detached home Full soft wash system £900–£1,500
Large property or complex surfaces Deep restoration clean £1,200–£2,500+
Pureseal Services operate at the higher end of this scale, reflecting a more detailed approach, controlled application systems and longer-lasting treatment results.

DIY Soft Washing vs Professional Service

Some homeowners attempt soft washing themselves, but there are significant differences in outcome and safety.

DIY limitations

  • Incorrect chemical dilution
  • Lack of professional equipment
  • Uneven application results
  • Higher risk of surface damage
  • Shorter-lasting results

Professional advantages

  • Controlled chemical systems
  • Knowledge of surface-specific treatment
  • Safer application at height
  • More consistent results
  • Longer protection cycles
Factor DIY Professional
Cost Lower upfront Higher upfront
Risk Higher Low
Result quality Variable Consistent
Longevity Shorter Longer

Environmental Impact of Soft Washing

Modern soft washing techniques are designed to be environmentally responsible when carried out correctly.

Environmental considerations

  • Use of biodegradable cleaning solutions where possible
  • Controlled chemical dilution
  • Reduced water consumption compared to pressure washing
  • Minimal disturbance to surrounding surfaces

Runoff management

Proper control ensures chemicals do not harm plants or enter drainage systems unnecessarily. Professional systems often include controlled application methods to reduce excess runoff.

Common Mistakes Homeowners Make

When soft washing is misunderstood, mistakes can reduce effectiveness or cause damage.

Typical errors

  • Using overly strong chemical mixtures
  • Rinsing too soon or too late
  • Cleaning in direct sunlight
  • Ignoring surface type differences
  • Attempting high-pressure rinsing after treatment
These mistakes often lead to uneven results or surface marking.

Signs Your Property Needs Soft Washing

Many homeowners wait until staining is severe before taking action.

Early warning signs

  • Light green patches on walls
  • Black streaks under windows or rooflines
  • Dull or faded exterior surfaces
  • Moss growth in shaded areas
  • Slippery paths or steps
Early treatment is more effective and requires less intensive cleaning.

Maintenance After Soft Washing

Once a property has been soft washed, ongoing maintenance helps preserve results.

Recommended maintenance routine

Frequency Task
Every 6–12 months Visual inspection
Every 1–3 years Light biocide treatment
Every 3–5 years Full soft wash treatment
As needed Spot cleaning of new growth

Protective Treatments After Soft Washing

After cleaning, additional protective treatments can extend results significantly.

Types of protection

Treatment Function Duration
Biocide seal Prevents regrowth 1–3 years
Hydrophobic coating Repels water 3–5 years
Anti-stain treatment Reduces pollution build-up 2–4 years
These treatments are especially useful for shaded or high-moisture properties.

Access Challenges in Soft Washing

Some properties require specialist access equipment depending on height and layout.

Common access methods

Method Use Case
Extension poles Ground-level reach
Ladders Small sections
Scaffold towers Multi-storey homes
Cherry pickers Large or complex buildings
Safe access is a key part of professional soft washing work, particularly on taller properties.

When Soft Washing Should Be Avoided

Although highly effective, there are situations where soft washing may need to be delayed.

Unsuitable conditions

  • Freezing temperatures
  • Active structural damage
  • Freshly painted or coated surfaces
  • Heavy rain during application
  • Extremely high winds
In these cases, timing the treatment correctly is essential for safety and effectiveness.

Final Considerations on Soft Washing Approach

Soft washing is best understood as a controlled restoration process rather than a simple cleaning method. It combines chemistry, timing and low-pressure application to safely remove organic growth and restore exterior surfaces without damage. The effectiveness of the process depends heavily on correct material identification, chemical selection and professional application techniques. When done properly, it provides longer-lasting results than traditional pressure washing and significantly reduces the risk of surface deterioration over time.

Advanced Understanding of Soft Washing Performance

Soft washing is often presented as a simple process, but in practice, the performance depends on a combination of surface chemistry, environmental conditions, and application control. Two homes treated with the same product can produce noticeably different results if conditions or technique vary. This is why professional systems focus less on “one-size-fits-all” cleaning and more on adapting the method to the property in front of them.

Factors that influence cleaning effectiveness

Factor Impact on Result
Surface porosity Determines chemical absorption and dwell behaviour
Temperature Affects how fast solutions activate and evaporate
Humidity Influences how long treatments remain active
Organic load Heavier growth requires longer treatment cycles
Exposure to sunlight Speeds drying, can reduce dwell time effectiveness
Understanding these variables is key to achieving consistent, long-lasting results.

How Weather Conditions Affect Soft Washing

Weather plays a much bigger role in soft washing than most homeowners realise. It is not just about avoiding rain on the day of cleaning, but about how conditions influence chemical behaviour and biological regrowth.

Ideal weather conditions

  • Dry but overcast skies
  • Mild temperatures between 10°C and 20°C
  • Low to moderate wind levels
  • No frost or extreme heat
These conditions allow cleaning solutions to remain active for the correct duration without evaporating too quickly or being washed away prematurely.

Challenging weather scenarios

Condition Effect on Soft Washing
Heavy rain Dilutes chemicals and reduces effectiveness
Strong sunlight Causes premature drying and streaking
Frost Prevents proper chemical activation
High wind Causes overspray and uneven application
Very hot weather Reduces dwell time significantly
Professional cleaners often schedule work around weather windows rather than fixed dates to ensure consistent results.

Surface Behaviour and Absorption Rates

Different exterior materials react differently to soft washing solutions. Some surfaces absorb treatments quickly, while others retain them on the surface longer.

Absorption comparison by material

Material Absorption Level Cleaning Behaviour
Render Medium–High Even absorption, good for biocides
Brick Medium Varies depending on age and porosity
Stone High Requires careful dilution control
Painted surfaces Low Risk of runoff if over-applied
PVC cladding Very low Surface-only cleaning required
This variation is why experienced operators adjust chemical strength and application speed depending on what they are treating.

Biological Regrowth and Why It Happens

One of the most common questions homeowners ask is why algae or mould sometimes returns after cleaning. This is not usually due to poor cleaning, but due to environmental conditions that remain unchanged.

Main causes of regrowth

  • Persistent moisture in shaded areas
  • Organic spores carried by wind
  • Poor drainage around the property
  • Lack of protective treatment after cleaning
  • Overhanging trees or vegetation
Even after thorough cleaning, spores in the environment will eventually settle again unless preventative measures are used.

Regrowth timelines

Environment Typical Regrowth Period
Open sunny areas 3–5 years
Suburban shaded areas 2–3 years
Heavily shaded gardens 12–24 months
Coastal or damp zones 12–18 months
This is why prevention is just as important as cleaning itself.

Soft Washing vs Steam Cleaning

Some homeowners confuse soft washing with steam cleaning, but they are very different processes.

Key differences

Method Mechanism Suitability
Soft washing Chemical breakdown of organic growth Most exterior surfaces
Steam cleaning High-temperature water vapour Limited use on hard surfaces
Steam cleaning uses heat rather than chemicals, but it is less effective on deep-rooted biological growth and can still cause surface stress on sensitive materials if misused. Soft washing remains more widely used in residential exterior cleaning because it targets the cause of staining rather than just the visible layer.

Detailed Look at Chemical Dwell Management

Dwell time is one of the most critical parts of soft washing, yet it is often overlooked.

What dwell time actually does

During dwell time, the chemical solution:
  • Penetrates organic growth layers
  • Breaks down cellular structure of algae and mould
  • Loosens bonded dirt and pollutants
  • Prepares surface for safe rinsing

Risks of incorrect dwell time

Error Result
Too short Incomplete cleaning, rapid regrowth
Too long Surface marking or discolouration
Uneven dwell Patchy appearance after rinse
Professional operators often monitor surface response rather than relying on fixed timing alone.

Multi-Surface Property Treatment Strategy

Most homes are not made from a single material. A typical property may include render, brick, roof tiles, cladding and paving all in one structure. Soft washing must therefore be adapted across multiple surfaces during a single project.

Example of a full property treatment approach

Area Method Adjustment Needed
Roof Low-pressure biocide treatment Longer dwell time
Render walls Soft wash system Balanced chemical mix
Brickwork Controlled application Adjusted absorption rate
Cladding Surface rinse + light treatment Low chemical concentration
Paths Spot treatment Short dwell cycle
Each area is treated separately to avoid cross-contamination or inconsistent results.

Long-Term Cost Efficiency of Soft Washing

Although soft washing is often priced higher than basic pressure cleaning, it tends to offer better value over time due to its longer-lasting results.

Cost efficiency comparison over time

Method Initial Cost Frequency 5-Year Cost Estimate
Pressure washing Lower Every 6–12 months Higher overall due to repetition
Soft washing Higher Every 2–5 years Lower long-term cost
Soft wash + protection Highest Every 3–7 years Most cost-efficient long-term
For many homeowners, the reduced frequency of treatment offsets the higher initial investment. Pureseal Services typically operate at the premium end of this market, reflecting a more detailed process that includes controlled chemical systems, longer dwell management, and optional protective coatings designed to extend the cleaning cycle further.

Property Value and Visual Impact

Exterior cleanliness has a direct influence on perceived property value, particularly in residential sales or rental markets.

Visual improvements from soft washing

  • Restored original colour of render or brick
  • Removal of dark streaking and algae lines
  • Improved contrast between surfaces and features
  • Cleaner roofline and gutter appearance
  • More uniform exterior finish
Even subtle improvements can significantly enhance kerb appeal.

Common Misconceptions About Soft Washing

There are several misunderstandings about soft washing that can lead homeowners to underestimate its complexity.

Misconception 1: “It is just watered-down pressure washing”

Soft washing is not pressure washing with reduced force. It is a chemical treatment process designed to remove biological growth at a microscopic level.

Misconception 2: “Stronger chemicals clean better”

Stronger is not always better. Overly concentrated solutions can damage surfaces or create uneven results. Correct dilution is more important than strength.

Misconception 3: “Results are instant”

While visible improvement often appears quickly, full cleaning action can continue for days or even weeks after treatment as biocides continue working.

Professional Soft Washing Workflow

A structured workflow ensures consistent results across different property types.

Standard professional sequence

  1. Initial survey and material identification
  2. Risk assessment and access planning
  3. Protection of sensitive areas and landscaping
  4. Controlled chemical application
  5. Dwell time monitoring
  6. Low-pressure rinse or natural activation
  7. Post-treatment inspection
  8. Optional protective coating application
Each stage is adjusted based on real-time surface response rather than fixed assumptions.

Final Operational Considerations

Soft washing is not a single technique but a controlled system that adapts to material type, weather conditions, biological growth levels and property structure. The most effective results come from careful planning, accurate chemical selection and measured application rather than force or speed. Homes in the UK are particularly susceptible to algae and moisture-related staining due to climate conditions, which makes preventative treatment just as important as cleaning itself. Regular maintenance, correct application methods and protective treatments all contribute to longer-lasting exterior surfaces and reduced long-term maintenance requirements. Professional services such as Pureseal Services focus heavily on this controlled approach, prioritising surface safety, treatment longevity and consistent results across a wide range of property types and materials.

Final Conclusion

Soft washing is best understood as a controlled cleaning system rather than a single technique. It combines low-pressure application with carefully selected cleaning solutions to deal with the root cause of exterior staining, not just the visible layer on the surface. That distinction is what separates it from traditional pressure washing and also explains why the results tend to last significantly longer when it is done properly. For homeowners, the main takeaway is that exterior staining is rarely just dirt. In most UK properties, it is a combination of algae, mould spores, pollution deposits and moisture retention within porous surfaces. Simply blasting these issues with high pressure might improve appearance temporarily, but it does not remove the biological source of the problem. In some cases, it can actually make things worse by opening up the surface and allowing moisture to penetrate more easily. Soft washing avoids that risk by working at a chemical level first. The cleaning solution breaks down organic growth where it attaches to the surface, and only then is low-pressure rinsing used to clear away residue. Because the growth is treated at its source, regrowth takes much longer to return, especially when the surface is also treated with a protective biocide or sealant afterwards. Another important point is how adaptable soft washing is. It can be used on render, roof tiles, brickwork, cladding and other exterior materials, but it is never applied in exactly the same way twice. Each surface type has its own absorption rate, sensitivity level and environmental exposure. That is why dwell times, dilution levels and application methods are adjusted on-site rather than being fixed in advance. This level of control is also what makes professional soft washing very different from DIY attempts. While it may look straightforward, small changes in concentration, timing or weather conditions can significantly affect the outcome. Over-application of chemicals can lead to streaking or discolouration, while under-application can leave behind active growth that quickly returns. The balance has to be precise. Cost is another factor that often gets misunderstood. Soft washing is usually positioned as a premium service in the UK because it involves more than just equipment use. It includes surface assessment, tailored chemical systems, safe working practices at height and often multiple stages of treatment. For a typical residential property, costs often sit in the higher bracket, particularly when full exterior cleaning and protective treatments are included. However, this is often offset by the longer intervals between cleans and the reduced likelihood of surface damage or repeat staining. In practical terms, homeowners benefit most when soft washing is viewed as part of a long-term maintenance approach rather than a one-off clean. Properties exposed to shade, moisture or pollution will always develop biological growth over time, but the rate at which it returns can be significantly reduced with the right treatment strategy. Regular inspections, light maintenance treatments and occasional full soft washes create a cycle that keeps exterior surfaces in stable condition without the need for aggressive intervention. There is also a clear link between soft washing and property preservation. Render, roofing materials and external finishes are all designed to protect the structure beneath. When those surfaces are kept clean and free from biological growth, they perform their job more effectively and for longer. On the other hand, when they are neglected or cleaned incorrectly, moisture retention and surface breakdown can accelerate, leading to more expensive remedial work later on. Professional services such as Pureseal Services tend to focus heavily on this preservation aspect. The approach is not just about restoring appearance, but about maintaining the integrity of the surface over time. That typically involves careful chemical selection, controlled application methods and optional protective treatments designed to extend the clean period as far as possible without introducing unnecessary risk to the material. Ultimately, soft washing sits in a space between cleaning and restoration. It is not simply about making a property look better for a short period. It is about resetting the surface condition in a way that slows future deterioration and reduces ongoing maintenance pressure. When done correctly, it becomes part of a wider exterior care strategy that supports both appearance and long-term durability across all exposed surfaces of a property.

Continue Reading

How to Clean Render Without Damaging It

Understanding Render and Why It Needs Careful Cleaning

Render is a protective and decorative coating applied to exterior walls, commonly found on homes and commercial buildings across the UK. It serves both an aesthetic and functional purpose, shielding masonry from weather damage while giving properties a clean, modern appearance. However, because render is exposed to constant environmental conditions such as rain, pollution, algae growth and frost, it naturally deteriorates in appearance over time. Cleaning it incorrectly can cause permanent staining, surface erosion or even structural damage. Unlike hard surfaces such as brick or stone, render is more delicate. Its finish can vary depending on the type used, meaning cleaning methods must be carefully matched to the material.

Types of Render Found in the UK

Before cleaning begins, it is essential to understand what type of render is on the property. Each type reacts differently to moisture, chemicals and pressure.

Common render types

Render Type Description Sensitivity Level Cleaning Risk
Cement render Traditional sand and cement mix Medium Moderate risk of cracking or erosion
Acrylic render Flexible, modern polymer-based finish Low–Medium Risk of surface marking if pressure is too high
Silicone render Highly water-resistant and breathable Low Low risk when cleaned correctly
Lime render Traditional breathable material used on older buildings High Very sensitive to pressure and chemicals
Monocouche render Through-coloured modern render Medium Risk of streaking if cleaned incorrectly
Understanding the material is the first step in preventing costly mistakes during cleaning.

Why Render Becomes Dirty Over Time

Render does not just become dirty from dust. In the UK climate, biological growth plays a major role in staining and discolouration.

Common causes of render staining

  • Algae growth in damp shaded areas
  • Black mould caused by moisture retention
  • Traffic pollution from roads
  • Rainwater runoff carrying dirt and minerals
  • Organic debris such as moss spores and lichen
  • Rust staining from metal fixtures or fittings

Environmental factors that speed up staining

Factor Impact on Render
North-facing walls Increased algae growth due to low sunlight
High rainfall areas Faster moisture retention
Urban pollution Black carbon staining
Poor drainage Persistent damp patches
Overhanging trees Organic debris build-up
Render in shaded or coastal environments typically requires more frequent maintenance.

Why Incorrect Cleaning Causes Damage

Render is often damaged not by dirt, but by incorrect cleaning methods. High-pressure washing is one of the most common causes of long-term problems.

Common damage caused by incorrect cleaning

  • Surface erosion and texture loss
  • Water penetration behind render layers
  • Patchy discolouration or “clean streaks”
  • Cracking due to moisture forcing into structure
  • Removal of protective coatings
Once damaged, render can be expensive to repair and may require full resurfacing in severe cases.

Safe Cleaning Methods for Render

Cleaning render safely requires a combination of low pressure, correct chemistry and controlled application techniques.

Soft washing vs pressure washing

Method Pressure Level Suitability for Render Risk Level
High-pressure washing High Not recommended Very high
Medium-pressure washing Medium Limited use only High
Soft washing Low Highly suitable Low
Manual cleaning None Suitable for small areas Very low
Soft washing is generally the safest and most effective method for most render types.

Soft Washing Explained

Soft washing uses low-pressure water combined with specialist cleaning solutions to break down biological growth and staining without damaging the surface.

How soft washing works

  1. Surface inspection and preparation
  2. Application of biodegradable cleaning solution
  3. Dwell time to allow chemical breakdown of organic matter
  4. Gentle rinsing using low pressure
  5. Neutralisation and optional protective treatment
This method focuses on cleaning at a chemical level rather than force.

Preparing Render Before Cleaning

Proper preparation significantly reduces the risk of damage and improves cleaning effectiveness.

Key preparation steps

  • Inspect for cracks or loose render
  • Protect electrical fittings and external sockets
  • Cover sensitive plants and landscaping
  • Check for existing damp penetration issues
  • Identify heavily stained areas for targeted treatment

Surface assessment checklist

Check Area What to Look For
Cracks Structural weakness or movement
Damp patches Potential water ingress
Paint or coating May affect chemical choice
Previous repairs May react differently to cleaning
Skipping inspection can result in further damage during cleaning.

Cleaning Solutions Used on Render

Chemistry plays a much larger role than pressure when cleaning render safely.

Types of cleaning solutions

Solution Type Purpose Suitability
Algae treatment biocide Removes green growth Very high
Mould and mildew remover Targets black staining High
General render cleaner Light dirt removal Medium
Stain-specific treatments Rust or pollution marks High

Application considerations

  • Always apply evenly across surface
  • Avoid over-saturation
  • Allow controlled dwell time
  • Never allow solution to dry fully on hot surfaces
Proper chemical use reduces the need for mechanical cleaning.

Safe Rinsing Techniques

Rinsing is where many mistakes occur, especially when operators try to speed up the process.

Correct rinsing approach

  • Use low pressure only
  • Work from bottom upwards in some cases to avoid streaking
  • Maintain consistent distance from surface
  • Avoid direct concentrated jets on one spot

Water pressure guidelines

Render Type Recommended Pressure
Silicone render Very low pressure rinse
Acrylic render Low pressure
Cement render Low–moderate pressure (carefully controlled)
Lime render Very low or manual rinse only

Common Mistakes When Cleaning Render

Many issues arise from well-intentioned but incorrect methods.

Overusing pressure

This is the most common mistake and often leads to permanent surface damage.

Incorrect chemical dilution

Too strong a solution can stain or discolour render.

Cleaning in direct sunlight

This causes chemicals to dry too quickly, leaving marks.

Ignoring surface cracks

Water can enter behind render layers and cause internal damage.

Algae and Biological Growth Removal

Algae is the most common issue on UK render surfaces.

Why algae grows on render

  • Moisture retention in shaded areas
  • Poor airflow around building
  • Organic spores carried by wind
  • Lack of protective coating

Treatment process

  1. Apply biocide treatment evenly
  2. Allow full dwell time for penetration
  3. Light rinse or natural weathering process
  4. Repeat treatment if necessary for heavy growth
In many cases, algae will fade over time after correct treatment rather than needing aggressive cleaning.

Dealing with Black Stains and Pollution Marks

Black staining is often caused by atmospheric pollution or long-term moisture exposure.

Types of black staining

Type Cause Difficulty
Carbon pollution Traffic and urban air Medium
Organic mould Moisture and spores High
Water runoff staining Minerals and dirt Medium

Removal approach

  • Apply specialist cleaning solution
  • Allow extended dwell time
  • Gentle rinse only
  • Avoid repeated high-pressure passes

Render Cleaning Frequency

Cleaning frequency depends on location and environmental exposure.

Recommended maintenance schedule

Environment Cleaning Frequency
Rural areas Every 3–5 years
Suburban areas Every 2–4 years
Urban areas Every 1–3 years
Coastal areas Every 1–2 years
Regular maintenance prevents heavy build-up that requires more intensive treatment.

DIY vs Professional Render Cleaning

While small areas may be suitable for DIY cleaning, render is generally better handled by trained professionals due to its sensitivity.

DIY considerations

  • Lower cost but higher risk
  • Limited access to professional chemicals
  • Higher chance of surface damage
  • Variable results depending on experience

Professional cleaning approach

Engaging a specialist service such as Pureseal Services ensures controlled application of soft washing systems, appropriate chemical selection and careful rinsing techniques designed specifically for render surfaces. Professional cleaning typically sits at the higher end of the market in terms of cost, reflecting the level of care and expertise involved. Depending on property size and condition, pricing can range from around £350 for smaller sections up to £1,200+ for full property exterior cleaning, particularly where heavy staining or multiple treatments are required.

Render Protection After Cleaning

Cleaning alone does not prevent future staining. Protection is essential for long-term results.

Types of protective treatments

Treatment Type Function Longevity
Biocide coating Prevents algae regrowth 1–3 years
Hydrophobic sealant Repels water 3–5 years
Anti-stain coating Reduces pollution absorption 2–4 years

Application timing

  • Must be applied after full drying
  • Surface must be completely free from active moisture
  • Weather conditions should be dry for at least 24 hours

Safety Considerations During Render Cleaning

Render cleaning involves working at height and using chemical solutions, so safety is important.

Key safety practices

  • Use stable ladders or access platforms
  • Wear protective eyewear and gloves
  • Avoid working in windy conditions
  • Keep chemicals away from children and pets
  • Ensure proper dilution of all cleaning solutions

Water Management and Environmental Impact

Responsible cleaning methods reduce environmental impact while maintaining effectiveness.

Best practices

  • Use controlled application systems
  • Avoid chemical runoff into drains or soil
  • Select biodegradable cleaning agents where possible
  • Minimise water waste through targeted rinsing
Professional services such as Pureseal Services typically operate with controlled application methods to reduce environmental exposure while maintaining cleaning performance.

Signs That Render Should Not Be Cleaned Immediately

In some cases, cleaning should be delayed until issues are addressed.

Warning signs

  • Active cracking or structural movement
  • Damp penetration inside walls
  • Loose or crumbling render sections
  • Recent repair or re-rendering work
Cleaning in these conditions can worsen underlying issues.

Long-Term Maintenance Strategy

Maintaining render is about preventing build-up rather than repeatedly restoring heavily stained surfaces.

Routine maintenance approach

  • Regular inspection of external walls
  • Early treatment of algae growth
  • Gentle cleaning before heavy staining develops
  • Application of protective coatings where appropriate

Advanced Render Cleaning Techniques for Stubborn Staining

Once the basics of soft washing are understood, there are more advanced approaches used when render has heavier staining or has not been maintained for several years. These methods are still focused on low impact cleaning, but they require more control, longer dwell times and better understanding of how render reacts to treatment.

Layered treatment approach

Instead of trying to remove all staining in one pass, professionals often use a layered process.
  1. Initial biocide application
  2. Partial rinse or natural dwell
  3. Second treatment for resistant areas
  4. Targeted spot cleaning
  5. Final rinse and neutralisation
This reduces stress on the render surface and avoids over-wetting or patchy results.

Controlled agitation techniques

In some cases, light manual agitation is used to help lift stubborn growth without increasing pressure.
Tool Type Use Case Risk Level
Soft bristle brush Algae and light staining Low
Microfibre pads Sensitive acrylic render Very low
Sponge applicators Delicate lime render Very low
Hard brushes Not recommended High risk
Agitation should always be minimal and controlled. The goal is to assist the chemical process, not replace it.

Hot weather adjustment method

Render behaves differently in warm conditions, especially when direct sunlight is involved. In hotter weather:
  • Cleaning solutions can dry too quickly
  • Streaking becomes more likely
  • Chemical effectiveness reduces
To manage this:
  • Work in shaded sections only
  • Apply smaller areas at a time
  • Increase dwell control by re-misting lightly if needed
  • Avoid midday cleaning where possible
This is particularly important on south-facing walls.

Deep Stain Correction Methods

Some render staining goes beyond surface algae and requires more targeted treatment.

Iron oxide and rust staining

Rust stains often appear near metal fixings, gutters or water runoff points.
Source Appearance Difficulty
Gutters Orange streaking Medium
Fixings Localised rust patches High
Water runoff Diffused staining Medium
Treatment process:
  • Apply rust-specific cleaning agent
  • Allow controlled dwell time
  • Gentle rinse only
  • Repeat if necessary rather than increasing strength
Aggressive pressure washing is avoided completely in these cases.

Paint transfer or graffiti marks

Render can sometimes absorb external paint or marking substances. Approach depends on render type:
  • Silicone render: more resistant, easier to treat
  • Acrylic render: moderate absorption
  • Lime render: high absorption risk
Treatment usually involves:
  • Solvent-based but render-safe cleaning agents
  • Multiple light applications
  • Careful spot treatment rather than full-wall cleaning

Deep biological colonisation

When algae or mould has been present for years, it can penetrate below the surface layer. In these cases:
  • First treatment may only lighten staining
  • Full improvement may take weeks as biocide continues working
  • Weathering plays a role in final result
This is one of the reasons render cleaning is often considered a staged restoration rather than a single-day fix.

Render Cleaning on Different Property Types

Render performance and cleaning approach can vary depending on building age, structure and exposure.

Modern new-build homes

Newer properties often use acrylic or silicone render systems. Key characteristics:
  • More uniform surface finish
  • Better water resistance
  • More predictable cleaning response
Risks are lower, but over-cleaning can still dull the finish if handled incorrectly.

Older properties

Older homes often use cement or lime-based render. Key challenges:
  • Uneven surface texture
  • Hidden cracks or historic repairs
  • Higher moisture retention
Property Age Render Type Likely Cleaning Sensitivity
0–10 years Acrylic/Silicone Low
10–40 years Cement render Medium
40+ years Lime render High
Older render should always be treated conservatively.

Coastal properties

Coastal environments create additional cleaning challenges.
  • Salt deposits accelerate staining
  • Wind-driven moisture increases algae growth
  • Surfaces deteriorate faster due to salt crystallisation
Cleaning frequency is often higher and protection becomes more important.

Preventing Future Render Staining

Cleaning is only part of the process. Prevention significantly reduces long-term maintenance costs and keeps render looking consistent.

Hydrophobic protection systems

Hydrophobic coatings reduce water absorption into the surface.
Benefit Impact
Water beading Reduces damp retention
Lower algae growth Less surface moisture
Easier cleaning Dirt does not bond as strongly
Longer lifespan Slower degradation
These coatings are often applied after professional cleaning and can last several years depending on exposure.

Biocide maintenance treatments

Unlike full cleaning, maintenance biocide treatments are light applications designed to prevent regrowth.
  • Typically applied annually or bi-annually
  • No pressure washing required
  • Helps maintain clean appearance longer
  • Reduces need for full restoration cleaning

Environmental design improvements

Sometimes staining is not just a cleaning issue but a property design issue. Common improvements include:
  • Trimming back vegetation to increase sunlight exposure
  • Improving drainage around building perimeter
  • Redirecting gutter outflow away from walls
  • Reducing standing water near foundations
These changes can dramatically reduce regrowth rates.

Cost Factors in High-Quality Render Cleaning

Render cleaning costs vary widely depending on condition, access and treatment requirements.

Key pricing influences

Factor Effect on Cost
Property size Larger surface area increases labour
Render type Lime render requires more care
Stain severity Heavy staining requires multiple treatments
Access difficulty Scaffolding or height increases cost
Protection treatment Adds long-term value and cost

Typical UK pricing ranges

Service Type Description Estimated Cost
Light maintenance clean Minor algae removal £350–£600
Full soft wash treatment Standard residential clean £600–£1,000
Deep restoration clean Heavy staining + multi-stage treatment £900–£1,500+
High-end services such as Pureseal Services sit toward the upper end of these ranges due to the use of controlled low-pressure systems, specialist chemical treatments and post-clean protective applications. The emphasis is less on speed and more on preserving the surface while achieving long-lasting results.

Access Equipment and Working at Height

Render cleaning often involves working at height, which adds another layer of complexity.

Common access methods

Method Suitable For Risk Level
Ladders Small areas Medium–High
Scaffold towers Medium buildings Low–Medium
Mobile platforms Large properties Low
Rope access Specialist work only High skill required
Safety and stability are critical, especially when applying liquids or working with hoses under pressure.

Chemical Behaviour on Render Surfaces

Understanding how chemicals interact with render helps explain why technique is more important than strength.

Absorption differences

  • Silicone render: low absorption, easy rinsing
  • Acrylic render: moderate absorption
  • Cement render: variable absorption depending on porosity
  • Lime render: high absorption, very sensitive
Over-application can lead to uneven results or prolonged surface activation, where chemicals continue reacting after cleaning has finished.

Maintenance Planning for Long-Term Appearance

Render maintenance should be planned rather than reactive.

Ideal maintenance cycle

Interval Action
6–12 months Visual inspection and light treatment if needed
1–3 years Biocide maintenance wash
3–5 years Full soft wash clean
As required Protective coating reapplication
This approach reduces the need for intensive restoration cleaning later.

Signs of Poor Render Cleaning Work

It is often easy to tell when render has been cleaned incorrectly.

Common indicators

  • Patchy or streaked appearance
  • Visible etching lines from pressure washing
  • Uneven colour tone across walls
  • Water ingress marks appearing after cleaning
  • Rapid return of algae within months
These issues usually result from excessive pressure or incorrect chemical handling.

Final Conclusion

Cleaning render safely is a controlled process that depends far more on technique, chemistry and timing than physical force. Because render is a semi-porous and often delicate exterior finish, it reacts poorly to aggressive cleaning methods, particularly high-pressure washing. The safest and most effective approach is a structured soft washing system that allows cleaning solutions to break down organic growth before gentle rinsing is used to remove it. Different render types also behave differently, meaning there is no single universal method. Cement, acrylic, silicone and lime renders all require specific handling, and older or more weathered surfaces need even greater care to avoid damage. Environmental exposure, building orientation and moisture levels all play a major role in how quickly staining develops and how often cleaning is needed. Preventative treatments such as biocides and hydrophobic coatings are increasingly important in reducing long-term maintenance requirements. For larger properties, heavily stained surfaces or sensitive render systems, professional cleaning is often the most reliable option. Pureseal Services operate with a focus on controlled application techniques, specialist cleaning systems and careful surface protection, ensuring render is cleaned thoroughly without compromising its structure or finish. The long-term condition of render depends on a combination of correct cleaning methods, ongoing protection and consistent maintenance rather than intensive, infrequent intervention.

Continue Reading