1-Mould-Algae-and-Mildew-on-Siding

Mould, Algae & Mildew on Siding: Causes, Removal & Prevention

How to Remove Mould, Algae & Mildew from Siding

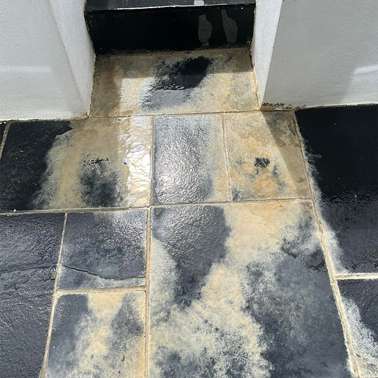
Mould, algae and mildew are among the most common – and most frustrating – problems affecting exterior siding in the UK. Thanks to our damp climate, shaded gardens, and frequent rainfall, these organic growths can quickly take hold and spread across walls, cladding, and facades 😬. While they may start as small green or black patches, left untreated they can stain surfaces permanently, degrade materials, and significantly reduce the visual appeal of a property.

This guide explores why mould, algae and mildew form, how to identify each one, and the safest, most effective ways to remove them from siding. It also looks at costs, prevention strategies, and long-term care, helping homeowners and property managers keep external walls clean, healthy, and looking their best.


Understanding the Difference Between Mould, Algae & Mildew

Although often grouped together, mould, algae and mildew are not the same. Each behaves differently and may require slightly different cleaning approaches.

What Is Mould?

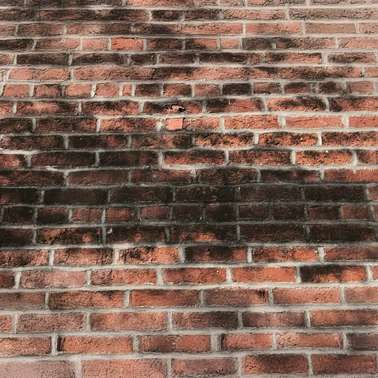
Mould is a type of fungus that thrives in damp, shaded conditions. On siding, it usually appears as black, dark green, or brown spots and patches. Mould feeds on organic material, including dirt, pollen, and even some finishes used on cladding.

It can:

  • Cause stubborn staining

  • Damage surface coatings

  • Trigger allergies and respiratory issues

What Is Algae?

Algae are plant-like organisms that grow in moist environments with limited sunlight. On siding, algae typically appear as green or yellowish streaks, especially on north-facing walls.

Algae are:

  • Less harmful structurally than mould

  • Extremely common in the UK

  • Slippery and unsightly

What Is Mildew?

Mildew is another type of fungus, closely related to mould but usually lighter in colour. It often appears as grey, white, or pale brown patches and tends to stay on the surface rather than penetrating deeply.


Visual Comparison Table

Growth Type Common Colour Typical Location Surface Damage Risk
Mould Black, dark green Shaded, damp walls High
Algae Green, yellow North-facing siding Low–Medium
Mildew White, grey Poorly ventilated areas Medium

Why Siding Is So Vulnerable

Exterior siding is constantly exposed to the elements. In the UK especially, the combination of moisture, mild temperatures, and limited sunlight creates ideal conditions for organic growth.

Key contributing factors include:

  • Persistent rainfall 🌧️

  • Overhanging trees and shrubs

  • Poor drainage around the property

  • North- or east-facing walls

  • Dirt and pollution buildup

Once spores or algae cells settle, they only need moisture to multiply.


Types of Siding and How Cleaning Differs

Not all siding materials respond the same way to cleaning. Using the wrong method can cause more harm than good.

uPVC & Vinyl Siding

  • Durable but prone to staining

  • Sensitive to harsh abrasives

  • Benefits from specialist exterior cleaners

Wood Siding

  • Highly absorbent

  • Vulnerable to rot if left damp

  • Requires gentle but thorough treatment

Fibre Cement

  • Strong and weather-resistant

  • Can still harbour mould in surface pores

Rendered & Painted Surfaces

  • Easily stained

  • High-pressure cleaning can strip paint


Safe & Effective Cleaning Methods

Manual Cleaning

Manual cleaning is suitable for light growth or delicate surfaces.

You will need:

  • Soft-bristled brush

  • Bucket of warm water

  • Specialist exterior cleaner

  • Protective gloves

Scrub gently in circular motions and rinse thoroughly. This method is time-consuming but gives maximum control.


Low-Pressure Washing

Low-pressure washing is often the most balanced approach, combining efficiency with safety. Unlike aggressive pressure washing, it reduces the risk of forcing water behind siding or damaging surfaces.

This method is ideal for:

  • Algae-covered walls

  • Large surface areas

  • Regular maintenance cleaning


Chemical Treatments

Specialist cleaning products are designed to kill spores at the root, not just remove visible growth. This helps prevent rapid regrowth.

When choosing a product, ensure it:

  • Is suitable for exterior siding

  • Targets mould, algae and mildew

  • Does not contain overly aggressive acids

High-quality cleaning solutions are available from https://puresealservices.co.uk/ and are designed specifically for safe, effective exterior cleaning in UK conditions.


Step-by-Step: Removing Mould, Algae & Mildew

Step 1: Inspect the Area

Identify the type and severity of growth. Note any cracks, damaged joints, or peeling paint.

Step 2: Prepare the Area

  • Cover nearby plants 🌱

  • Close windows and vents

  • Wear gloves and eye protection

Step 3: Apply Cleaner

Apply evenly from bottom to top to prevent streaking. Allow the product to dwell as instructed.

Step 4: Agitate Gently

Use a soft brush if required. Avoid wire brushes or abrasive pads.

Step 5: Rinse Thoroughly

Rinse with clean water, working from top to bottom.


Cost Considerations in the UK

Cleaning costs vary depending on surface size, level of contamination, and product choice.

Typical Cost Breakdown

Item Estimated Cost (£)
Specialist cleaner £20–£60
Soft brush & tools £10–£25
Water usage £5–£15
Protective equipment £10–£20

While DIY cleaning can be cost-effective, improper methods can lead to repairs costing hundreds or even thousands of pounds later on.


Common Mistakes to Avoid 🚫

  • Using bleach incorrectly, which can damage siding

  • Overusing high-pressure washers

  • Ignoring regrowth prevention

  • Mixing cleaning chemicals

  • Scrubbing painted surfaces too aggressively


Health & Environmental Considerations

Mould spores can become airborne during cleaning, so proper precautions are essential. Always:

  • Wear gloves and eye protection

  • Avoid cleaning on windy days

  • Rinse surrounding areas thoroughly

Eco-conscious homeowners should opt for biodegradable cleaning products designed for outdoor use.


Preventing Future Growth

Prevention is always easier (and cheaper) than cure.

Practical Prevention Tips

  • Trim back trees and hedges 🌳

  • Improve drainage around walls

  • Wash siding annually

  • Keep gutters clean

  • Address leaks promptly


Annual Maintenance Schedule

Task Frequency
Visual inspection Every 6 months
Light wash Once per year
Deep clean Every 2–3 years
Drainage check Annually

Long-Term Benefits of Clean Siding

Maintaining clean siding is not just about appearance. It can:

  • Extend the lifespan of materials

  • Protect property value 💷

  • Improve kerb appeal

  • Reduce health risks

  • Prevent costly repairs

Over time, regular care pays for itself.


Final Thoughts Before You Add More Later 😉

Removing mould, algae and mildew from siding is a vital part of exterior property maintenance in the UK. With the right knowledge, suitable products, and a careful approach, it is possible to restore siding safely and keep it looking fresh for years to come.

Whether tackling a small problem area or planning routine maintenance, understanding the causes and correct removal methods makes all the difference.

How Weather Patterns Accelerate Organic Growth

UK weather plays a major role in how quickly mould, algae and mildew spread across siding. Mild winters mean spores are rarely killed off, while warm, damp springs create perfect growing conditions. Even summer doesn’t always slow things down, as shaded walls can remain wet for long periods ☁️.

Frequent temperature changes also contribute to condensation forming on exterior surfaces, particularly overnight. This constant cycle of dampness allows spores to reactivate repeatedly, making untreated siding a long-term target for regrowth.

Understanding this seasonal pattern helps homeowners time their cleaning more effectively, with spring and early autumn being ideal periods for treatment.


The Impact of Orientation and Sunlight

Not all sides of a property age equally. Walls that receive little direct sunlight dry more slowly, giving mould and algae a consistent moisture source.

North-facing walls are the most affected, followed closely by east-facing elevations. In contrast, south-facing siding tends to remain cleaner for longer due to faster evaporation and natural UV exposure ☀️.

When planning maintenance, it’s wise to prioritise shaded elevations and inspect them more frequently.


How Air Pollution Contributes to Staining

Urban and roadside properties are especially vulnerable to exterior staining. Pollution particles settle on siding, creating a thin film that feeds mould and algae growth.

This grime:

  • Traps moisture

  • Reduces surface reflectivity

  • Encourages darker staining

Over time, pollution-related buildup can make organic growth harder to remove, requiring more thorough cleaning and longer treatment dwell times.


The Role of Surface Texture in Growth Retention

Smooth surfaces are easier to clean, but textured siding presents more challenges. Rough finishes, deep grooves, and decorative cladding profiles create tiny pockets where moisture and spores can hide.

These areas:

  • Take longer to dry

  • Are harder to rinse thoroughly

  • Often show regrowth sooner

Regular cleaning is particularly important for textured siding, as once growth embeds itself, removal becomes far more labour-intensive.


Why Ignoring Early Signs Makes Things Worse

Early-stage algae or mildew often looks harmless — a faint green tinge or light grey haze. Unfortunately, these early indicators are easy to dismiss.

Ignoring them allows:

  • Deeper staining to develop

  • Surface coatings to degrade

  • Cleaning costs to rise significantly

Addressing growth early usually means faster cleaning, lower chemical usage, and better long-term results 👍.


Cleaning Older Properties Versus New Builds

Older properties often have siding that has weathered for decades. Paint layers may be thinner, seals less effective, and surfaces more porous.

New builds, while visually cleaner, often use modern cladding systems that can trap moisture behind panels if not maintained properly.

Both require care, but older properties typically benefit from gentler methods and longer dwell times to avoid surface damage.


Understanding Regrowth Cycles

One of the most frustrating aspects of mould and algae is how quickly it can return. Even after thorough cleaning, spores remain present in the surrounding environment.

Typical regrowth timelines:

  • Algae: 6–12 months

  • Mildew: 9–18 months

  • Mould: Varies based on conditions

Using appropriate cleaning products and following a maintenance schedule helps disrupt this cycle rather than simply resetting it.


The Importance of Proper Rinsing

Rinsing may seem like a minor step, but it plays a critical role in preventing streaks, residue, and uneven results.

Incomplete rinsing can:

  • Leave cleaning agents behind

  • Attract new dirt

  • Cause patchy discolouration

Using sufficient water pressure (without excess force) and working methodically across the surface ensures a clean, uniform finish 💧.


How Poor Maintenance Affects Property Value

Exterior appearance has a direct impact on kerb appeal. Stained siding can make an otherwise well-maintained home look neglected.

Estate agents frequently note that visible mould or algae:

  • Deters potential buyers

  • Suggests damp issues

  • Lowers perceived maintenance standards

Routine exterior cleaning is a small investment compared to the potential reduction in asking price or buyer interest.


Cleaning as Part of Wider Exterior Care

Siding should never be cleaned in isolation. Its condition is closely linked to gutters, roofs, paths, and drainage systems.

Blocked gutters, for example, can overflow and repeatedly soak walls, undoing even the most thorough cleaning efforts.

Taking a holistic view of exterior maintenance ensures results last longer and reduces repeat work.


Seasonal Planning for Best Results

Timing matters more than many people realise. Cleaning during freezing conditions can trap moisture, while cleaning during heatwaves can cause products to dry too quickly.

Best practice is to:

  • Avoid frost and extreme heat

  • Choose dry, overcast days

  • Allow sufficient drying time

This approach improves cleaning effectiveness and reduces the risk of marks or residue.


Building a Long-Term Care Routine

Rather than reacting to visible growth, a proactive routine keeps siding consistently clean and protected.

A simple long-term plan includes:

  • Annual inspection

  • Light wash before heavy growth forms

  • Targeted treatment of problem areas

Over time, this routine reduces effort, lowers costs, and keeps exterior walls looking fresh year after year 😊.

How Moisture Becomes Trapped Behind Siding

One often overlooked issue is moisture retention behind siding rather than on the visible surface. Poor ventilation, blocked drainage channels, or incorrectly sealed joints can allow water to sit unseen for long periods.

When moisture becomes trapped:

  • Mould can grow beneath the surface

  • Staining may reappear quickly after cleaning

  • Structural materials can begin to deteriorate

This hidden damp environment feeds surface growth from behind, making repeated cleaning feel ineffective. Ensuring water can escape and air can circulate is just as important as cleaning the exterior face of the siding.


Why Consistency Matters More Than Intensity

Many homeowners only address mould and algae once the problem becomes severe, often using strong treatments in a single session. While this may provide short-term results, it rarely prevents regrowth.

Consistent, moderate cleaning:

  • Reduces the need for aggressive chemicals

  • Preserves finishes and coatings

  • Keeps spores from establishing

A steady maintenance approach is gentler on siding and far more effective long term, saving time, effort, and money 💷 while keeping exterior walls in a constantly presentable condition.

Continue Reading

6-The-Complete-Guide-to-Soft-Washing-Roofs-Without-Damage

The Complete Guide to Soft Washing Roofs Without Damage

Introduction to Soft Washing Roofs 🧼🏠

Soft washing is a low-pressure cleaning method used to remove biological growth like moss, algae, lichen and dirt from roof surfaces. Unlike high-pressure jetting, which can damage tiles and shingles, soft washing uses eco-friendly chemical solutions and gentle water flow to clean deeply without causing harm to the roof structure.

Soft washing can:

  • Make a roof look new again

  • Reduce future regrowth of moss and algae

  • Extend the life of roofing materials

  • Improve kerb appeal and property value

⚠️ Safety first: Roof cleaning can be dangerous. Falls from height and chemical exposure are serious risks. Always prepare, use correct equipment and follow safety precautions.


What Soft Washing Is — and Isn’t

Feature Soft Washing Pressure Washing
Water pressure Low (below 1000 psi) High (1000–4000+ psi)
Risk of tile/shingle damage Minimal High
Effective on organic growth Excellent with chemicals Short-term only
Best for Roofs, cladding, render Hard surfaces like driveways
Chemical use Essential Optional

Soft washing is not just pressure washing at a lower setting. It’s a method that combines specialist cleaning solutions with controlled application to kill organic growth at its roots.


Why Soft Washing Is Better for Roofs

Roofs are delicate. Tiles and shingles can crack or loosen under high pressure. Soft washing:

  • Uses biodegradable cleaning agents to break down biological matter

  • Allows chemicals time to kill growth rather than just blast it off

  • Protects gutters, windows and landscaping

  • Causes less splashback and mess

⚠️ Never assume that cheaper, aggressive pressure washing is acceptable. On roofs, this commonly causes damage.


Choosing the Right Soft Wash Chemicals

To soft wash effectively, you need cleaning products designed for roof biology removal. One trusted source for these is the range available at https://puresealservices.co.uk/.

These products typically include:

  • Algaecides

  • Moss and lichen killers

  • Surfactants to help chemical adhesion

  • Rust stain removers (for metal roofs)

👉 Important: Always follow the instructions on any product label and use the correct dilution rate. Excessive strength can harm plants and the environment; insufficient strength may not clean effectively.


Essential PPE (Personal Protective Equipment)

Before you begin, gather the following PPE:

PPE Item Purpose
Safety harness and secured anchor Prevent falls
Sturdy, non-slip boots Good grip on tiles/slates
Gloves (chemical resistant) Protect skin from solution
Eye protection Prevent splashes into eyes
Long-sleeved clothing Protect skin from spray
Respirator or mask Avoid inhaling mist

🪖 Tip: Even on cool, overcast days, mist from cleaning solutions can travel — respirators help avoid breathing chemicals.


Tools and Equipment Checklist

To soft wash safely and effectively you will need:

  • A soft wash system (low-pressure pump and spray wand)

  • Extension poles for high areas

  • Buckets and measuring jugs

  • A ladder with stabiliser

  • Rope or safety lines

  • Brush with soft bristles (for stubborn spots)

📌 Warning: Do not use a pressure washer with a turbo nozzle for roof cleaning — this is damaging.


Pre-Work Preparations

Before you start spraying:

  1. Check the weather forecast: Pick a calm, dry day. Wind can blow chemicals onto plants and walls.

  2. Protect plants: Cover delicate plants and shrubs around the house with tarpaulin or plastic sheets.

  3. Clear access: Remove obstacles from around the house and garden.

  4. Plan your route: Know where the ladder will go and how you will access different roof sections safely.

  5. Warn householders: Tell everyone in the property about the work to avoid accidental exposure.


Step-by-Step Soft Washing Process

Step 1: Set Up Safety Equipment

  • Secure a stable ladder with a ladder stabiliser.

  • Attach a safety harness and rope to a secure anchor point.

  • Make sure someone else is at ground level in case help is needed.

Step 2: Mix the Cleaning Solution

Use the cleaning products from https://puresealservices.co.uk/ according to the manufacturer’s dilution instructions. Prepare only what you need.

Example dilution table:

Roof Size Cleaning Solution Fresh Water
Small (50 m²) 5 L 15–20 L
Medium (100 m²) 10 L 30–40 L
Large (150 m²+) 15 L 50–60 L

💧 Always mix in a well-ventilated area and wear PPE.

Step 3: Apply the Solution 💦

  • Starting from the lowest section of the roof, spray the solution upwards.

  • Allow the cleaning chemicals to cling and work for 15–30 minutes — never let them dry on the surface.

  • Do not scrub aggressively; let the solution break down growth.

Step 4: Rinse Carefully (Optional)

In many soft wash systems, a final low-pressure rinse is used to remove the loosened debris. If rinsing:

  • Use clean water only

  • Keep the pressure low

  • Work top to bottom

💡 In some cases, letting rain naturally rinse the roof after chemical application is sufficient.

Step 5: Inspect the Roof

After application and any rinsing:

  • Check for missed patches

  • Spot-treat these areas

  • Ensure gutters are clear of debris


Safety Tips While on the Roof 🛖

Working at height is inherently risky. Observe these rules:

✔ Always have someone nearby on the ground
✔ Avoid working when tiles are wet and slippery
✔ Use a rope ladder or platform where possible
✔ Take regular breaks — fatigue causes accidents
✔ Never lean too far to one side

Do not attempt if you are uncomfortable with heights. Professional assistance might be safer.


Environmental and Neighbourhood Considerations

Soft washing chemicals can affect nearby plants and soil. To minimise impact:

  • Cover gardens with sheeting

  • Rinse only onto areas that won’t be damaged

  • Avoid extreme wind conditions

  • Use biodegradable products when possible

💡 Many products from https://puresealservices.co.uk/ are formulated to be environmentally responsible — but proper application is still crucial.


How Often Should You Soft Wash Your Roof?

The frequency of roof cleaning depends on several factors:

Roof Type Typical Cleaning Interval
Concrete tiles Every 2–4 years
Slate roofs Every 3–5 years
Metal roofs Every 3–6 years
Shingle roofs Every 2–4 years

☁️ Shaded areas, high humidity and nearby trees can increase moss and algae growth.


Signs Your Roof Needs Soft Washing

You might need to clean your roof if you notice:

🟢 Green or black streaks
🟢 Moss or lichen patches
🟢 Blocked gutters due to debris
🟢 Slippery surfaces when wet
🟢 Loss of roof colour and brightness

If these are present, soft washing can restore appearance and function.


Cost Estimates (UK £)

Here’s a rough guide to how costs may stack up if you are buying your own equipment and products:

Cost Item Typical UK Price
Soft wash chemical concentrate £25–£80 per 5 L
Low-pressure pump system £150–£500
PPE (gloves, mask, goggles) £30–£80
Ladder stabiliser £30–£60
Safety harness £40–£90

💷 Example total for DIY: £275–£810+ depending on equipment quality.


Common Mistakes to Avoid ❌

Below are pitfalls that can undermine your efforts:

❗ Using high pressure — damages tiles
❗ Inadequate PPE — risk of injury
❗ Ignoring safety harness — dangerous falls
❗ Wrong chemical dilution — ineffective cleaning
❗ Spraying in wind — chemicals drift onto plants

Avoid these by planning properly and taking your time.


Troubleshooting: What If It’s Not Working?

If you follow the steps but don’t see results:

🔹 Your solution may be too weak — check dilution
🔹 Moss may be very thick — spot treat stubborn areas
🔹 Weather may dilute the solution too fast — check forecast
🔹 Dirt may be deeply embedded — repeat application after a few days

🧠 Patience is key. Soft washing works by chemical action, not brute force.


Aftercare and Prevention

Once your roof is clean:

🌿 Trim overhanging branches — less shade means slower moss growth
🧹 Keep gutters clear — standing water encourages moss
🧽 Annual inspection — fix small problems early

A tidy roof stays cleaner for longer and reduces future maintenance.


Final Thoughts Before You Begin

Soft washing is a safe, effective way to restore your roof when done with care and right equipment. It’s about respecting the surface and using chemistry intelligently rather than brute force.

Remember:

✅ Prepare thoroughly
✅ Use correct PPE
✅ Pick suitable products — many available at https://puresealservices.co.uk/
✅ Take your time and prioritise safety


If you want specific product recommendations from the range at https://puresealservices.co.uk/ for your roof type (tiles, slate, metal), tell me the roof material and I can suggest exactly what to use! 😊

Understanding Different Roof Materials and How They React to Soft Washing 🏠

Not all roofs respond the same way to soft washing, and understanding your roof material is essential before applying any cleaning solution. In the UK, the most common roof types include concrete tiles, clay tiles, slate, metal sheeting and asphalt shingles.

Concrete tiles are porous and tend to harbour moss and algae deeply. Soft washing is ideal here, as the chemical solution penetrates the pores and kills growth below the surface. Clay tiles are less porous but more brittle, so gentle application and minimal foot traffic are crucial. Slate roofs are durable but can delaminate if walked on incorrectly, meaning extra care is needed when positioning ladders and safety lines.

Metal roofs respond very well to soft washing, especially when dealing with algae staining, but care must be taken to avoid corrosive residues. Asphalt shingles should only ever be soft washed, as pressure washing strips away protective granules and dramatically shortens lifespan.

Knowing your roof type helps you choose the right dilution strength, dwell time and rinsing method.


Managing Run-Off and Protecting Gutters and Drainage 🌧️

One commonly overlooked aspect of soft washing is managing chemical run-off. When cleaning solutions flow off the roof, they often enter gutters, downpipes and surface drains. If not controlled properly, this can cause blockages or harm surrounding soil.

Before starting, ensure gutters are free from heavy debris such as moss clumps and leaves. Blocked gutters can overflow during application, sending cleaning solution down walls and onto pathways. Temporarily blocking downpipes and collecting run-off in containers can help, especially when working near delicate planting.

After cleaning, flush gutters and downpipes thoroughly with clean water. This prevents residue build-up and ensures rainwater systems continue working as intended. Good run-off management also reduces the risk of staining paving or affecting lawns, which helps keep the overall job tidy and professional-looking.


Weather Conditions and Timing Your Roof Clean Properly ⛅

Timing plays a huge role in how effective and safe soft washing is. Ideal conditions are dry, overcast days with little wind. Strong sunlight can cause cleaning solutions to dry too quickly, reducing effectiveness and increasing the chance of residue marks. Windy conditions increase the risk of chemical drift onto neighbouring properties or gardens.

Rain immediately after application can dilute the solution before it has time to work, while frost makes roofs extremely slippery and unsafe. In the UK climate, spring and early autumn are often the most reliable seasons for roof cleaning.

Early mornings can also be beneficial, as temperatures are cooler and surfaces are less likely to dry too fast. Planning around weather forecasts isn’t just about results — it’s a major safety consideration too.


Health and Legal Responsibilities When Cleaning a Roof ⚠️

Soft washing a roof isn’t just a technical task — it comes with health and legal responsibilities, especially when working at height. Even on domestic properties, falls from roofs are one of the leading causes of serious injury.

If you’re carrying out the work yourself, you’re responsible for ensuring safe access, proper fall prevention and correct handling of chemicals. This includes reading safety data sheets, wearing suitable PPE and keeping others away from the work area.

Care should also be taken to prevent overspray or run-off affecting neighbouring properties. Damage caused by chemicals or falling debris could result in liability issues. Taking a cautious, methodical approach reduces risk and ensures the job is carried out responsibly.


Long-Term Benefits of Soft Washing Compared to Aggressive Cleaning 🌱

Soft washing offers benefits that go far beyond immediate appearance. By killing moss, algae and lichen at a microscopic level, it slows regrowth significantly compared to aggressive methods that simply remove visible debris.

Over time, reduced biological growth helps tiles dry faster after rainfall, lowering the risk of frost damage and surface erosion. Clean roofs also allow rainwater to flow properly into gutters, reducing damp issues around fascias and walls.

From a financial perspective, gentle cleaning can delay costly repairs or premature roof replacement. While it may require patience, soft washing is an investment in the long-term health of your roof rather than a short-term cosmetic fix.


Planning Ongoing Maintenance After Soft Washing 🧹

Once a roof has been soft washed, maintaining it becomes much easier. Regular visual inspections — ideally once or twice a year — help catch early signs of regrowth before they become established. Clearing gutters and trimming back nearby trees significantly reduces moisture retention and shade, both of which encourage moss.

Some homeowners choose to apply preventative treatments every few years to keep growth at bay. These treatments are lighter than full cleans and help extend the clean appearance without intensive work.

By adopting a proactive maintenance approach, the need for frequent deep cleaning is reduced, saving time, money and effort while keeping the roof in good condition year after year 😊

Continue Reading

5-Pressure-Washing-a-Driveway-Step-by-Step-Guide

Pressure Washing a Driveway: Step-by-Step Guide

How to Clean a Driveway with a Pressure Washer 🚿💪

Keeping your driveway clean not only improves the appearance of your home but also helps prevent the build-up of moss, algae, oil stains, and weeds that can deteriorate the surface over time. One of the most effective ways to rejuvenate your driveway is with a pressure washer. In this comprehensive guide, we’ll walk you through every step of cleaning a driveway using a pressure washer — from preparation and safety to techniques, costs, maintenance and troubleshooting.

We’ll also reference a source of quality cleaning products you can use alongside your pressure washer: https://puresealservices.co.uk/.


Why Use a Pressure Washer for Driveways?

A pressure washer delivers a powerful stream of high-pressure water that can blast away dirt, grime, and stubborn stains far more effectively than a standard garden hose. Whether your driveway is concrete, block paved, tarmacadam (asphalt), or natural stone, a pressure washer can dramatically improve its appearance.

Benefits of Pressure Washing Your Driveway

Benefit Description
Deep Cleaning High pressure removes embedded dirt and organic growth.
Quick Results Tasks that take hours by hand can be done in minutes.
Prepares Surface Ideal before sealing or repainting.
Enhances Curb Appeal Makes your driveway look fresh and new.
Prevents Damage Removes moss and weeds that break up surfaces.

Pressure washers aren’t just for big job sites — there are many models suitable for domestic use that balance power with ease of use.


What You’ll Need 🧰

Before you start, gather the necessary equipment and cleaning products. Preparation is key to a successful cleaning job.

Essential Equipment

  • Pressure washer – Electric or petrol model, depending on size of driveway.

  • Surface cleaner attachment – Optional but very useful for large flat areas.

  • Protective clothing – Safety goggles, gloves, sturdy footwear.

  • Broom or stiff brush – For initial sweeping.

  • Weed killer – For stubborn growth between paving stones (optional).

  • Driveway cleaner solution – For example products from https://puresealservices.co.uk/.

  • Garden hose – To pre-rinse and rinse afterwards.

Recommended Cleaning Products

When using detergents or cleaning solutions, choose ones formulated for driveways and pressure washers. Products from https://puresealservices.co.uk/ include degreasers and surface cleaners that can help break down oil, grease and grime before you apply water pressure.

💡 Tip: Always follow the manufacturer’s instructions when using chemicals with your pressure washer to avoid damage to surfaces or yourself.


Safety First ⚠️

Pressure washers are powerful tools. Respecting safety guidelines will help you avoid injury and damage.

Safety Checklist

  • Wear eye protection – high-pressure water can send debris flying.

  • Use sturdy, non-slip footwear.

  • Do not point the pressure washer at people, pets, windows, or electrical fittings.

  • Be aware that high pressure can damage softer surfaces.

  • Avoid using ladders while pressure washing — the recoil can destabilise you.

  • Keep children and pets indoors during the cleaning process.


Preparing Your Driveway

Before you even switch on the pressure washer, some preparatory steps will make the job easier and more effective.

Step 1: Clear the Area

Remove vehicles, plant pots, outdoor furniture, bins and other obstacles from the driveway. Sweep away loose debris with a broom.

Step 2: Pre-Tackle Problem Areas

Identify oil stains, rust marks, or patches of algae/moss. Apply a suitable cleaning solution (e.g., a degreaser from https://puresealservices.co.uk/) and allow it to sit for the recommended time so it can penetrate tough stains.

Step 3: Wet the Surface

Using a garden hose, dampen the driveway. This reduces the chance that the detergent dries out too quickly and helps the pressure washer work more efficiently.


Pressure Washing Techniques

Now for the main event! How you use your pressure washer makes a big difference in results.

Choosing the Right Nozzle

Pressure washers come with a variety of nozzles, each with a different spray pattern:

Nozzle Colour Spray Angle Use
Red Very concentrated, high pressure — only for very stubborn stains and careful use.
Yellow 15° Great for tough dirt and deep cleaning.
Green 25° General cleaning — ideal for most driveway work.
White 40° Light cleaning and rinsing.
Black Low pressure For applying detergents.

💡 General rule: Start with a wider spray and only switch to narrower patterns if you need more power.


Cleaning in Sections

Break your driveway into manageable sections — this keeps your work organised and ensures you don’t miss any areas.

  1. Work Systematically: Start at the top or one corner and work your way across in lines. Overlap each pass slightly for even cleaning.

  2. Maintain Distance: Keep the nozzle around 20–30cm (8–12 inches) from the surface. Too close and you could damage the driveway; too far and you lose cleaning power.

  3. Use a Surface Cleaner: If you have a surface cleaner attachment, this helps speed up the process and gives a uniform finish.

  4. Rinse as You Go: After each section, go over it with clean water to prevent detergent residue from drying on the surface.


Dealing With Specific Stains

Different stains require different approaches:

Oil & Grease

  1. Apply a degreaser from https://puresealservices.co.uk/.

  2. Allow it to sit for the recommended time (often 10–15 minutes).

  3. Use a narrow spray (15° or 25°) and work the stain from the outside in.

  4. Rinse thoroughly.

Moss and Algae

Use a cleaning solution designed to kill organic matter. After applying and letting it act, pressure wash with a medium nozzle.

Rust Marks

Rust removers formulated for concrete can help. Avoid overly abrasive techniques that could etch the surface.


After Cleaning: Sealing & Protection 🛡️

Cleaning your driveway is often followed by sealing, which protects the surface from future stains and weathering.

Why Seal?

Benefit Result
Prevents future stains Liquids bead rather than soak in
Reduces moss and weed growth Harder surface deters seeds germinating
Enhances colour Makes driveway look newer

Products from https://puresealservices.co.uk/ include sealers suitable for various driveway types. Always apply sealant when the surface is completely dry (often 24–48 hours after washing).


Cost Guide 💷

Here’s an approximate breakdown of what you might expect to spend when cleaning your driveway with a pressure washer:

Item Approximate Cost
Pressure washer (purchase) £120 – £500+
Surface cleaner attachment £30 – £120
Cleaning detergents & sealers £10 – £60
Optional: Petrol fuel £10 – £30
Total (DIY) £170 – £710+

💡 Tip: Hiring a pressure washer can reduce initial cost for one-off jobs. If you plan regular maintenance, owning one may be more cost-effective.


Common Mistakes to Avoid ❌

Even experienced DIYers can slip up. Here are frequent mistakes and how to avoid them:

Mistake Solution
Using too much pressure Start with lower settings and increase if necessary.
Not pre-treating stains Apply proper detergents before washing.
Pressure washing in hot, sunny weather Clean early morning or late afternoon to prevent quick drying.
Ignoring safety Wear protective gear and be cautious.
Rushing the job Work methodically for best results.

Maintenance Schedule 📅

Once your driveway is clean and sealed, maintenance helps keep it looking great:

Regular Tasks

  • Weekly: Sweep loose debris.

  • Monthly: Hose surface to prevent build-up.

  • Seasonal: Pressure wash and re-apply sealer if needed.

Consistency pays off — frequent light cleaning prevents heavier dirt build-up that requires more intensive work.


Environmental Considerations 🌍

When washing outdoors, consider where the water runoff goes. Avoid allowing dirty water to enter storm drains directly. Use environmentally friendly detergents where possible, and try to capture and dispose of wastewater responsibly.


Pressure Washer Settings Overview

Getting the pressure and flow rate right can make your job easier and safer.

Pressure Level (PSI) Best For Notes
Up to 1500 PSI Light cleaning Suitable for gentle sanitising.
1500–2500 PSI Standard driveway cleaning Ideal for most domestic jobs.
Above 2500 PSI Heavy stains Use with care — can damage surfaces.

Electric models are usually sufficient for most driveways and are quieter and easier to maintain.


Troubleshooting Common Problems 🔍

Even with careful preparation, problems can arise.

Streaks After Washing

  • Cause: Uneven pressure or residue.

  • Fix: Rinse thoroughly, and make sure nozzles are clean.

Pressure Washer Not Starting

  • Cause: Fuel issues (petrol models) or electrical supply problem (electric).

  • Fix: Check power supply, cords, and fuel/oil levels.

Surface Damage

  • Cause: Too close or too powerful a jet.

  • Fix: Reduce pressure or use a wider spray nozzle.


Case Study: Before & After (Hypothetical)

Here’s a simple comparison to help visualise the impact of pressure washing:

Aspect Before Cleaning After Cleaning
Colour Dull, grey Bright, restored
Moss/Weeds Present between slabs Removed
Oil Stains Visible dark patches Significantly reduced
Overall Appearance Tired look Fresh, renewed

Summary of Steps

To recap the process in a user-friendly checklist:

  1. Clear the driveway of debris and obstacles.

  2. Pre-treat stains with the right solutions (e.g., from https://puresealservices.co.uk/).

  3. Sweep and wet surface.

  4. Select correct nozzle for your pressure washer.

  5. Work in sections, keeping even distance from surface.

  6. Rinse as you go.

  7. Allow to dry fully before sealing.

  8. Apply sealer if desired for protection.

  9. Maintain regularly with light cleaning.

Seasonal Driveway Cleaning Tips 🌦️

The time of year plays a big role in how effective driveway pressure washing will be. Understanding seasonal conditions can help you plan the best cleaning schedule and avoid unnecessary effort.

Spring

Spring is one of the best times to pressure wash a driveway. Winter grime, salt residue, algae, and moss tend to accumulate during colder months. Temperatures are mild enough to allow cleaning solutions to work effectively without drying too quickly.

Summer

Summer cleaning can be effective but should be done early in the morning or later in the evening. Strong sunlight can cause detergents to dry too fast, leaving residue or streaks. Always keep the surface damp when using any cleaning solution.

Autumn

Autumn cleaning helps remove falling leaves, organic stains, and early moss growth before winter sets in. It’s also an ideal time to clean and seal the driveway to protect it from frost damage.

Winter

Pressure washing in winter is generally not recommended. Freezing temperatures can cause water to expand in cracks, leading to surface damage. If necessary, only clean during milder spells and ensure proper drainage.


Driveway Types and How Pressure Washing Affects Them 🧱

Not all driveways respond the same way to pressure washing. Adjusting your approach based on surface material is essential.

Driveway Type Cleaning Approach Special Considerations
Block paving Medium pressure with wide nozzle Re-sanding may be needed after cleaning
Concrete Medium to high pressure Avoid lingering in one spot
Tarmac Low pressure only High pressure can cause pitting
Resin-bound Low to medium pressure Avoid aggressive nozzles
Natural stone Medium pressure Some stones are porous

💡 Helpful tip: Always test a small, hidden area first to check how the surface reacts before committing to the whole driveway.


Managing Joint Sand After Pressure Washing 🧹

One often overlooked aspect of driveway cleaning—especially block paving—is joint sand displacement. Pressure washing can remove the sand between blocks, which is essential for structural stability.

Why Joint Sand Matters

  • Prevents block movement

  • Reduces weed growth

  • Helps distribute weight evenly

When to Re-Sand

Once the driveway is completely dry (usually 24 hours after cleaning), inspect the joints. If sand levels are low, re-sanding is recommended before sealing.

Best Practice

  • Use kiln-dried sand

  • Sweep it evenly into joints

  • Compact gently with a broom

  • Avoid heavy traffic for at least 24 hours

Skipping this step can shorten the lifespan of your driveway and undo much of the hard work you’ve just completed.


How Long Results Should Last ⏳

A properly pressure-washed driveway doesn’t just look good for a few days — with the right care, results can last months or even years.

Factor Impact on Cleanliness Duration
Weather exposure Heavy rain and shade encourage regrowth
Surface type Porous surfaces stain faster
Sealing Extends cleanliness significantly
Foot and vehicle traffic Higher use leads to faster re-soiling

In general:

  • Unsealed driveways: 6–12 months of noticeable improvement

  • Sealed driveways: 1–3 years with basic maintenance

Regular light cleaning and sweeping dramatically reduce the need for frequent pressure washing.


Signs Your Driveway Needs Cleaning Again 👀

Knowing when to clean your driveway again prevents long-term damage and keeps it looking its best.

Visual Indicators

  • Green patches forming in shaded areas

  • Dark oil or tyre marks reappearing

  • Uneven colouring or dull patches

  • Slippery surface after rain

Safety Indicators

  • Reduced grip when walking

  • Increased slipping risk during wet weather

Addressing these early with a pressure washer is far easier than waiting until stains become deeply embedded.

Continue Reading

4-Pressure-Washing-a-House-Complete-UK-Homeowner-Guide

Pressure Washing a House: Complete UK Homeowner Guide

How to Pressure Wash a House – Step by Step Guide 🏡💦

Pressure washing a house can restore the original look of exterior surfaces, remove stubborn dirt, algae and grime, and significantly enhance your home’s curb appeal. It may seem daunting at first, but with the right preparation, tools, and method, you can do a thorough and effective job safely.

This guide will walk you through each stage, from assessing your home’s surface to finishing touches. Whether you’re a complete beginner or just need a refresher, follow these steps to get professional-quality results at home.


Why Pressure Wash a House?

Pressure washing:

  • Improves appearance 🧼

  • Prepares surfaces for painting or staining 🎨

  • Removes mould, algae and moss

  • Helps maintain property value 💷

The process uses high-pressure water to blast away built-up debris and contaminants. It’s powerful, so it must be done with care to avoid damaging surfaces.


Tools and Materials You’ll Need 🧰

Tool/Material Purpose
Pressure washer (electric or petrol) Provides high-pressure water
Surface cleaner attachment More even cleaning for large flat areas
Turbomax or specialised cleaning chemicals Boosts cleaning power especially for mould/mildew
Safety glasses Protects eyes from spray and debris
Gloves Prevents skin irritation
Ladder or scaffold Reaches high areas safely (use with caution)
Extension wand Helps wash high places safely
Garden hose Supplies water to the pressure washer

It’s often worth investing in quality cleaning products designed for exterior surfaces. For example, you can find appropriate solutions at https://puresealservices.co.uk/ — many are formulated to work with pressure washers and are ideal for removing algae, moss and stubborn dirt.


Step 1 — Inspect the Exterior 🧐

Before you begin, walk around the entire house and inspect all surfaces you plan to wash.

Check for:

  • Cracked, peeling or loose paint

  • Rotten wood

  • Cracked bricks or loose mortar

  • Windows that don’t shut fully

⚠️ These are areas where pressure washing can cause damage unless addressed. You may need to make repairs before pressure washing.

Take notes of:

  • Surface type — e.g., masonry, brick, wood, composite

  • Areas with heavy dirt or staining

  • Fragile components like old gutters or decorative features

This inspection helps you plan your approach and avoid damage.


Step 2 — Prepare the Area 🧹

Clear the area around your home:

  1. Remove outdoor furniture 🪑

  2. Move potted plants and garden ornaments

  3. Cover electrical outlets, lights and vents with waterproof covers

  4. Close all windows and doors 👨‍🔧

You should also:

  • Turn off outdoor power sockets

  • Protect delicate plants — high pressure and cleaning detergents can harm leaves

Practising good preparation speeds up the job and prevents accidents or damage.


Step 3 — Choose the Right Pressure Washer

Pressure washers come in two main types:

🔹 Electric pressure washers

✔ Quieter
✔ Easier to maintain
✔ Best for small to medium homes

🔹 Petrol pressure washers

✔ More powerful
✔ Better for large homes & heavy stains
✖ Heavier and louder

Here’s a quick comparison:

Feature Electric Petrol
Power ⭐⭐ ⭐⭐⭐
Noise Quiet Loud
Portability Lighter Heavier
Best For Small houses Large houses

Choose a unit powerful enough to clean effectively but not so powerful that it damages surfaces. Typically, a unit between 1500–3000 PSI is suitable for most homes.


Step 4 — Select the Correct Nozzle

Pressure washers come with colour-coded nozzles. Using the wrong one can:

  • Damage soft surfaces

  • Strip paint or wood

Here’s a typical nozzle guide:

Nozzle Colour Spray Angle Best Use
Red Very narrow, very powerful — only for very tough stains and hard masonry
Yellow 15° Heavy cleaning on tough surfaces
Green 25° All-purpose cleaning
White 40° Gentle cleaning of wood, siding
Black Low pressure Gentle rinsing and detergent application

Start with a wider, gentler spray (white or green) and adjust if needed.


Step 5 — Mix and Apply Detergent

Cleaning solutions make a huge difference in breakup of dirt, algae and grime. Most pressure washers have a detergent tank or foam cannon.

Recommended detergent steps:

  1. Mix the solution according to manufacturer instructions

  2. Apply detergent from bottom to top — this prevents streaking

  3. Allow 5–10 minutes for the detergent to work (don’t let it dry)

💧 Always use detergents suitable for your surface type. Solutions designed for pressure washers — like those available at https://puresealservices.co.uk/ — often perform better than generic soaps.


Step 6 — Start at the Top 📏

Begin washing from the highest point of the house and work downwards. This ensures:

  • Cleaner water flows downward

  • Surfaces are rinsed thoroughly

Maintain a consistent distance (usually ~30cm) between the nozzle and the surface. Too close can:

  • Etch wood

  • Damage brick

  • Remove paint

Move the wand steadily, overlapping each pass by about 50%. This gives an even finish.


Step 7 — Work Methodically, Section by Section

Divide the house exterior into manageable sections:

  1. One wall at a time

  2. Around windows and door frames

  3. Under eaves and gutters

Work in overlapping horizontal lines, then vertical as needed. Avoid long pauses in one spot to stop:

  • Uneven cleaning

  • Surface damage

For textured surfaces (like brick or stone), keep a slightly wider spray and ensure you reach into grooves.


Step 8 — Rinse Thoroughly 💦

Once detergent has done its job:

  1. Switch to a clean water rinse (no detergent)

  2. Use a gentler nozzle (e.g., white/40°)

  3. Rinse from top to bottom

Make sure all soap residue is rinsed away — leftover detergent can leave streaks or damage plants.


Step 9 — Clean Windows and Glass Carefully 🪟

Glass should be rinsed gently:

  • Use a spray with lower pressure (black or white nozzle)

  • Keep the wand at a greater distance (~45cm)

  • Finish with a soft squeegee if needed

Too much pressure on window seals can force water inside — so take extra care.


Step 10 — Address Tough Spots

Certain stains may need additional attention:

Stain Type Suggested Technique
Mould & algae Reapply detergent & scrub with soft brush
Rust stains Use rust-specific cleaner (per instructions)
Oil/grease Pre-treat with degreaser before washing

Take your time here — persistent stains often need patience, not brute force.


Step 11 — Check and Clean the Ground

Often overlooked, the ground around your house can collect:

  • Dirty water runoff

  • Mud and debris

  • Detergent residue

Sweep and rinse paved areas afterwards. Keeping paths clean complements the refreshed look of your house.


Step 12 — Inspect Your Work 📸

After washing:

  1. Walk around your house

  2. Check for streaks or missed areas

  3. Spot-clean as needed

A quick second pass on stubborn areas makes a big difference in the overall finish.


Safety Tips — Important to Know ⚠️

Pressure washing is powerful. Always follow safety practices:

✔ Wear eye protection
✔ Keep children and pets away
✔ Do not spray electrical points directly
✔ Never point the washer at people or animals
✔ Use ladder safety protocols
✔ Avoid wet ladders — they slip easily

If a surface looks fragile under pressure, stop and reassess.


Common Surfaces & Best Practices

Every surface type responds differently to pressure washing. Below is a quick reference:

A. Brick

  • Use moderate pressure

  • Gentle rinse nozzle

  • Avoid pointing directly at mortar joints

B. Wood

  • Low pressure

  • Keep distance to avoid gouging

  • Good for patios, fences and cladding

C. Vinyl siding

  • Mild detergent with 40° nozzle

  • Move at steady pace

  • Rinse thoroughly

D. Concrete

  • Higher pressure accepted

  • Good for driveways and paths

  • Can use surface cleaner attachment


How Often Should You Pressure Wash?

This depends on:

  • Weather conditions (rain, shade, trees)

  • Surface type

  • Exposure to dirt and algae

A general guideline:

🔹 Every 12–18 months for most houses
🔹 Annually for homes with heavy shade or tree cover

Regular cleaning maintains appearance and prevents build-up.


Troubleshooting Common Issues 🛠️

Problem: Streaks on the wall
Solution: Rinse thoroughly; check detergent dilution

Problem: Surface damage
Solution: Reduce pressure or use wider nozzle

Problem: Dirt returns quickly
Solution: Increase cleaning frequency and consider anti-mould solutions

Problem: Pressure washer keeps stalling
Solution: Check water source and filter for blockages


Overview Table — Quick Reference

Stage Key Action Tip
Inspection Check surface condition List areas needing repair
Preparation Clear and protect Cover outlets & plants
Washer Setup Select correct nozzle Start gentle
Detergent Apply cleaning solution Let it dwell briefly
Washing Work top to bottom Overlap passes
Rinse Remove all detergent Use gentle spray
Detail Clean windows & spots Use care around fragile parts
Final Check Inspect & correct Spot clean where needed

Final Tips for Best Results ✨

✔ Always test-wash a small area first
✔ Keep pressure consistent
✔ Don’t rush – methodical work yields better finish
✔ Return to stubborn stains after initial wash once dry

Using a high-quality pressure washer and the right cleaning products can make all the difference. If you’re looking for detergents and treatment solutions that work well with pressure washers, explore options at https://puresealservices.co.uk/ — they offer products suited for home exterior cleaning.

Dealing With Different Weather Conditions 🌦️

Weather plays a bigger role in pressure washing than many people realise. Choosing the right day can significantly affect both safety and results.

Best conditions:

  • Dry but overcast weather

  • Mild temperatures (between 10°C and 22°C)

  • Little to no wind

Avoid pressure washing during:

  • Freezing temperatures ❄️ (risk of ice and surface cracking)

  • Very hot, sunny days ☀️ (detergent dries too quickly and leaves marks)

  • High winds 🌬️ (overspray becomes difficult to control)

If rain is expected shortly after cleaning, it’s usually not an issue, but heavy downpours during washing can dilute detergents and reduce effectiveness. Planning around the weather ensures a more even, professional-looking finish.


Understanding Water Usage and Costs 💧💷

Pressure washing is often more water-efficient than using a standard hose, despite appearing more powerful.

Typical water usage comparison:

Method Average Water Used (per hour)
Garden hose 1,000+ litres
Pressure washer 350–500 litres

Electric pressure washers are especially efficient, delivering stronger cleaning power with less water. This not only saves on water bills but also reduces runoff around your property.

If you’re concerned about cost:

  • Use targeted cleaning rather than spraying continuously

  • Turn the machine off when repositioning

  • Avoid unnecessary repeat passes

Efficient water use keeps costs manageable while still achieving excellent results.


Preventing Damage to Your Home 🛑

Pressure washing can cause damage if done incorrectly, but most issues are preventable with the right technique.

Common mistakes to avoid:

  • Holding the nozzle too close

  • Using the wrong nozzle angle

  • Spraying directly into vents or gaps

  • Applying high pressure to soft materials

Pay special attention around:

  • Window seals

  • Door frames

  • Fascias and soffits

  • Old brickwork or crumbling mortar

When in doubt, reduce pressure and increase distance. Let the cleaning solution do the hard work rather than relying purely on force.


Environmental Considerations 🌱

Being mindful of the environment while pressure washing is increasingly important.

Eco-conscious practices include:

  • Using biodegradable detergents

  • Avoiding excessive chemical use

  • Directing runoff away from drains where possible

  • Protecting soil and plants during cleaning

Cover flowerbeds and lawns before applying detergents, then rinse thoroughly once finished. This minimises chemical absorption into the ground and keeps gardens healthy.

Responsible cleaning protects not only your property but also the surrounding environment.


Maintaining Results After Pressure Washing 🧽

Once your house exterior is clean, a few simple steps can help maintain the results for longer.

Maintenance tips:

  • Rinse walls lightly every few months

  • Keep gutters clear to prevent staining

  • Trim nearby trees and shrubs

  • Address mould growth early before it spreads

Regular light maintenance reduces the need for heavy pressure washing and helps preserve surfaces over time.


Signs It’s Time to Wash Again 🔄

Knowing when to pressure wash again prevents excessive build-up and keeps your home looking its best.

Look out for:

  • Green algae patches

  • Black streaks on walls

  • Dirt lines beneath gutters

  • Dull or grey-looking surfaces

If these signs start appearing, it’s usually time for another clean. Staying proactive avoids more aggressive cleaning later and extends the life of exterior materials.

Pressure Washing vs Soft Washing – Knowing When to Use Each 🧼💦

While pressure washing is highly effective, it isn’t always the best approach for every surface. Understanding the difference between pressure washing and soft washing helps you choose the safest and most effective method for your home.

Pressure washing:

  • Uses high-pressure water

  • Best for hard, durable surfaces

  • Removes heavy dirt, mud and surface staining

Common pressure washing surfaces include:

  • Concrete paths and driveways

  • Brick walls in good condition

  • Stonework and paving slabs

Soft washing:

  • Uses low-pressure water combined with specialised cleaning solutions

  • Relies on chemicals rather than force

  • Kills algae, mould and bacteria at the root

Soft washing is better suited for:

  • Rendered walls

  • Painted surfaces

  • Older brickwork

  • Fascias, soffits and cladding

Using high pressure on these materials can cause paint failure, water ingress or surface erosion. In many cases, applying a cleaning solution first and gently rinsing delivers longer-lasting results with far less risk.

By choosing the right method for each surface, you protect your home’s structure while achieving a cleaner, brighter exterior that stays looking fresh for longer.

Continue Reading

3-Pressure-Washing-Laws-UK-How-to-Stay-Legal-and-Avoid-Fines

Pressure Washing Laws UK: How to Stay Legal and Avoid Fines

How to Avoid Fines When Pressure Washing 🚿💷

Pressure washing is an effective way to clean driveways, patios, walls, decking, and other outdoor surfaces. Whether you’re a professional contractor or a homeowner taking pride in your property, pressure washing can deliver excellent results when done correctly. However, if you don’t follow local regulations and best practices, you could face fines — sometimes substantial ones — for environmental damage, improper waste disposal, or nuisance issues.

This comprehensive guide tells you how to avoid fines when pressure washing while helping you stay safe, compliant, and efficient. We’ll break down essential regulations, practical techniques, common pitfalls, and checklists designed for UK standards. Along the way, you’ll find tables and actionable advice you can apply immediately.

For quality cleaning products that help improve results and reduce environmental impact, check out https://puresealservices.co.uk/ 🧼


Understanding the Legal Landscape in the UK ⚖️

Before you even power up your machine, it’s important to understand what you’re allowed to do and what you’re not. In the UK, there isn’t a single national pressure washing law, but there are rules you must follow related to:

  • Water discharge and surface water drains

  • Pollution of watercourses

  • Noise and nuisance

  • Health and safety

  • Waste removal and environmental protection

Different councils may also have local bylaws governing high-pressure cleaning, especially in conservation areas.

Key Areas Where Fines Apply

Area of Concern Regulator / Authority Potential Fines or Penalties
Discharging dirty water into drains Local council / water company Fixed Penalty Notice / Court fine
Polluting rivers/streams Environment Agency Unlimited fines and prosecution
Noise nuisance Local council Noise abatement notices / fines
Improper waste disposal Local council / Environment Agency Fines / legal action
Health and safety breaches HSE (Health and Safety Executive) Prosecution / fines

Table 1: Common areas of compliance where fines may be issued


Why Fines Happen — Real Scenarios 🚨

Understanding common mistakes helps you prevent them. Fines usually occur when:

  • Dirty water enters storm drains that lead to rivers or seas

  • Contaminated runoff pollutes natural water bodies

  • Chemicals are used irresponsibly

  • Neighbours are disturbed by early-morning or late-night cleaning

  • Waste water is pumped into the sewer system without permission

Even well-meaning DIYers can fall foul of regulations if they are unaware of the rules.


Preparing for Pressure Washing 🧰

Step 1 — Know Your Site

Before you start, survey your work area:

✔ Are there surface water drains nearby?
✔ Is the property near a river, stream, or pond?
✔ Are there neighbours close by who might be affected?
✔ Is the surface sensitive (painted brick, old stonework)?

Taking note of these factors helps you plan how to contain and dispose of wastewater appropriately.

Step 2 — Check Local Rules

Different local authorities can have specific requirements. Contact your local council environmental services team and ask:

  • Do I need permission to wash this surface?

  • Are there any restrictions on hours of operation?

  • What waste disposal rules apply?

This simple call can save you £££ in fines.

Step 3 — Choose the Right Equipment

Having the correct pressure washing equipment helps you get the job done quickly and within regulations. Consider:

  • Adjustable pressure washers

  • Water reclamation systems (more on these later)

  • Proper nozzles to avoid surface damage

Good cleaning products can help you use lower pressure and less water while still getting excellent results. For products designed to enhance cleaning efficiency, visit https://puresealservices.co.uk/.


Water Management — Your Top Priority 💧

One of the biggest reasons for fines is poor water management. Let’s explore how to handle water responsibly.

Surface Water vs. Foul Water

In the UK, surface water drains often lead directly to rivers and are not treated. Foul drains go to sewage treatment works.

Never allow pressure washing wastewater to enter a surface water drain.
✔ Always direct it to either a sealed container or a foul sewer with permission.

Water Containment Options

Method Suitable For Pros Cons
Water mats / drain covers Small patios/driveways Effective, low cost Manual setup
Vacuum recovery systems Larger jobs High capture rate More expensive
Suction pumps with tanks Commercial jobs Very effective Requires planning
Block & divert methods Urban locations Can protect drains Needs careful setup

Table 2: Water containment strategies


Wastewater Disposal — Do It Legally 🗑️

Once you have captured wastewater, the next step is disposal.

Disposal Options

  • Foul sewer connection: Requires permission from the water company. Typically involves a licensed waste carrier.

  • Licensed waste recycling centre: You can transport wastewater in sealed tanks to be disposed of legally.

  • Sewer discharge consent: Sometimes required for commercial discharge — check with the local water authority.

Avoid These Illegal Practices

❌ Pouring wastewater into gullies or surface drains
❌ Discharging runoff into streams, rivers, or ponds
❌ Leaving wastewater to enter neighbouring properties

Failing to comply can result in fines from both local councils and environmental regulators.


Chemicals and Detergents — Use With Care 🧪

Pressure washing often uses detergents to break down grease and grime. However:

  • Certain chemicals can be toxic to aquatic life

  • Some may be banned or restricted for outdoor use

Always choose environmentally friendly cleaning products and follow the manufacturer’s instructions closely. The wrong chemical can increase your liability if wastewater contaminates natural water sources.

💡 Tip: Products that boost cleaning performance allow you to use less water and lower pressure, helping both compliance and results.

👉 For a range of effective cleaning solutions, explore https://puresealservices.co.uk/.


Timing and Neighbour Consideration 🕑

Noise nuisance is another common cause of complaints and fines. Pressure washers can be loud.

Best Practices to Avoid Noise Complaints

  • Only operate between 08:00 and 18:00 on weekdays (check your local bylaws)

  • Avoid weekend early morning/late evening work

  • Notify neighbours if you plan a large job

  • Use equipment with noise-reduction features where possible

Showing consideration reduces complaints — and complaints often trigger inspections and fines.


Health & Safety Requirements ⚠️

Whether you’re a professional or DIYer, you must follow safety rules:

  • Wear appropriate PPE (eye protection, gloves, non-slip boots)

  • Ensure electrical cables are safe and dry

  • Never point pressure jets at people or animals

If someone is injured due to negligence, you could face not only fines but legal action.


Case Study: Typical Fines in the UK 💷

To illustrate the stakes, let’s look at how fines can add up.

Offence Example Fine (UK) Notes
Pollution of watercourse £1,200+ (variable) Court can impose much higher fines
Illegal discharge to surface water drain £300–£1,000 Local council enforcement
Noise nuisance breach £100–£500 Per notice or incident
Waste disposal offence £400+ Higher for repeat offences

Table 3: Typical ranges of fines

💡 Remember: these amounts are illustrative — actual fines can be higher depending on severity, impact, and whether you are a business or individual.


Checklist: Before You Start Pressure Washing 📝

Use this checklist to make sure you’re compliant:

✅ Checked local council rules
✅ Identified all nearby drains
✅ Set up water containment
✅ Chosen appropriate detergents
✅ Planned legal wastewater disposal
✅ Notified neighbours if required
✅ Confirmed safe working hours
✅ Put on PPE
✅ Tested equipment safely


Advanced Techniques to Avoid Fines 🛠️

Here are methods professionals use to stay compliant:

1. Water Recycling Units

These machines collect and filter used water so it can be reused or disposed of safely.

Benefits:

  • Minimises wastewater

  • Saves water costs

  • Reduces disposal issues

2. Eco-Friendly Detergents

Choosing biodegradable products means less environmental impact if small amounts of water escape.

3. Silt Busters

These devices filter out solids and prevent them from entering drains.


Common Myths — Busted! 🧨

Myth 1: “I can wash anywhere as long as it’s my property.”

❌ Not true — responsibility extends to where the wastewater goes.

Myth 2: “If I mix with rainwater it’s fine.”

❌ Rainwater doesn’t neutralise pollutants or make discharge legal.

Myth 3: “Small jobs don’t need planning.”

❌ Even small volumes entering drains can result in fines.


Practical Examples

Example 1: Washing a Patio in a Town Centre

Scenario:

  • Busy high street

  • Nearby surface water drains

  • Neighbours above shops

Solutions:

  • Use drain covers and water mats

  • Capture wastewater in containers

  • Dispose at a licensed facility

  • Work within permitted hours

Example 2: Cleaning a Driveway Near a Garden Pond

Scenario:

  • Sloping driveway

  • Pond downhill

  • Loose soil and algae

Solutions:

  • Block off pond area

  • Recycle water with vacuum system

  • Use eco-friendly detergents

  • Alert neighbours about noise


Table: Comparisons of Common Wastewater Handling Strategies

Strategy Captures Water Requires Equipment Best Use Case
Drain mats Medium Low Small patios
Vacuum recovery High Medium Driveways & patios
Suction tanks Very high High Commercial jobs
Block & divert Low Low Quick urban jobs

Table 4: Wastewater handling strategies compared


What to Do If You’re Inspected 👮‍♂️

Sometimes, inspections happen unexpectedly. Here’s how to handle them:

  1. Cooperate calmly and professionally

  2. Show your planning and containment setup

  3. Demonstrate where wastewater is being stored/removed

  4. Have documentation ready (waste transfer notes, permission letters)

Good records show you are responsible — this reduces the likelihood of fines.


Final Tips for Staying Fine-Free 🎯

  • Always think before washing

  • Plan wastewater capture and disposal

  • Use good quality products like those at https://puresealservices.co.uk/

  • Respect neighbours and local rules

  • Keep detailed notes of your work

By taking the right steps, you’ll not only avoid fines — you’ll work more efficiently and protect your local environment.

Record-Keeping and Documentation 📂

One often overlooked way to avoid fines when pressure washing is proper documentation. While paperwork might feel excessive for outdoor cleaning, it can be your strongest defence if a complaint or inspection arises.

What Records Should You Keep?

Keeping simple, organised records shows that you have taken reasonable steps to comply with regulations.

Record Type Why It Matters How Long to Keep
Job risk assessments Demonstrates safety planning 12–24 months
Wastewater disposal notes Proves legal disposal Minimum 12 months
Permission letters/emails Evidence of consent Duration of job + 1 year
Product usage logs Shows controlled chemical use 6–12 months
Noise complaints (if any) Helps resolve disputes As needed

Even handwritten notes can be acceptable if they are clear and dated. For businesses, keeping digital copies is often easier and more reliable.

💡 Tip: If questioned by an enforcement officer, being able to show records immediately can make the difference between advice and a fine.


Residential vs Commercial Pressure Washing Rules 🏠🏢

The expectations placed on pressure washing jobs can differ depending on whether the work is residential or commercial.

Residential Pressure Washing

Homeowners and small domestic jobs are still subject to environmental rules, but enforcement often focuses on pollution impact rather than paperwork.

Key points:

  • You are responsible for where the water goes

  • “DIY” is not an excuse for pollution

  • Neighbour complaints are the most common trigger for investigations

Commercial Pressure Washing

Commercial work is scrutinised more closely, especially in public areas.

Area Residential Commercial
Wastewater control Expected Mandatory
Documentation Recommended Strongly expected
Inspections Occasional More frequent
Fines Lower typical range Often higher

If you carry out paid work, you are expected to demonstrate professional standards, even on small jobs.


Managing Runoff on Slopes and Uneven Surfaces ⛰️

Sloped driveways, ramps, and uneven ground increase the risk of accidental discharge into drains or neighbouring land.

Practical Runoff Control Methods

  • Work from the lowest point upward to reduce flow speed

  • Use temporary barriers such as sandbags or rubber edging

  • Break large areas into smaller sections

  • Pause regularly to collect pooled water

Surface Type Risk Level Control Strategy
Flat patios Low Basic drain covers
Sloped driveways Medium Barriers + suction
Steep ramps High Vacuum recovery
Block paving Medium Controlled flow

Taking extra time on sloped areas significantly reduces your risk of fines caused by accidental pollution.


Weather Conditions and Compliance 🌦️

Weather plays a bigger role in compliance than many people realise.

Why Weather Matters

  • Heavy rain can overwhelm containment systems

  • Wind can spread contaminated spray

  • Freezing temperatures increase slip hazards

Best Practices by Weather Type

Weather Risk Recommended Action
Dry & calm Low Ideal working conditions
Light rain Medium Increase containment
Heavy rain High Postpone work
Frost/ice High Avoid washing entirely
High wind Medium Reduce pressure or delay

If runoff escapes due to poor weather planning, you may still be held responsible — even if conditions changed unexpectedly.

🌧️ When in doubt, reschedule. Delays cost less than fines.


Training and Competency Awareness 🎓

Lack of knowledge is one of the most common reasons people receive fines. Understanding what you’re doing — and why — dramatically lowers your risk.

Areas You Should Be Confident In

  • Identifying drain types

  • Basic environmental protection rules

  • Safe chemical handling

  • Noise and nuisance awareness

  • Emergency response if water escapes

Self-Assessment Table

Skill Area Confident Needs Improvement
Drain identification
Wastewater capture
Chemical control
Noise management
Spill response

Being honest with yourself here helps prevent mistakes before they happen.

💡 Even informal learning — reading guidance, observing experienced cleaners, and reviewing past jobs — can significantly reduce your exposure to enforcement action.

Continue Reading