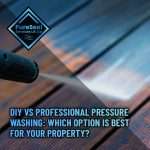
Posts Tagged ‘Roof Cleaning’

3-How-to-Prevent-Surface-Damage-When-Pressure-Washing

How to Prevent Surface Damage When Pressure Washing | Expert Guide

How to Prevent Surface Damage When Pressure Washing

Pressure washing is an effective way to clean many outdoor surfaces — patios, driveways, decking, brickwork, and more. However, if it’s done incorrectly, the powerful spray can cause surface damage, strip paint, etch stone, gouge wood, or force water into unwanted places. This guide explains how to protect surfaces, choose the right equipment and settings, and apply pressure washing safely and effectively.

Whether you’re a DIY enthusiast or a professional contractor, understanding the principles of safe pressure washing will save time, money and help you achieve better results. We’ll look at common mistakes, protective measures, strategies for different materials, and practical checklists you can follow.


Why Surface Damage Happens

Pressure washers produce jets of water at high velocity — often between 1,000 and 4,000 PSI (pounds per square inch). This force is great for dislodging dirt and grime, but it can also:

  • Strip paint and sealants

  • Chip or break softer surfaces

  • Etch concrete and stone

  • Split or gouge wood

  • Drive water into cracks or beneath finishes

Surface damage usually results from a combination of incorrect pressure, wrong nozzle, inappropriate detergents, or poor technique.


The Basics: Understand Your Equipment

Before you start cleaning, it’s essential to know your pressure washer’s capabilities. A pressure washer has two main performance ratings:

Feature What It Means Why It Matters
PSI (Pressure) Pounds per square inch — force of water Determines how aggressive the spray is
GPM (Flow) Gallons per minute — volume of water delivered Affects how quickly dirt is rinsed away
Cleaning Units (CU) PSI × GPM Overall cleaning performance

💡 Tip: Higher PSI isn’t always better. Delicate surfaces need lower pressure, even if it takes slightly longer to clean.


Surface Types and Appropriate Pressure

Different materials tolerate different levels of pressure. The table below shows general guidelines — these should be adjusted based on surface condition and age.

Surface Recommended PSI Range Notes
Softwood decking 500–1,000 PSI Test a small area first
Hardwood decking 800–1,200 PSI Avoid lingering in one spot
Concrete driveways 2,000–3,000 PSI Great for grease and stains
Brickwork 1,000–2,000 PSI Too much pressure can erode mortar
Vinyl siding 1,200–1,600 PSI Keep wand at an angle
Painted surfaces 1,200–1,500 PSI Test a hidden area to avoid stripping
Roof tiles <1,200 PSI High risk of breaking tiles

Choosing the Right Nozzle

Nozzles determine how narrow or wide the water spray pattern is — and thus how aggressive it feels on the surface.

Nozzle Colour Spray Pattern Best Use
Red 0° (cone) Very concentrated — great for concrete, risky on other surfaces
Yellow 15° Good for heavy cleaning on hard surfaces
Green 25° General cleaning
White 40° Gentle — decks, siding, fences
Black Soap nozzle Low pressure for detergents

🔎 Important: Start with a wide angle (gentler) nozzle and only move to narrower options if necessary. This reduces the risk of damage.


Step-by-Step: How to Avoid Damage

Here’s a practical workflow to pressure wash safely:

1. Inspect and Prepare

✔ Check the surface for cracks, loose materials, weak spots.

✔ Remove furniture, potted plants, and delicate items.

✔ Sweep away loose debris.

✔ Identify areas that may require gentler treatment.

2. Choose the Right Settings

✔ Select the correct PSI range for the surface.

✔ Fit a gentle nozzle (start with 25° or 40°).

✔ If using detergent, apply it with a low-pressure nozzle.

3. Test a Hidden Area

⚠ Always test a small, inconspicuous patch before you begin work on the main surface. This allows you to adjust pressure and technique without risking visible damage.

4. Maintain Correct Distance

Keep the lance at an angle and distance appropriate to the surface:

Surface Ideal Distance
Softwood 45–60 cm
Concrete 30–45 cm
Brick 45–60 cm
Painted wood 60–90 cm

👉 Holding the wand too close increases the risk of gouging; too far reduces cleaning effectiveness.

5. Use Gentle, Overlapping Strokes

Move in smooth, overlapping sweeps rather than blasting one spot. Avoid pointing directly at seams, edges or grout joints — water can be forced behind the surface and cause hidden damage.

6. Rinse and Evaluate

After washing, rinse thoroughly and give the surface time to dry. Then inspect for signs of damage such as dull spots, chips, wood splinters, or lifted paint.


Choosing Cleaning Solutions Wisely

Sometimes pressure alone isn’t enough — especially for oil, grease, algae, moss and mildew. Using a specialised pressure washer detergent can improve results, but the wrong product may damage surfaces.

✔ Always choose a solution formulated for the specific material.

✔ Use detergents sparingly and avoid caustic chemicals on wood or softer materials.

✔ Rinse thoroughly after application.

One option for professional-grade cleaning products is at https://puresealservices.co.uk/ — they offer cleaners designed for use with pressure washers and suitable for a range of surfaces.


Protecting Specific Surfaces

Decking (Wood)

Wood is sensitive to pressure washing. Too high a pressure will lift wood fibres, leaving a fuzzy, rough surface.

Safeguards for decks:

  • Use lower PSI (500–1,000)

  • Wide spray pattern (40°)

  • Keep wand at 45°

  • Follow the grain, not across

Avoid lingered focus on one spot — especially on softwoods like cedar or redwood.


Concrete and Paving

Concrete tolerates higher pressure but can be etched if nozzle is too concentrated at too close a distance.

Best approach:

  • Start with medium pressure and 25° nozzle

  • Hold wand at a steady 30–45 cm

  • Move in slow, parallel lines

If there are deep stains, use a detergent designed for masonry and allow dwell time before rinsing.


Brick and Mortar

Brick is surprisingly delicate. Overpressure can erode mortar and loosen bricks over time.

Tips:

  • Keep pressure moderate

  • Avoid 0° red nozzle

  • Spray at an angle to protect joints

For moss or algae, consider applying a detergent, waiting as instructed, then rinsing with low pressure.


Painted Surfaces

Paint can lift easily under high pressure or narrow spray.

Safe practice:

  • Use wide angle nozzle

  • Increase distance

  • Test a small area

If paint does crack or peel, you may need to address the surface with a repaint or repair.


Common Mistakes and How to Avoid Them

Even experienced users can make errors. Below are frequent issues and how to prevent them:

Mistake Problem Prevention
Too high pressure Surface damage Start low and adjust up only if necessary
Wrong nozzle Ineffective or damaging spray Match nozzle to surface and test
Spraying straight on edges Water under surface Spray at angle
Not using protective detergent Poor cleaning Use correct solutions judiciously
Rushing Inconsistent results Take slow, steady passes

Safety for You and Others

While protecting surfaces is vital, your safety matters too. High pressure can cause injury.

✔ Wear eye protection
✔ Wear sturdy shoes and gloves
✔ Tie back long hair
✔ Be aware of people and pets nearby
✔ Never point the spray at people or animals


Maintenance Tips After Pressure Washing

Pressure washing is only part of maintenance. Once the surface is clean:

Wood

  • Allow to dry completely

  • Sand if fibres are raised

  • Apply a sealant to protect against weathering

Concrete/Paving

  • Re-apply joint sand if needed

  • Seal surfaces if desired

Painted Areas

  • Check for flaking paint

  • Touch up or repaint as needed

Regular maintenance extends the life of outdoor surfaces and improves appearance.


Example: Checklist Before You Start

Use this quick checklist before starting any pressure washing task:

☑ Inspect surface condition
☑ Remove loose debris
☑ Gather protective gear
☑ Choose correct PSI and nozzle
☑ Test a hidden area
☑ Apply detergent (if needed)
☑ Wash in consistent, overlapping passes
☑ Rinse and check results


Example: Pressure Washing Programme

Here’s a sample schedule for an annual pressure washing programme:

Month Task
March Clean decking and patio after winter
May Rinse driveway before summer events
August Clean siding to remove pollen & dirt
October Remove algae before colder months

Consistent cleaning prevents buildup of dirt, grime, moss and lichen — making each session easier and less damaging.


FAQs about Pressure Washing and Surface Protection

Q: Can pressure washing remove oil stains?

Yes — but oil often requires a degreasing detergent and sometimes pre-treatment. Follow with moderate pressure to avoid etching concrete.

Q: Is pressure washing safe for plants?

Plants can be damaged by high pressure and detergent. Rinse foliage gently after washing nearby, and consider covering delicate plants.

Q: How often should I pressure wash my deck?

Generally once a year is enough, but high-traffic areas or shaded areas with moss may need more frequent attention.


If you’d like help choosing the right cleaning products for each surface you’re working on, check out the specialist range available at https://puresealservices.co.uk/ — designed with performance and surface protection in mind.

Weather Conditions and Timing Matter 🌦️

Pressure washing at the wrong time can increase the risk of surface damage. Very hot weather can cause detergents to dry too quickly, leaving residues or streaks, while freezing or near-freezing temperatures may allow water to seep into cracks and expand later.

Best conditions for pressure washing:

  • Mild, overcast days

  • Dry weather with no rain forecast

  • Temperatures between 8°C and 20°C

Avoid pressure washing during strong winds, as spray can become harder to control and may be forced into joints, vents or gaps.


Be Careful Around Joints, Seals and Edges

Some of the most common damage occurs not on flat surfaces, but around joints, seals and edges. These areas are more vulnerable to water intrusion.

Extra care should be taken around:

  • Expansion joints in concrete

  • Block paving joints and kiln-dried sand

  • Window and door seals

  • Deck board ends and fixings

Using a wider spray angle and reducing pressure around these areas helps prevent water being driven underneath surfaces where it can cause long-term problems.


Managing Moss, Algae and Lichen Safely 🌱

Biological growth such as moss and algae can make surfaces slippery and unsightly, but aggressively blasting them off often causes more harm than good.

A safer approach includes:

  • Applying a suitable cleaning solution

  • Allowing enough dwell time to loosen growth

  • Rinsing gently rather than forcefully

This method reduces the need for high pressure and helps preserve the integrity of the surface beneath the growth.


Avoiding Etching and Striping Marks

Etching marks and visible stripes are signs that pressure washing has been too aggressive or uneven. These marks are especially noticeable on concrete, paving slabs and stone.

To reduce the risk:

  • Keep the lance moving at a steady pace

  • Maintain consistent distance from the surface

  • Overlap each pass slightly

  • Avoid sudden stops in one position

Taking a slower, more methodical approach often delivers a cleaner and more professional-looking finish.


Training Yourself Before Larger Areas

If you’re new to pressure washing or using unfamiliar equipment, it’s wise to practise before tackling large or prominent areas.

Good practice ideas include:

  • Testing on a spare paving slab

  • Starting with less visible sections

  • Adjusting pressure gradually rather than all at once

Building confidence and understanding how the washer reacts on different surfaces significantly reduces the chance of accidental damage.

Managing Water Run-Off and Drainage 💧

Water run-off is often overlooked, yet it plays a big role in preventing damage during pressure washing. Poor drainage can allow dirty water, chemicals and debris to pool against surfaces, increasing staining and the risk of erosion.

To manage run-off effectively:

  • Work from higher areas downwards

  • Avoid forcing water towards walls or thresholds

  • Keep drains clear before starting

  • Rinse in controlled stages rather than all at once

Controlling where water flows helps protect surrounding surfaces and reduces the chance of water entering unwanted areas.


Understanding When Lower Pressure Works Better

Higher pressure does not always mean better results. In many cases, allowing water flow and cleaning solutions to do the work is far safer than increasing PSI.

Lower pressure is often more effective when:

  • Cleaning older or weathered surfaces

  • Working on decorative stone or paving

  • Removing organic growth after treatment

  • Washing painted or sealed areas

By relying less on force and more on technique, you reduce surface wear while still achieving a thorough clean.

Continue Reading

2-How-to-Use-a-Pressure-Washer-Safely

How to Use a Pressure Washer Safely: A Beginner’s Guide

Pressure Washing Safety Tips for Beginners

Pressure washing is an incredibly effective way to clean patios, driveways, decking, walls, vehicles and much more. For beginners, though, it can feel intimidating — and if you don’t follow solid safety practices, it can be dangerous. This guide explains everything you need to know to get started safely, comfortably and confidently.

Whether you’re cleaning your home exterior for the first time or helping a friend with their garden path, these tips will help you avoid common accidents, protect yourself and others, and get the best results possible.

💡 Don’t forget to stock up on good quality cleaning solutions from https://puresealservices.co.uk/ — they offer a range of products designed to work with pressure washing tasks.


Why Safety Matters with Pressure Washers

Pressure washers blast water at very high pressures — typically from 1,000 to 4,000 PSI (pounds per square inch) for consumer models. At these pressures, water can cut through skin and cause serious injury. Even if you’re only cleaning dirt and grime, the force of the spray can throw debris, damage surfaces or cause slips.

A safe operator is an effective operator — so taking time to understand the risks and how to mitigate them is essential.


Basic Safety Equipment You Should Always Use

Before you even think about starting the machine, make sure you’re properly equipped.

🔒 Essential Personal Protective Equipment (PPE)

Equipment Purpose Notes
Safety glasses / goggles Protects eyes from flying debris Essential — even light chips can injure eyes
Waterproof gloves Better grip & hand protection Thick gloves reduce vibration discomfort
Non-slip footwear Prevents falls Avoid smooth-soled shoes outdoors
Long trousers Shields legs Lightweight but durable fabrics are ideal
Ear protection Reduces noise fatigue Pressure washers are loud — especially petrol models

🎧 Pressure washers can be as loud as 90-110 decibels — similar to power tools. Protect your hearing!


Getting to Know Your Pressure Washer

Before firing up a pressure washer:

🛠 Familiarise Yourself With:

  • On/off switch

  • Trigger lock

  • Pressure settings

  • Nozzle types

  • Hose connections

  • Water inlet filter

Read the user manual carefully. Each machine is slightly different — and some have specific instructions for fuel, water type and cleaning chemicals.

Never modify your pressure washer or attach accessories not recommended by the manufacturer.


Choosing the Right Nozzle

Pressure washers usually come with several coloured nozzles, each designed for a different spray angle and power:

Nozzle Colour Spray Angle Best For
Red Hard, concentrated stream — only for very sturdy surfaces
Yellow 15° Heavy cleaning, stripping paint or stubborn stains
Green 25° General cleaning — decks, patios, driveways
White 40° Gentle wash — cars, windows, garden furniture
Black Soap Applies detergent at lower pressure

⚠️ Never use the red (0°) nozzle on surfaces that can be easily damaged. This is extremely powerful and can etch concrete or gouge soft materials.


Preparing the Work Area

Before you start pressure washing:

✔ Remove hazards:

  • Pots, toys, tools and garden furniture

  • Loose stones or gravel

  • Fragile objects like plant pots or decorations

✔ Mark or cover:

  • Electrical outlets

  • Outdoor lights

  • Air vents

  • Delicate plants

✔ Keep pets and children well away

Pressure washers are loud and the spray can injure bystanders.


Proper Stance and Spray Technique

How you stand and hold the wand matters for safety and comfort.

🦵 Stable Stance:

  • Feet shoulder-width apart

  • One foot slightly forward

  • Knees slightly bent

🖐 Hold the Wand Correctly:

  • Keep both hands on the wand

  • Don’t overreach — move your feet instead

  • Keep the spray pointed away from people, pets and fragile materials

🌀 Move Smoothly

Do not hold the spray in one place too long. This can cause damage to surfaces — and can kick back debris.


Using Cleaning Chemicals Safely

Using detergents and cleaning agents can boost the effectiveness of your pressure washing, especially for grease, algae, oil or mould. But chemicals must be used responsibly.

🌿 Best practice with cleaning products:

  • Only use products designed for pressure washers

  • Follow the manufacturer’s dilution instructions

  • Apply chemicals before pressure washing

  • Avoid getting chemicals in your eyes or on exposed skin

  • Never mix different cleaning products together

👉 You can find suitable cleaning chemicals for your pressure washing systems at https://puresealservices.co.uk/ — designed to pair with pressure washing tasks and formulated for safety.


Electrical Safety (For Electric Pressure Washers)

If you’re using an electric pressure washer:

🔌 Important points:

  • Use only outdoor-rated extension leads

  • Keep all electrical connections dry

  • Never plug or unplug with wet hands

  • Ensure sockets are protected by an RCD (Residual Current Device)

💧 Water and electricity don’t mix — always err on the side of caution.


Petrol Pressure Washer Safety

Petrol models offer more power and mobility than electric ones, but come with extra risks.

⚠️ Petrol Safety Tips

  • Refuel only when the engine is cold

  • Keep petrol cans sealed and stored safely

  • Work in a well-ventilated area (to avoid carbon monoxide buildup)

  • Never run the engine indoors or in an enclosed space

Petrol pressure washers can produce fumes that are dangerous if inhaled for long periods — so ensure good ventilation.


Slips, Trips and Falls: A Major Risk

Pressure washing often leaves surfaces wet and slippery, so take these precautions:

✔ Wear non-slip shoes
✔ Be mindful of trailing hoses
✔ Work systematically to avoid backtracking on wet surfaces
✔ Use signage if others are around (“Wet Surface” signs)

If you’re working on steps or ladders, consider whether a warranty or extra help would be safer. Never lean over too far!


Surfaces That Require Extra Care

Some materials are more delicate than others:

🧱 Brick, Stone & Concrete

These tough surfaces can take higher pressure, but sensitive areas like old brick joints can be damaged. Start with a moderate pressure and work up.

🪵 Timber Decking

Wood can splinter under high pressure. Use wider spray angles (25°–40°) and keep the wand moving.

🚗 Vehicles and Paintwork

Only use low pressure (white nozzle) and soap designed for automotive use. Avoid spraying directly at tyre valves, rubber seals and delicate trims.

🪟 Windows & Glass

Use a gentle spray and work at an angle. Never use red or yellow nozzles on glass.


Avoiding Injury from Recoil and Kickback

High-pressure water jets can cause recoil — especially if you trap the spray against a surface.

Tips to reduce recoil:

  • Hold the wand firmly with both hands

  • Stand with a balanced stance

  • Never spray directly into corners at very close range

  • Release the trigger when moving between areas

Being prepared for the force helps you stay in control.


Everyday Do’s and Don’ts

Here’s a simple reference to keep in mind:

DO DON’T
Read your user manual Assume all surfaces can handle high pressure
Wear proper PPE Point the nozzle at people or animals
Test on a small area first Use damaged hoses or nozzles
Work in daylight Spray electrical outlets
Follow chemical instructions Mix cleaning products

Checklist: What to Have Before You Start

Before you begin, make sure you can tick off this list:

☑ Pressure washer manual read
☑ PPE ready (glasses, gloves, boots, ear protection)
☑ Correct nozzles attached
☑ Area cleared of hazards
☑ Pets and people out of the way
☑ Chemicals chosen and diluted properly
☑ Suitable power source or fuel on hand


Pressure Settings Guide

Beginners especially benefit from understanding pressure levels — too low and cleaning won’t work; too high and surfaces get damaged.

Surface Recommended PSI Notes
Wooden fencing 1,200–1,500 Start low, test area
Driveway concrete 2,500–3,000 Tough surface
Patio slabs 2,000–2,500 Avoid etching stone
Car bodywork 1,200–1,800 Use gentle nozzle
Decking 1,500–2,000 Keep moving to avoid gouges

Always start at a lower setting and increase gradually if needed.


Dealing with Tough Stains

💡 Some stains (like oil or rust) are stubborn. Techniques that help include:

  • Pre-soaking with cleaning solution

  • Letting detergent dwell for a short time (but don’t let it dry)

  • Using brush attachments for gentle agitation

  • Rinsing thoroughly from top to bottom

Avoid aggressive scrubbing with high pressure — it often causes more harm than good.


Handling Environmental Concerns

Pressure washing can loosen paint chips, chemicals and dirt that flow into drains.

🌱 Eco-aware practices:

  • Sweep up solids before washing

  • Avoid washing directly into storm drains

  • Choose biodegradable detergents where possible

  • Contain wastewater if local regulations require it

Being environmentally considerate protects your garden and community.


Storage and Maintenance of Your Equipment

After the job:

🧽 Maintenance Steps

  • Rinse out detergent tank

  • Flush out hoses with clean water

  • Inspect nozzles and filters

  • Drain water from the pump (especially before winter)

  • Store in a dry, frost-free place

Regular care extends the life of your machine and prevents unexpected issues.


Common Beginner Mistakes (and How to Avoid Them)

Here are pitfalls many newcomers make — and how to avoid them.

Spraying too close
Solution: Keep a distance of at least 30cm and adjust as needed.

Skipping PPE
Solution: Always gear up before starting.

Using the wrong nozzle
Solution: Refer to the nozzle table and pick the correct spray angle.

Neglecting safety zones
Solution: Establish a clear area before washing.

Not testing pressure
Solution: Always test on an inconspicuous area.


Frequently Asked Questions

Is pressure washing safe for all surfaces?

No — some materials like soft wood, old brick or painted surfaces can be damaged by high pressure. Always test first.

Can I use bleach with a pressure washer?

Only use cleaning products the manufacturer approves. Bleach can damage surfaces and harm plants.

Do I need insurance to pressure wash for others?

If you’re doing work for money, yes — public liability insurance is generally required.

How often should I service my pressure washer?

Annually at minimum — more often if you use it regularly.


Quick Reference Tables

Pressure Washer Nozzle Guide

Colour Angle Best Use
Red Tough stains on hard surfaces
Yellow 15° Heavy cleaning
Green 25° General purpose
White 40° Gentle washing
Black Soap Apply detergent

Final Safety Summary

Pressure washing is a powerful tool when used correctly. With appropriate preparation, protective equipment, correct nozzle selection, and awareness of your surroundings, you can get fantastic results with minimal risk.

Remember:

  • Respect the power of the spray

  • Protect yourself and others

  • Take your time to learn and practise

  • Always clean up responsibly

Working Safely Around Buildings and Boundaries 🏠

Pressure washing close to buildings requires extra care. Water under pressure can penetrate gaps, damage seals and even find its way indoors if used incorrectly.

Key Areas to Watch

  • Doors and window seals – especially older UPVC or timber frames

  • Air bricks and vents – forcing water inside can cause damp issues

  • Pointing and mortar joints – weakened mortar can be washed away

  • Soffits and fascias – often lightweight materials

When working near a property, always spray at a downward angle rather than directly into joins or gaps. Start with a lower pressure and gradually increase only if needed.

Safe Distance Guidelines Near Buildings

Area Minimum Distance Notes
Brick walls 30–45 cm Increase distance on older buildings
Window frames 50+ cm Use wide-angle nozzle only
Doors 60 cm Avoid spraying directly at seals
Air vents Avoid direct spray Rinse gently from the side

💡 If water is bouncing back at you, that’s a sign you’re too close or using too much pressure.


Weather Conditions and When Not to Pressure Wash 🌦️

Beginners often overlook how much the weather affects safety and results. Pressure washing in poor conditions increases the risk of slips, damage and ineffective cleaning.

Conditions to Avoid

  • Freezing temperatures – water can freeze on surfaces and hoses

  • 🌬 Strong winds – spray becomes unpredictable

  • 🌧 Heavy rain – reduces visibility and cleaning effectiveness

  • Extreme heat – detergents can dry too quickly and stain surfaces

Ideal Conditions for Pressure Washing

Factor Recommended
Temperature £5–£20°C
Wind Light breeze or calm
Rain Dry day
Lighting Daylight for visibility

In hot weather, work in shaded areas where possible and rinse surfaces frequently to prevent detergent residue drying onto them.


Chemical Handling and Storage Safety 🧴

Even beginner-friendly cleaning products need to be treated with respect. Poor storage or incorrect handling can cause skin irritation, damage surfaces or create environmental issues.

When using pressure washing detergents:

  • Read the label every time

  • Measure carefully — more product does not mean better results

  • Wear gloves when handling concentrates

  • Wash hands thoroughly after use

High-quality cleaning solutions designed specifically for pressure washing tasks are available from https://puresealservices.co.uk/, making it easier to work safely when instructions are followed.

Safe Storage Checklist

Item Best Practice
Containers Keep sealed and upright
Location Cool, dry, out of reach of children
Labelling Never remove original labels
Mixing Only mix with water if instructed

🚫 Never pour leftover chemicals down drains unless the product explicitly states it is safe to do so.


Knowing When to Stop and Reassess ⛔

One of the most important safety skills for beginners is knowing when to stop. Pushing on despite warning signs often leads to damage or injury.

Signs You Should Pause Immediately

  • Excessive vibration or loss of control

  • Hose bulging or leaking

  • Unusual noises from the machine

  • Surface material breaking up or splintering

  • Fatigue in arms, hands or lower back

Pressure washing is physically demanding. Take regular breaks, stay hydrated and avoid rushing. A slow, controlled approach is safer and usually delivers better results anyway.

Work Session Safety Limits

Task Suggested Break
Light cleaning Every 30–40 minutes
Heavy-duty washing Every 20–30 minutes
Overhead or angled work Short bursts only

If something doesn’t feel right, turn the machine off, release pressure from the system and check everything before continuing.

Continue Reading

1-Mould-Algae-and-Mildew-on-Siding

Mould, Algae & Mildew on Siding: Causes, Removal & Prevention

How to Remove Mould, Algae & Mildew from Siding

Mould, algae and mildew are among the most common – and most frustrating – problems affecting exterior siding in the UK. Thanks to our damp climate, shaded gardens, and frequent rainfall, these organic growths can quickly take hold and spread across walls, cladding, and facades 😬. While they may start as small green or black patches, left untreated they can stain surfaces permanently, degrade materials, and significantly reduce the visual appeal of a property.

This guide explores why mould, algae and mildew form, how to identify each one, and the safest, most effective ways to remove them from siding. It also looks at costs, prevention strategies, and long-term care, helping homeowners and property managers keep external walls clean, healthy, and looking their best.


Understanding the Difference Between Mould, Algae & Mildew

Although often grouped together, mould, algae and mildew are not the same. Each behaves differently and may require slightly different cleaning approaches.

What Is Mould?

Mould is a type of fungus that thrives in damp, shaded conditions. On siding, it usually appears as black, dark green, or brown spots and patches. Mould feeds on organic material, including dirt, pollen, and even some finishes used on cladding.

It can:

  • Cause stubborn staining

  • Damage surface coatings

  • Trigger allergies and respiratory issues

What Is Algae?

Algae are plant-like organisms that grow in moist environments with limited sunlight. On siding, algae typically appear as green or yellowish streaks, especially on north-facing walls.

Algae are:

  • Less harmful structurally than mould

  • Extremely common in the UK

  • Slippery and unsightly

What Is Mildew?

Mildew is another type of fungus, closely related to mould but usually lighter in colour. It often appears as grey, white, or pale brown patches and tends to stay on the surface rather than penetrating deeply.


Visual Comparison Table

Growth Type Common Colour Typical Location Surface Damage Risk
Mould Black, dark green Shaded, damp walls High
Algae Green, yellow North-facing siding Low–Medium
Mildew White, grey Poorly ventilated areas Medium

Why Siding Is So Vulnerable

Exterior siding is constantly exposed to the elements. In the UK especially, the combination of moisture, mild temperatures, and limited sunlight creates ideal conditions for organic growth.

Key contributing factors include:

  • Persistent rainfall 🌧️

  • Overhanging trees and shrubs

  • Poor drainage around the property

  • North- or east-facing walls

  • Dirt and pollution buildup

Once spores or algae cells settle, they only need moisture to multiply.


Types of Siding and How Cleaning Differs

Not all siding materials respond the same way to cleaning. Using the wrong method can cause more harm than good.

uPVC & Vinyl Siding

  • Durable but prone to staining

  • Sensitive to harsh abrasives

  • Benefits from specialist exterior cleaners

Wood Siding

  • Highly absorbent

  • Vulnerable to rot if left damp

  • Requires gentle but thorough treatment

Fibre Cement

  • Strong and weather-resistant

  • Can still harbour mould in surface pores

Rendered & Painted Surfaces

  • Easily stained

  • High-pressure cleaning can strip paint


Safe & Effective Cleaning Methods

Manual Cleaning

Manual cleaning is suitable for light growth or delicate surfaces.

You will need:

  • Soft-bristled brush

  • Bucket of warm water

  • Specialist exterior cleaner

  • Protective gloves

Scrub gently in circular motions and rinse thoroughly. This method is time-consuming but gives maximum control.


Low-Pressure Washing

Low-pressure washing is often the most balanced approach, combining efficiency with safety. Unlike aggressive pressure washing, it reduces the risk of forcing water behind siding or damaging surfaces.

This method is ideal for:

  • Algae-covered walls

  • Large surface areas

  • Regular maintenance cleaning


Chemical Treatments

Specialist cleaning products are designed to kill spores at the root, not just remove visible growth. This helps prevent rapid regrowth.

When choosing a product, ensure it:

  • Is suitable for exterior siding

  • Targets mould, algae and mildew

  • Does not contain overly aggressive acids

High-quality cleaning solutions are available from https://puresealservices.co.uk/ and are designed specifically for safe, effective exterior cleaning in UK conditions.


Step-by-Step: Removing Mould, Algae & Mildew

Step 1: Inspect the Area

Identify the type and severity of growth. Note any cracks, damaged joints, or peeling paint.

Step 2: Prepare the Area

  • Cover nearby plants 🌱

  • Close windows and vents

  • Wear gloves and eye protection

Step 3: Apply Cleaner

Apply evenly from bottom to top to prevent streaking. Allow the product to dwell as instructed.

Step 4: Agitate Gently

Use a soft brush if required. Avoid wire brushes or abrasive pads.

Step 5: Rinse Thoroughly

Rinse with clean water, working from top to bottom.


Cost Considerations in the UK

Cleaning costs vary depending on surface size, level of contamination, and product choice.

Typical Cost Breakdown

Item Estimated Cost (£)
Specialist cleaner £20–£60
Soft brush & tools £10–£25
Water usage £5–£15
Protective equipment £10–£20

While DIY cleaning can be cost-effective, improper methods can lead to repairs costing hundreds or even thousands of pounds later on.


Common Mistakes to Avoid 🚫

  • Using bleach incorrectly, which can damage siding

  • Overusing high-pressure washers

  • Ignoring regrowth prevention

  • Mixing cleaning chemicals

  • Scrubbing painted surfaces too aggressively


Health & Environmental Considerations

Mould spores can become airborne during cleaning, so proper precautions are essential. Always:

  • Wear gloves and eye protection

  • Avoid cleaning on windy days

  • Rinse surrounding areas thoroughly

Eco-conscious homeowners should opt for biodegradable cleaning products designed for outdoor use.


Preventing Future Growth

Prevention is always easier (and cheaper) than cure.

Practical Prevention Tips

  • Trim back trees and hedges 🌳

  • Improve drainage around walls

  • Wash siding annually

  • Keep gutters clean

  • Address leaks promptly


Annual Maintenance Schedule

Task Frequency
Visual inspection Every 6 months
Light wash Once per year
Deep clean Every 2–3 years
Drainage check Annually

Long-Term Benefits of Clean Siding

Maintaining clean siding is not just about appearance. It can:

  • Extend the lifespan of materials

  • Protect property value 💷

  • Improve kerb appeal

  • Reduce health risks

  • Prevent costly repairs

Over time, regular care pays for itself.


Final Thoughts Before You Add More Later 😉

Removing mould, algae and mildew from siding is a vital part of exterior property maintenance in the UK. With the right knowledge, suitable products, and a careful approach, it is possible to restore siding safely and keep it looking fresh for years to come.

Whether tackling a small problem area or planning routine maintenance, understanding the causes and correct removal methods makes all the difference.

How Weather Patterns Accelerate Organic Growth

UK weather plays a major role in how quickly mould, algae and mildew spread across siding. Mild winters mean spores are rarely killed off, while warm, damp springs create perfect growing conditions. Even summer doesn’t always slow things down, as shaded walls can remain wet for long periods ☁️.

Frequent temperature changes also contribute to condensation forming on exterior surfaces, particularly overnight. This constant cycle of dampness allows spores to reactivate repeatedly, making untreated siding a long-term target for regrowth.

Understanding this seasonal pattern helps homeowners time their cleaning more effectively, with spring and early autumn being ideal periods for treatment.


The Impact of Orientation and Sunlight

Not all sides of a property age equally. Walls that receive little direct sunlight dry more slowly, giving mould and algae a consistent moisture source.

North-facing walls are the most affected, followed closely by east-facing elevations. In contrast, south-facing siding tends to remain cleaner for longer due to faster evaporation and natural UV exposure ☀️.

When planning maintenance, it’s wise to prioritise shaded elevations and inspect them more frequently.


How Air Pollution Contributes to Staining

Urban and roadside properties are especially vulnerable to exterior staining. Pollution particles settle on siding, creating a thin film that feeds mould and algae growth.

This grime:

  • Traps moisture

  • Reduces surface reflectivity

  • Encourages darker staining

Over time, pollution-related buildup can make organic growth harder to remove, requiring more thorough cleaning and longer treatment dwell times.


The Role of Surface Texture in Growth Retention

Smooth surfaces are easier to clean, but textured siding presents more challenges. Rough finishes, deep grooves, and decorative cladding profiles create tiny pockets where moisture and spores can hide.

These areas:

  • Take longer to dry

  • Are harder to rinse thoroughly

  • Often show regrowth sooner

Regular cleaning is particularly important for textured siding, as once growth embeds itself, removal becomes far more labour-intensive.


Why Ignoring Early Signs Makes Things Worse

Early-stage algae or mildew often looks harmless — a faint green tinge or light grey haze. Unfortunately, these early indicators are easy to dismiss.

Ignoring them allows:

  • Deeper staining to develop

  • Surface coatings to degrade

  • Cleaning costs to rise significantly

Addressing growth early usually means faster cleaning, lower chemical usage, and better long-term results 👍.


Cleaning Older Properties Versus New Builds

Older properties often have siding that has weathered for decades. Paint layers may be thinner, seals less effective, and surfaces more porous.

New builds, while visually cleaner, often use modern cladding systems that can trap moisture behind panels if not maintained properly.

Both require care, but older properties typically benefit from gentler methods and longer dwell times to avoid surface damage.


Understanding Regrowth Cycles

One of the most frustrating aspects of mould and algae is how quickly it can return. Even after thorough cleaning, spores remain present in the surrounding environment.

Typical regrowth timelines:

  • Algae: 6–12 months

  • Mildew: 9–18 months

  • Mould: Varies based on conditions

Using appropriate cleaning products and following a maintenance schedule helps disrupt this cycle rather than simply resetting it.


The Importance of Proper Rinsing

Rinsing may seem like a minor step, but it plays a critical role in preventing streaks, residue, and uneven results.

Incomplete rinsing can:

  • Leave cleaning agents behind

  • Attract new dirt

  • Cause patchy discolouration

Using sufficient water pressure (without excess force) and working methodically across the surface ensures a clean, uniform finish 💧.


How Poor Maintenance Affects Property Value

Exterior appearance has a direct impact on kerb appeal. Stained siding can make an otherwise well-maintained home look neglected.

Estate agents frequently note that visible mould or algae:

  • Deters potential buyers

  • Suggests damp issues

  • Lowers perceived maintenance standards

Routine exterior cleaning is a small investment compared to the potential reduction in asking price or buyer interest.


Cleaning as Part of Wider Exterior Care

Siding should never be cleaned in isolation. Its condition is closely linked to gutters, roofs, paths, and drainage systems.

Blocked gutters, for example, can overflow and repeatedly soak walls, undoing even the most thorough cleaning efforts.

Taking a holistic view of exterior maintenance ensures results last longer and reduces repeat work.


Seasonal Planning for Best Results

Timing matters more than many people realise. Cleaning during freezing conditions can trap moisture, while cleaning during heatwaves can cause products to dry too quickly.

Best practice is to:

  • Avoid frost and extreme heat

  • Choose dry, overcast days

  • Allow sufficient drying time

This approach improves cleaning effectiveness and reduces the risk of marks or residue.


Building a Long-Term Care Routine

Rather than reacting to visible growth, a proactive routine keeps siding consistently clean and protected.

A simple long-term plan includes:

  • Annual inspection

  • Light wash before heavy growth forms

  • Targeted treatment of problem areas

Over time, this routine reduces effort, lowers costs, and keeps exterior walls looking fresh year after year 😊.

How Moisture Becomes Trapped Behind Siding

One often overlooked issue is moisture retention behind siding rather than on the visible surface. Poor ventilation, blocked drainage channels, or incorrectly sealed joints can allow water to sit unseen for long periods.

When moisture becomes trapped:

  • Mould can grow beneath the surface

  • Staining may reappear quickly after cleaning

  • Structural materials can begin to deteriorate

This hidden damp environment feeds surface growth from behind, making repeated cleaning feel ineffective. Ensuring water can escape and air can circulate is just as important as cleaning the exterior face of the siding.


Why Consistency Matters More Than Intensity

Many homeowners only address mould and algae once the problem becomes severe, often using strong treatments in a single session. While this may provide short-term results, it rarely prevents regrowth.

Consistent, moderate cleaning:

  • Reduces the need for aggressive chemicals

  • Preserves finishes and coatings

  • Keeps spores from establishing

A steady maintenance approach is gentler on siding and far more effective long term, saving time, effort, and money 💷 while keeping exterior walls in a constantly presentable condition.

Continue Reading

6-The-Complete-Guide-to-Soft-Washing-Roofs-Without-Damage

The Complete Guide to Soft Washing Roofs Without Damage

Introduction to Soft Washing Roofs 🧼🏠

Soft washing is a low-pressure cleaning method used to remove biological growth like moss, algae, lichen and dirt from roof surfaces. Unlike high-pressure jetting, which can damage tiles and shingles, soft washing uses eco-friendly chemical solutions and gentle water flow to clean deeply without causing harm to the roof structure.

Soft washing can:

  • Make a roof look new again

  • Reduce future regrowth of moss and algae

  • Extend the life of roofing materials

  • Improve kerb appeal and property value

⚠️ Safety first: Roof cleaning can be dangerous. Falls from height and chemical exposure are serious risks. Always prepare, use correct equipment and follow safety precautions.


What Soft Washing Is — and Isn’t

Feature Soft Washing Pressure Washing
Water pressure Low (below 1000 psi) High (1000–4000+ psi)
Risk of tile/shingle damage Minimal High
Effective on organic growth Excellent with chemicals Short-term only
Best for Roofs, cladding, render Hard surfaces like driveways
Chemical use Essential Optional

Soft washing is not just pressure washing at a lower setting. It’s a method that combines specialist cleaning solutions with controlled application to kill organic growth at its roots.


Why Soft Washing Is Better for Roofs

Roofs are delicate. Tiles and shingles can crack or loosen under high pressure. Soft washing:

  • Uses biodegradable cleaning agents to break down biological matter

  • Allows chemicals time to kill growth rather than just blast it off

  • Protects gutters, windows and landscaping

  • Causes less splashback and mess

⚠️ Never assume that cheaper, aggressive pressure washing is acceptable. On roofs, this commonly causes damage.


Choosing the Right Soft Wash Chemicals

To soft wash effectively, you need cleaning products designed for roof biology removal. One trusted source for these is the range available at https://puresealservices.co.uk/.

These products typically include:

  • Algaecides

  • Moss and lichen killers

  • Surfactants to help chemical adhesion

  • Rust stain removers (for metal roofs)

👉 Important: Always follow the instructions on any product label and use the correct dilution rate. Excessive strength can harm plants and the environment; insufficient strength may not clean effectively.


Essential PPE (Personal Protective Equipment)

Before you begin, gather the following PPE:

PPE Item Purpose
Safety harness and secured anchor Prevent falls
Sturdy, non-slip boots Good grip on tiles/slates
Gloves (chemical resistant) Protect skin from solution
Eye protection Prevent splashes into eyes
Long-sleeved clothing Protect skin from spray
Respirator or mask Avoid inhaling mist

🪖 Tip: Even on cool, overcast days, mist from cleaning solutions can travel — respirators help avoid breathing chemicals.


Tools and Equipment Checklist

To soft wash safely and effectively you will need:

  • A soft wash system (low-pressure pump and spray wand)

  • Extension poles for high areas

  • Buckets and measuring jugs

  • A ladder with stabiliser

  • Rope or safety lines

  • Brush with soft bristles (for stubborn spots)

📌 Warning: Do not use a pressure washer with a turbo nozzle for roof cleaning — this is damaging.


Pre-Work Preparations

Before you start spraying:

  1. Check the weather forecast: Pick a calm, dry day. Wind can blow chemicals onto plants and walls.

  2. Protect plants: Cover delicate plants and shrubs around the house with tarpaulin or plastic sheets.

  3. Clear access: Remove obstacles from around the house and garden.

  4. Plan your route: Know where the ladder will go and how you will access different roof sections safely.

  5. Warn householders: Tell everyone in the property about the work to avoid accidental exposure.


Step-by-Step Soft Washing Process

Step 1: Set Up Safety Equipment

  • Secure a stable ladder with a ladder stabiliser.

  • Attach a safety harness and rope to a secure anchor point.

  • Make sure someone else is at ground level in case help is needed.

Step 2: Mix the Cleaning Solution

Use the cleaning products from https://puresealservices.co.uk/ according to the manufacturer’s dilution instructions. Prepare only what you need.

Example dilution table:

Roof Size Cleaning Solution Fresh Water
Small (50 m²) 5 L 15–20 L
Medium (100 m²) 10 L 30–40 L
Large (150 m²+) 15 L 50–60 L

💧 Always mix in a well-ventilated area and wear PPE.

Step 3: Apply the Solution 💦

  • Starting from the lowest section of the roof, spray the solution upwards.

  • Allow the cleaning chemicals to cling and work for 15–30 minutes — never let them dry on the surface.

  • Do not scrub aggressively; let the solution break down growth.

Step 4: Rinse Carefully (Optional)

In many soft wash systems, a final low-pressure rinse is used to remove the loosened debris. If rinsing:

  • Use clean water only

  • Keep the pressure low

  • Work top to bottom

💡 In some cases, letting rain naturally rinse the roof after chemical application is sufficient.

Step 5: Inspect the Roof

After application and any rinsing:

  • Check for missed patches

  • Spot-treat these areas

  • Ensure gutters are clear of debris


Safety Tips While on the Roof 🛖

Working at height is inherently risky. Observe these rules:

✔ Always have someone nearby on the ground
✔ Avoid working when tiles are wet and slippery
✔ Use a rope ladder or platform where possible
✔ Take regular breaks — fatigue causes accidents
✔ Never lean too far to one side

Do not attempt if you are uncomfortable with heights. Professional assistance might be safer.


Environmental and Neighbourhood Considerations

Soft washing chemicals can affect nearby plants and soil. To minimise impact:

  • Cover gardens with sheeting

  • Rinse only onto areas that won’t be damaged

  • Avoid extreme wind conditions

  • Use biodegradable products when possible

💡 Many products from https://puresealservices.co.uk/ are formulated to be environmentally responsible — but proper application is still crucial.


How Often Should You Soft Wash Your Roof?

The frequency of roof cleaning depends on several factors:

Roof Type Typical Cleaning Interval
Concrete tiles Every 2–4 years
Slate roofs Every 3–5 years
Metal roofs Every 3–6 years
Shingle roofs Every 2–4 years

☁️ Shaded areas, high humidity and nearby trees can increase moss and algae growth.


Signs Your Roof Needs Soft Washing

You might need to clean your roof if you notice:

🟢 Green or black streaks
🟢 Moss or lichen patches
🟢 Blocked gutters due to debris
🟢 Slippery surfaces when wet
🟢 Loss of roof colour and brightness

If these are present, soft washing can restore appearance and function.


Cost Estimates (UK £)

Here’s a rough guide to how costs may stack up if you are buying your own equipment and products:

Cost Item Typical UK Price
Soft wash chemical concentrate £25–£80 per 5 L
Low-pressure pump system £150–£500
PPE (gloves, mask, goggles) £30–£80
Ladder stabiliser £30–£60
Safety harness £40–£90

💷 Example total for DIY: £275–£810+ depending on equipment quality.


Common Mistakes to Avoid ❌

Below are pitfalls that can undermine your efforts:

❗ Using high pressure — damages tiles
❗ Inadequate PPE — risk of injury
❗ Ignoring safety harness — dangerous falls
❗ Wrong chemical dilution — ineffective cleaning
❗ Spraying in wind — chemicals drift onto plants

Avoid these by planning properly and taking your time.


Troubleshooting: What If It’s Not Working?

If you follow the steps but don’t see results:

🔹 Your solution may be too weak — check dilution
🔹 Moss may be very thick — spot treat stubborn areas
🔹 Weather may dilute the solution too fast — check forecast
🔹 Dirt may be deeply embedded — repeat application after a few days

🧠 Patience is key. Soft washing works by chemical action, not brute force.


Aftercare and Prevention

Once your roof is clean:

🌿 Trim overhanging branches — less shade means slower moss growth
🧹 Keep gutters clear — standing water encourages moss
🧽 Annual inspection — fix small problems early

A tidy roof stays cleaner for longer and reduces future maintenance.


Final Thoughts Before You Begin

Soft washing is a safe, effective way to restore your roof when done with care and right equipment. It’s about respecting the surface and using chemistry intelligently rather than brute force.

Remember:

✅ Prepare thoroughly
✅ Use correct PPE
✅ Pick suitable products — many available at https://puresealservices.co.uk/
✅ Take your time and prioritise safety


If you want specific product recommendations from the range at https://puresealservices.co.uk/ for your roof type (tiles, slate, metal), tell me the roof material and I can suggest exactly what to use! 😊

Understanding Different Roof Materials and How They React to Soft Washing 🏠

Not all roofs respond the same way to soft washing, and understanding your roof material is essential before applying any cleaning solution. In the UK, the most common roof types include concrete tiles, clay tiles, slate, metal sheeting and asphalt shingles.

Concrete tiles are porous and tend to harbour moss and algae deeply. Soft washing is ideal here, as the chemical solution penetrates the pores and kills growth below the surface. Clay tiles are less porous but more brittle, so gentle application and minimal foot traffic are crucial. Slate roofs are durable but can delaminate if walked on incorrectly, meaning extra care is needed when positioning ladders and safety lines.

Metal roofs respond very well to soft washing, especially when dealing with algae staining, but care must be taken to avoid corrosive residues. Asphalt shingles should only ever be soft washed, as pressure washing strips away protective granules and dramatically shortens lifespan.

Knowing your roof type helps you choose the right dilution strength, dwell time and rinsing method.


Managing Run-Off and Protecting Gutters and Drainage 🌧️

One commonly overlooked aspect of soft washing is managing chemical run-off. When cleaning solutions flow off the roof, they often enter gutters, downpipes and surface drains. If not controlled properly, this can cause blockages or harm surrounding soil.

Before starting, ensure gutters are free from heavy debris such as moss clumps and leaves. Blocked gutters can overflow during application, sending cleaning solution down walls and onto pathways. Temporarily blocking downpipes and collecting run-off in containers can help, especially when working near delicate planting.

After cleaning, flush gutters and downpipes thoroughly with clean water. This prevents residue build-up and ensures rainwater systems continue working as intended. Good run-off management also reduces the risk of staining paving or affecting lawns, which helps keep the overall job tidy and professional-looking.


Weather Conditions and Timing Your Roof Clean Properly ⛅

Timing plays a huge role in how effective and safe soft washing is. Ideal conditions are dry, overcast days with little wind. Strong sunlight can cause cleaning solutions to dry too quickly, reducing effectiveness and increasing the chance of residue marks. Windy conditions increase the risk of chemical drift onto neighbouring properties or gardens.

Rain immediately after application can dilute the solution before it has time to work, while frost makes roofs extremely slippery and unsafe. In the UK climate, spring and early autumn are often the most reliable seasons for roof cleaning.

Early mornings can also be beneficial, as temperatures are cooler and surfaces are less likely to dry too fast. Planning around weather forecasts isn’t just about results — it’s a major safety consideration too.


Health and Legal Responsibilities When Cleaning a Roof ⚠️

Soft washing a roof isn’t just a technical task — it comes with health and legal responsibilities, especially when working at height. Even on domestic properties, falls from roofs are one of the leading causes of serious injury.

If you’re carrying out the work yourself, you’re responsible for ensuring safe access, proper fall prevention and correct handling of chemicals. This includes reading safety data sheets, wearing suitable PPE and keeping others away from the work area.

Care should also be taken to prevent overspray or run-off affecting neighbouring properties. Damage caused by chemicals or falling debris could result in liability issues. Taking a cautious, methodical approach reduces risk and ensures the job is carried out responsibly.


Long-Term Benefits of Soft Washing Compared to Aggressive Cleaning 🌱

Soft washing offers benefits that go far beyond immediate appearance. By killing moss, algae and lichen at a microscopic level, it slows regrowth significantly compared to aggressive methods that simply remove visible debris.

Over time, reduced biological growth helps tiles dry faster after rainfall, lowering the risk of frost damage and surface erosion. Clean roofs also allow rainwater to flow properly into gutters, reducing damp issues around fascias and walls.

From a financial perspective, gentle cleaning can delay costly repairs or premature roof replacement. While it may require patience, soft washing is an investment in the long-term health of your roof rather than a short-term cosmetic fix.


Planning Ongoing Maintenance After Soft Washing 🧹

Once a roof has been soft washed, maintaining it becomes much easier. Regular visual inspections — ideally once or twice a year — help catch early signs of regrowth before they become established. Clearing gutters and trimming back nearby trees significantly reduces moisture retention and shade, both of which encourage moss.

Some homeowners choose to apply preventative treatments every few years to keep growth at bay. These treatments are lighter than full cleans and help extend the clean appearance without intensive work.

By adopting a proactive maintenance approach, the need for frequent deep cleaning is reduced, saving time, money and effort while keeping the roof in good condition year after year 😊

Continue Reading

5-Pressure-Washing-a-Driveway-Step-by-Step-Guide

Pressure Washing a Driveway: Step-by-Step Guide

How to Clean a Driveway with a Pressure Washer 🚿💪

Keeping your driveway clean not only improves the appearance of your home but also helps prevent the build-up of moss, algae, oil stains, and weeds that can deteriorate the surface over time. One of the most effective ways to rejuvenate your driveway is with a pressure washer. In this comprehensive guide, we’ll walk you through every step of cleaning a driveway using a pressure washer — from preparation and safety to techniques, costs, maintenance and troubleshooting.

We’ll also reference a source of quality cleaning products you can use alongside your pressure washer: https://puresealservices.co.uk/.


Why Use a Pressure Washer for Driveways?

A pressure washer delivers a powerful stream of high-pressure water that can blast away dirt, grime, and stubborn stains far more effectively than a standard garden hose. Whether your driveway is concrete, block paved, tarmacadam (asphalt), or natural stone, a pressure washer can dramatically improve its appearance.

Benefits of Pressure Washing Your Driveway

Benefit Description
Deep Cleaning High pressure removes embedded dirt and organic growth.
Quick Results Tasks that take hours by hand can be done in minutes.
Prepares Surface Ideal before sealing or repainting.
Enhances Curb Appeal Makes your driveway look fresh and new.
Prevents Damage Removes moss and weeds that break up surfaces.

Pressure washers aren’t just for big job sites — there are many models suitable for domestic use that balance power with ease of use.


What You’ll Need 🧰

Before you start, gather the necessary equipment and cleaning products. Preparation is key to a successful cleaning job.

Essential Equipment

  • Pressure washer – Electric or petrol model, depending on size of driveway.

  • Surface cleaner attachment – Optional but very useful for large flat areas.

  • Protective clothing – Safety goggles, gloves, sturdy footwear.

  • Broom or stiff brush – For initial sweeping.

  • Weed killer – For stubborn growth between paving stones (optional).

  • Driveway cleaner solution – For example products from https://puresealservices.co.uk/.

  • Garden hose – To pre-rinse and rinse afterwards.

Recommended Cleaning Products

When using detergents or cleaning solutions, choose ones formulated for driveways and pressure washers. Products from https://puresealservices.co.uk/ include degreasers and surface cleaners that can help break down oil, grease and grime before you apply water pressure.

💡 Tip: Always follow the manufacturer’s instructions when using chemicals with your pressure washer to avoid damage to surfaces or yourself.


Safety First ⚠️

Pressure washers are powerful tools. Respecting safety guidelines will help you avoid injury and damage.

Safety Checklist

  • Wear eye protection – high-pressure water can send debris flying.

  • Use sturdy, non-slip footwear.

  • Do not point the pressure washer at people, pets, windows, or electrical fittings.

  • Be aware that high pressure can damage softer surfaces.

  • Avoid using ladders while pressure washing — the recoil can destabilise you.

  • Keep children and pets indoors during the cleaning process.


Preparing Your Driveway

Before you even switch on the pressure washer, some preparatory steps will make the job easier and more effective.

Step 1: Clear the Area

Remove vehicles, plant pots, outdoor furniture, bins and other obstacles from the driveway. Sweep away loose debris with a broom.

Step 2: Pre-Tackle Problem Areas

Identify oil stains, rust marks, or patches of algae/moss. Apply a suitable cleaning solution (e.g., a degreaser from https://puresealservices.co.uk/) and allow it to sit for the recommended time so it can penetrate tough stains.

Step 3: Wet the Surface

Using a garden hose, dampen the driveway. This reduces the chance that the detergent dries out too quickly and helps the pressure washer work more efficiently.


Pressure Washing Techniques

Now for the main event! How you use your pressure washer makes a big difference in results.

Choosing the Right Nozzle

Pressure washers come with a variety of nozzles, each with a different spray pattern:

Nozzle Colour Spray Angle Use
Red Very concentrated, high pressure — only for very stubborn stains and careful use.
Yellow 15° Great for tough dirt and deep cleaning.
Green 25° General cleaning — ideal for most driveway work.
White 40° Light cleaning and rinsing.
Black Low pressure For applying detergents.

💡 General rule: Start with a wider spray and only switch to narrower patterns if you need more power.


Cleaning in Sections

Break your driveway into manageable sections — this keeps your work organised and ensures you don’t miss any areas.

  1. Work Systematically: Start at the top or one corner and work your way across in lines. Overlap each pass slightly for even cleaning.

  2. Maintain Distance: Keep the nozzle around 20–30cm (8–12 inches) from the surface. Too close and you could damage the driveway; too far and you lose cleaning power.

  3. Use a Surface Cleaner: If you have a surface cleaner attachment, this helps speed up the process and gives a uniform finish.

  4. Rinse as You Go: After each section, go over it with clean water to prevent detergent residue from drying on the surface.


Dealing With Specific Stains

Different stains require different approaches:

Oil & Grease

  1. Apply a degreaser from https://puresealservices.co.uk/.

  2. Allow it to sit for the recommended time (often 10–15 minutes).

  3. Use a narrow spray (15° or 25°) and work the stain from the outside in.

  4. Rinse thoroughly.

Moss and Algae

Use a cleaning solution designed to kill organic matter. After applying and letting it act, pressure wash with a medium nozzle.

Rust Marks

Rust removers formulated for concrete can help. Avoid overly abrasive techniques that could etch the surface.


After Cleaning: Sealing & Protection 🛡️

Cleaning your driveway is often followed by sealing, which protects the surface from future stains and weathering.

Why Seal?

Benefit Result
Prevents future stains Liquids bead rather than soak in
Reduces moss and weed growth Harder surface deters seeds germinating
Enhances colour Makes driveway look newer

Products from https://puresealservices.co.uk/ include sealers suitable for various driveway types. Always apply sealant when the surface is completely dry (often 24–48 hours after washing).


Cost Guide 💷

Here’s an approximate breakdown of what you might expect to spend when cleaning your driveway with a pressure washer:

Item Approximate Cost
Pressure washer (purchase) £120 – £500+
Surface cleaner attachment £30 – £120
Cleaning detergents & sealers £10 – £60
Optional: Petrol fuel £10 – £30
Total (DIY) £170 – £710+

💡 Tip: Hiring a pressure washer can reduce initial cost for one-off jobs. If you plan regular maintenance, owning one may be more cost-effective.


Common Mistakes to Avoid ❌

Even experienced DIYers can slip up. Here are frequent mistakes and how to avoid them:

Mistake Solution
Using too much pressure Start with lower settings and increase if necessary.
Not pre-treating stains Apply proper detergents before washing.
Pressure washing in hot, sunny weather Clean early morning or late afternoon to prevent quick drying.
Ignoring safety Wear protective gear and be cautious.
Rushing the job Work methodically for best results.

Maintenance Schedule 📅

Once your driveway is clean and sealed, maintenance helps keep it looking great:

Regular Tasks

  • Weekly: Sweep loose debris.

  • Monthly: Hose surface to prevent build-up.

  • Seasonal: Pressure wash and re-apply sealer if needed.

Consistency pays off — frequent light cleaning prevents heavier dirt build-up that requires more intensive work.


Environmental Considerations 🌍

When washing outdoors, consider where the water runoff goes. Avoid allowing dirty water to enter storm drains directly. Use environmentally friendly detergents where possible, and try to capture and dispose of wastewater responsibly.


Pressure Washer Settings Overview

Getting the pressure and flow rate right can make your job easier and safer.

Pressure Level (PSI) Best For Notes
Up to 1500 PSI Light cleaning Suitable for gentle sanitising.
1500–2500 PSI Standard driveway cleaning Ideal for most domestic jobs.
Above 2500 PSI Heavy stains Use with care — can damage surfaces.

Electric models are usually sufficient for most driveways and are quieter and easier to maintain.


Troubleshooting Common Problems 🔍

Even with careful preparation, problems can arise.

Streaks After Washing

  • Cause: Uneven pressure or residue.

  • Fix: Rinse thoroughly, and make sure nozzles are clean.

Pressure Washer Not Starting

  • Cause: Fuel issues (petrol models) or electrical supply problem (electric).

  • Fix: Check power supply, cords, and fuel/oil levels.

Surface Damage

  • Cause: Too close or too powerful a jet.

  • Fix: Reduce pressure or use a wider spray nozzle.


Case Study: Before & After (Hypothetical)

Here’s a simple comparison to help visualise the impact of pressure washing:

Aspect Before Cleaning After Cleaning
Colour Dull, grey Bright, restored
Moss/Weeds Present between slabs Removed
Oil Stains Visible dark patches Significantly reduced
Overall Appearance Tired look Fresh, renewed

Summary of Steps

To recap the process in a user-friendly checklist:

  1. Clear the driveway of debris and obstacles.

  2. Pre-treat stains with the right solutions (e.g., from https://puresealservices.co.uk/).

  3. Sweep and wet surface.

  4. Select correct nozzle for your pressure washer.

  5. Work in sections, keeping even distance from surface.

  6. Rinse as you go.

  7. Allow to dry fully before sealing.

  8. Apply sealer if desired for protection.

  9. Maintain regularly with light cleaning.

Seasonal Driveway Cleaning Tips 🌦️

The time of year plays a big role in how effective driveway pressure washing will be. Understanding seasonal conditions can help you plan the best cleaning schedule and avoid unnecessary effort.

Spring

Spring is one of the best times to pressure wash a driveway. Winter grime, salt residue, algae, and moss tend to accumulate during colder months. Temperatures are mild enough to allow cleaning solutions to work effectively without drying too quickly.

Summer

Summer cleaning can be effective but should be done early in the morning or later in the evening. Strong sunlight can cause detergents to dry too fast, leaving residue or streaks. Always keep the surface damp when using any cleaning solution.

Autumn

Autumn cleaning helps remove falling leaves, organic stains, and early moss growth before winter sets in. It’s also an ideal time to clean and seal the driveway to protect it from frost damage.

Winter

Pressure washing in winter is generally not recommended. Freezing temperatures can cause water to expand in cracks, leading to surface damage. If necessary, only clean during milder spells and ensure proper drainage.


Driveway Types and How Pressure Washing Affects Them 🧱

Not all driveways respond the same way to pressure washing. Adjusting your approach based on surface material is essential.

Driveway Type Cleaning Approach Special Considerations
Block paving Medium pressure with wide nozzle Re-sanding may be needed after cleaning
Concrete Medium to high pressure Avoid lingering in one spot
Tarmac Low pressure only High pressure can cause pitting
Resin-bound Low to medium pressure Avoid aggressive nozzles
Natural stone Medium pressure Some stones are porous

💡 Helpful tip: Always test a small, hidden area first to check how the surface reacts before committing to the whole driveway.


Managing Joint Sand After Pressure Washing 🧹

One often overlooked aspect of driveway cleaning—especially block paving—is joint sand displacement. Pressure washing can remove the sand between blocks, which is essential for structural stability.

Why Joint Sand Matters

  • Prevents block movement

  • Reduces weed growth

  • Helps distribute weight evenly

When to Re-Sand

Once the driveway is completely dry (usually 24 hours after cleaning), inspect the joints. If sand levels are low, re-sanding is recommended before sealing.

Best Practice

  • Use kiln-dried sand

  • Sweep it evenly into joints

  • Compact gently with a broom

  • Avoid heavy traffic for at least 24 hours

Skipping this step can shorten the lifespan of your driveway and undo much of the hard work you’ve just completed.


How Long Results Should Last ⏳

A properly pressure-washed driveway doesn’t just look good for a few days — with the right care, results can last months or even years.

Factor Impact on Cleanliness Duration
Weather exposure Heavy rain and shade encourage regrowth
Surface type Porous surfaces stain faster
Sealing Extends cleanliness significantly
Foot and vehicle traffic Higher use leads to faster re-soiling

In general:

  • Unsealed driveways: 6–12 months of noticeable improvement

  • Sealed driveways: 1–3 years with basic maintenance

Regular light cleaning and sweeping dramatically reduce the need for frequent pressure washing.


Signs Your Driveway Needs Cleaning Again 👀

Knowing when to clean your driveway again prevents long-term damage and keeps it looking its best.

Visual Indicators

  • Green patches forming in shaded areas

  • Dark oil or tyre marks reappearing

  • Uneven colouring or dull patches

  • Slippery surface after rain

Safety Indicators

  • Reduced grip when walking

  • Increased slipping risk during wet weather

Addressing these early with a pressure washer is far easier than waiting until stains become deeply embedded.

Continue Reading