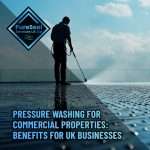
Pressure Washing for Commercial Properties: Benefits for UK Businesses
Commercial properties create powerful first impressions. Whether you operate a retail park, office complex, industrial facility, hotel, restaurant, healthcare premises, or educational institution, the appearance of your building directly influences how customers, clients, employees, and visitors perceive your business.
Over time, external surfaces become contaminated with dirt, algae, moss, lichen, chewing gum, oil stains, vehicle emissions, and general environmental pollution. These issues can make even well-maintained premises appear neglected and unprofessional.
Professional pressure washing is one of the most effective methods of restoring and maintaining commercial properties. Businesses across the UK increasingly invest in scheduled exterior cleaning programmes to protect their assets, improve safety, and enhance their brand image.
For businesses seeking a premium commercial cleaning service,
Pure Seal Services provides professional pressure washing solutions tailored to a wide range of commercial environments.
What Is Commercial Pressure Washing?
Commercial pressure washing involves the use of specialised equipment that delivers water at controlled pressures to remove contaminants from external surfaces.
Unlike domestic cleaning, commercial pressure washing often requires larger-scale equipment, trained operatives, site-specific risk assessments, and techniques adapted to different materials.
Common surfaces that can be pressure washed include:
- Car parks
- Concrete yards
- Paved walkways
- Building facades
- Loading bays
- Service roads
- Warehouse exteriors
- Retail forecourts
- Hotel entrances
- School playgrounds
- Industrial premises
- Commercial patios and seating areas
The goal is not simply to improve appearance but also to maintain safety, prolong surface lifespan, and support property maintenance programmes.
Why Appearance Matters for Commercial Properties
First impressions are formed within seconds. Customers often make assumptions about a business based on the cleanliness and condition of its premises before they even enter the building.
A clean exterior can communicate:
| Positive Impression |
Business Benefit |
| Professionalism |
Builds customer confidence |
| Attention to detail |
Enhances brand reputation |
| Care for premises |
Creates trust |
| Investment in standards |
Improves client perception |
| Clean environment |
Encourages repeat visits |
Conversely, stained paving, algae-covered walkways, dirty walls, and neglected entrances can create a negative impression regardless of the quality of products or services offered inside.
Pressure washing helps ensure your property consistently reflects the standards of your business.
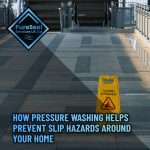
Improved Health and Safety
One of the most significant benefits of commercial pressure washing is the reduction of slip and trip hazards.
External surfaces are constantly exposed to:
- Moss growth
- Algae
- Lichen
- Mud
- Oil deposits
- Food waste
- Leaf debris
- Chewing gum
These contaminants can create dangerous walking conditions, particularly during wet weather.
Regular pressure washing helps businesses maintain safer environments for:
- Employees
- Customers
- Visitors
- Contractors
- Delivery drivers
Common Slip Hazards Removed Through Pressure Washing
| Hazard |
Risk Level |
| Algae |
High |
| Moss |
High |
| Wet leaf build-up |
Medium to High |
| Oil contamination |
High |
| Food spillages |
Medium |
| Chewing gum accumulation |
Medium |
For commercial property owners, reducing slip hazards can help support compliance with workplace safety responsibilities while minimising the likelihood of accidents occurring on-site.
Protecting Building Materials
External surfaces are constantly subjected to weathering and environmental contamination.
Over time, dirt and biological growth can damage:
- Concrete
- Block paving
- Brickwork
- Stone surfaces
- Render
- Tarmac
- Cladding
Organic growth such as moss and algae can trap moisture against surfaces. This prolonged moisture retention may accelerate deterioration and increase maintenance requirements.
Routine pressure washing helps remove these contaminants before they cause long-term damage.
Surface Protection Benefits
| Surface Type |
Benefit of Pressure Washing |
| Block paving |
Reduces weed and moss growth |
| Concrete |
Removes staining and contamination |
| Brickwork |
Prevents biological growth build-up |
| Stone |
Helps preserve appearance |
| Render |
Reduces algae discolouration |
| Cladding |
Restores professional appearance |
Investing in preventative maintenance is often considerably more cost-effective than replacing damaged surfaces.
Enhancing Brand Image
Your premises are an extension of your brand.
For customer-facing businesses such as:
- Hotels
- Restaurants
- Retail centres
- Car dealerships
- Leisure facilities
- Healthcare providers
The condition of the external environment can significantly influence customer perceptions.
A professionally cleaned exterior demonstrates that a business takes pride in its operations.
Pressure washing can instantly improve:
- Entrance areas
- Customer walkways
- Forecourts
- Parking facilities
- Outdoor seating areas
- Building frontages
These improvements help create a more welcoming environment that supports customer confidence and strengthens brand reputation.
Increased Property Value
Commercial property represents a substantial investment.
Maintaining exterior surfaces can contribute to preserving property value over the long term.
Potential buyers, tenants, investors, and surveyors often assess the condition of external areas when evaluating a property.
Regular pressure washing helps prevent visible deterioration and demonstrates that the property has been actively maintained.
Factors That Influence Property Appeal
| Property Feature |
Impact of Professional Cleaning |
| External paving |
Improved appearance |
| Car parks |
Enhanced presentation |
| Building facade |
Stronger kerb appeal |
| Walkways |
Better safety and aesthetics |
| Entrance areas |
Positive first impression |
Clean, well-maintained premises are generally more attractive to prospective tenants and investors.
Creating a Better Environment for Employees
Workplace appearance can influence employee morale and satisfaction.
A clean and professional environment contributes to:
- Improved workplace pride
- Better staff perception of the business
- Enhanced visitor experiences
- Greater confidence when hosting clients
While interior cleanliness often receives significant attention, exterior areas also form part of the overall workplace environment.
Pressure washing can transform neglected outdoor spaces into attractive and professional surroundings that employees can be proud of.
Supporting Scheduled Property Maintenance
Commercial pressure washing works most effectively when incorporated into a planned maintenance programme.
Rather than waiting for surfaces to become heavily contaminated, businesses can benefit from regular cleaning schedules.
Typical Commercial Cleaning Frequencies
| Area |
Suggested Frequency |
| Customer entrances |
Every 3–6 months |
| Retail forecourts |
Every 3–6 months |
| Car parks |
Every 6–12 months |
| Industrial yards |
Every 6–12 months |
| Hotel entrances |
Every 3–6 months |
| Walkways |
Every 6 months |
| Building exteriors |
Every 12–24 months |
Actual requirements vary depending on usage levels, location, and environmental conditions.
Properties situated near busy roads or surrounded by trees may require more frequent cleaning.
Removal of Oil and Industrial Contamination
Industrial and commercial sites often experience contamination from:
- Vehicle traffic
- Fuel spills
- Hydraulic fluids
- Machinery operations
- Loading activities
These contaminants can create both visual and safety concerns.
Professional pressure washing equipment can remove substantial levels of contamination from:
- Loading bays
- Service yards
- Distribution centres
- Manufacturing facilities
- Vehicle depots
Regular cleaning helps maintain safer and more professional-looking operational areas.
Benefits for Retail Businesses
Retail premises rely heavily on customer perception.
A clean exterior can influence footfall and customer experience.
Pressure washing helps maintain:
- Shopping centre walkways
- Retail parks
- Store entrances
- Outdoor seating areas
- Car parks
- Delivery zones
Customers are more likely to associate a clean environment with professionalism and quality service.
Benefits for Hospitality Businesses
Hotels, restaurants, pubs, and leisure venues depend upon appearance to attract and retain customers.
Dirty paving, stained patios, and algae-covered entrances can negatively affect customer impressions.
Pressure washing can improve:
- Hotel entrances
- Restaurant terraces
- Beer gardens
- Courtyard areas
- Event venues
- Outdoor dining spaces
Clean exterior spaces help create positive guest experiences from the moment visitors arrive.
Environmental Considerations
Modern pressure washing techniques are increasingly focused on environmental responsibility.
Professional contractors assess:
- Water usage
- Run-off control
- Surface suitability
- Waste management procedures
Responsible cleaning methods help minimise environmental impact while still delivering excellent results.
Professional operators understand how to clean effectively without causing unnecessary damage to surrounding landscapes or drainage systems.
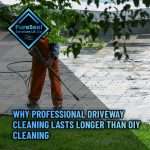
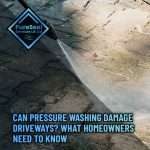
Why Professional Pressure Washing Delivers Better Results
Commercial pressure washing requires more than simply using high-pressure equipment.
Different surfaces require different approaches.
Using excessive pressure can damage:
- Brickwork
- Mortar joints
- Natural stone
- Render
- Certain paving materials
Professional contractors assess each surface individually and select appropriate cleaning methods.
Advantages of Professional Services
| Professional Service Benefit |
Why It Matters |
| Surface assessment |
Prevents damage |
| Commercial-grade equipment |
Superior cleaning performance |
| Trained operatives |
Consistent results |
| Risk assessments |
Improved safety |
| Insurance cover |
Additional protection |
| Tailored cleaning plans |
Better long-term maintenance |
This expertise helps ensure that cleaning is effective while protecting the integrity of the surfaces being treated.
Commercial Pressure Washing Costs in the UK
Commercial pressure washing costs vary depending on several factors:
- Site size
- Surface type
- Level of contamination
- Access requirements
- Water availability
- Frequency of cleaning
Premium providers generally focus on delivering superior workmanship, professional site management, comprehensive insurance, and long-lasting results rather than competing on the lowest price.
Factors Affecting Commercial Pressure Washing Costs
| Factor |
Impact on Price |
| Surface area |
Larger areas require more time and resources |
| Contamination levels |
Heavier soiling increases labour requirements |
| Site access |
Restricted access may increase costs |
| Frequency |
Scheduled maintenance can improve efficiency |
| Surface material |
Specialist treatments may be required |
Businesses seeking high-quality commercial cleaning often prioritise reliability, safety standards, professionalism, and long-term results over finding the cheapest available service.
Commercial Properties That Benefit from Pressure Washing
Pressure washing is suitable for a wide range of commercial environments.
Common Commercial Applications
| Property Type |
Areas Commonly Cleaned |
| Offices |
Entrances, paths, car parks |
| Retail parks |
Walkways, forecourts, loading zones |
| Warehouses |
Yards, loading bays, access roads |
| Hotels |
Entrances, patios, courtyards |
| Schools |
Playgrounds, pathways, entrances |
| Healthcare facilities |
Walkways, parking areas |
| Restaurants |
Outdoor dining areas, entrances |
| Industrial sites |
Service yards, hardstanding areas |
Each property type has unique cleaning requirements, making professional assessment essential for achieving the best results.
Choosing a Commercial Pressure Washing Contractor
When selecting a contractor, businesses should evaluate several important factors beyond price alone.
Key considerations include:
- Experience with commercial properties
- Insurance coverage
- Health and safety procedures
- Equipment quality
- Risk assessment processes
- Reputation
- Reliability
- Ability to manage large-scale projects
For businesses seeking a premium commercial cleaning service,
Pure Seal Services provides professional pressure washing solutions designed to help commercial properties maintain exceptional standards of cleanliness, safety, and presentation throughout the year.
Seasonal Challenges for UK Commercial Properties
The British climate presents a range of challenges for commercial property owners throughout the year. Frequent rainfall, damp conditions, falling leaves, frost, and fluctuating temperatures all contribute to the build-up of contaminants on external surfaces.
During autumn and winter, pathways and car parks often become covered with organic debris. Leaves can trap moisture against paving, creating ideal conditions for moss and algae growth. As temperatures drop, these surfaces can become increasingly slippery and hazardous for staff and visitors.
Spring and summer bring their own challenges. Warmer temperatures encourage rapid biological growth, particularly on shaded surfaces that receive limited sunlight. Green algae staining can quickly develop on paving, walls, and entrance areas, affecting the overall appearance of the property.
A proactive pressure washing programme helps businesses address these seasonal issues before they become significant problems.
Seasonal Cleaning Priorities
| Season |
Common Issues |
Pressure Washing Benefits |
| Spring |
Algae growth, winter grime |
Restores appearance after winter |
| Summer |
Dust, pollution, increased foot traffic |
Maintains presentation standards |
| Autumn |
Leaves, organic debris |
Reduces slip hazards |
| Winter |
Moss, damp surfaces, contamination |
Improves safety and accessibility |
By scheduling cleaning at strategic points throughout the year, businesses can maintain consistently high standards while reducing long-term maintenance costs.
Pressure Washing and Customer Confidence
Customers naturally form opinions about a business based on its surroundings. While many organisations invest heavily in marketing, branding, and customer service, the condition of their premises can undermine those efforts if external areas appear neglected.
For example, a customer approaching an office building with stained paving, dirty cladding, or moss-covered pathways may subconsciously question the standards maintained inside the building.
Pressure washing can help create a more positive customer experience by improving:
- Visual appeal
- Cleanliness standards
- Accessibility
- Safety perceptions
- Professional presentation
This is particularly important for businesses that regularly welcome members of the public, prospective clients, suppliers, or investors.
A clean and well-maintained exterior reinforces the message that attention to detail matters throughout the organisation.
The Impact of Traffic and Pollution
Commercial properties located near busy roads often experience accelerated surface contamination.
Vehicle emissions, tyre residue, brake dust, and airborne pollutants gradually accumulate on external surfaces. Over time, these contaminants can cause significant discolouration and staining.
Areas most affected include:
- Building facades
- Entrance pathways
- Forecourts
- Car parks
- Loading areas
- External walls
Without regular cleaning, pollution build-up can make relatively new properties appear considerably older than they are.
Professional pressure washing removes these contaminants and helps restore the original appearance of surfaces, allowing businesses to maintain a more professional image.
Maintaining Large Commercial Estates
For property management companies, facilities managers, and estate owners, maintaining multiple buildings across a site can present significant challenges.
Large commercial estates often include:
- Shared access roads
- Visitor car parks
- Pedestrian walkways
- Service areas
- Communal outdoor spaces
- Building entrances
These areas experience varying levels of traffic and contamination throughout the year.
Implementing a structured pressure washing programme helps maintain consistency across the entire site. This ensures that all areas remain clean, safe, and visually appealing rather than focusing solely on the most visible sections.
A well-maintained estate can also improve tenant satisfaction and support higher occupancy rates by creating a more attractive environment for businesses operating within the development.
Supporting Long-Term Asset Management
Commercial properties require ongoing investment to remain attractive, functional, and compliant with modern expectations.
Pressure washing should be viewed as part of a wider asset management strategy rather than a one-off cosmetic improvement.
Regular cleaning helps property owners:
- Identify maintenance issues earlier
- Reduce long-term repair costs
- Protect valuable external surfaces
- Preserve professional appearance
- Extend the lifespan of hard landscaping
When dirt, algae, and contamination are allowed to accumulate for extended periods, underlying defects can remain hidden until more extensive repairs become necessary.
Routine pressure washing allows surfaces to be inspected more effectively, helping property owners plan maintenance proactively rather than reacting to costly deterioration.
For businesses that take pride in their premises and wish to maintain a premium image, investing in professional pressure washing from
Pure Seal Services can form an important part of a comprehensive property maintenance programme, helping commercial buildings remain clean, safe, and visually impressive throughout the year.

 Artificial and Sports Surfaces
 Awnings / Canopies / Gazebos
 Block Paving
 Brickwork
 Composite Surfaces
 Decking / Timber
 Granite
 Imprinted Concrete
 Internal Masonry
 Limestone
 Marble
 Metal Cladding
 Polished or Honed Stone
 Porcelain
 Render
 Resin Bond
 Road and Rail Signs
 Roof Tiles / Slates
 Sandstone
 Slate
Slate Solar Panels and Glass
 Stone Sills and Pier Caps
 Tarmac and Asphalt
 Gutters & UPVC
 Acid Damage
 Biofilm
 Bitumen
 Blood
Blood Carbon
 Concrete / Grout / Mortar
 Copper Oxide
 Efflorescence
 Egg
Egg Failed Sealer
 Fire Damage
 Fuel / Oil
 Graffiti
 Grease / Fat / Cooking Oil
 Lawn Fertiliser
 Lead Carbonate
 Lead Oxide
 Paint Splashes
 Rust
Rust Tar & Glue
 Tannin Removers
 Traffic Film Removers
 Trapped Moisture / Sealer Repairs
 Urine Neutralisers