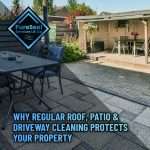
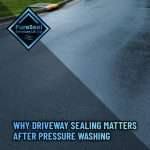
Understanding Lichen and Why It Forms on Patios

Understanding Lichen and Why It Forms on Patios

Lichen is one of those outdoor growths that tends to creep in quietly and then suddenly become very noticeable once it has established itself. It appears as pale green, grey, yellow or even slightly orange patches that cling tightly to patio slabs, block paving and natural stone surfaces. Unlike simple surface dirt, lichen is a living organism made up of algae and fungus working together, which is why it behaves differently from moss or algae alone. Patios are particularly vulnerable because they offer exactly what lichen needs to thrive: moisture, shade and a rough surface to anchor into. Over time, it slowly embeds itself into the microscopic pores of stone or concrete, making it more difficult to remove with standard cleaning methods. This is why many homeowners eventually turn to more advanced cleaning techniques, including pressure washing and specialist treatments. When carried out correctly, these methods can restore patios to a near-original condition without damaging the surface. Pureseal Services provides professional exterior cleaning solutions that deal with stubborn biological growth like lichen using controlled methods designed to protect the integrity of the patio while achieving a deep clean.

Why Lichen Is More Difficult to Remove Than Moss or Algae

Lichen is often confused with moss or algae, but it is significantly more resilient.

Key differences between patio growth types

Growth Type Appearance Root Structure Removal Difficulty
Algae Green slippery film Surface-level Easy
Moss Soft, thick green growth Shallow roots Moderate
Lichen Crusty, patchy growth Deeply embedded High
Unlike moss, which sits on top of the surface, lichen attaches itself firmly into the stone. This means scraping alone rarely works, and water pressure must be carefully combined with chemical treatment to fully break it down.

Common Types of Lichen Found on Patios

Different environments encourage different types of lichen growth. Understanding what you are dealing with helps determine the best removal method.

Crustose lichen

This is the most stubborn type, forming flat, crust-like patches that are tightly bonded to the surface.
  • Very difficult to remove manually
  • Often changes colour depending on moisture
  • Requires chemical and pressure treatment

Foliose lichen

This type has a leaf-like structure and slightly lifts away from the surface.
  • Easier to remove than crustose
  • Can be scraped after treatment
  • Still rooted into pores of stone

Fruticose lichen

This is more branched and shrubby in appearance.
  • Less common on patios
  • Usually found in shaded, damp areas
  • Can often be removed with combined methods

Why Lichen Grows on Patios in the First Place

Lichen does not appear randomly. It develops over time due to specific environmental conditions.

Main causes of lichen growth

Cause Effect on Patio
Shade Reduces drying time, encourages moisture retention
Poor drainage Water sits on surface longer
Organic debris Provides nutrients for growth
Weather exposure Alternating wet and dry conditions encourage spread
Lack of maintenance Allows spores to establish over time
North-facing patios and areas under trees are particularly prone to heavy lichen growth due to limited sunlight.

Tools and Equipment Needed for Lichen Removal

Removing lichen properly requires more than just a pressure washer. A combination of tools and treatments produces the best results.

Essential equipment list

Equipment Purpose
Pressure washer Removes loosened lichen and surface debris
Patio surface cleaner attachment Ensures even cleaning coverage
Biocide treatment Kills lichen at root level
Stiff-bristle brush Agitates stubborn patches
Scraper tool Removes thick, lifted growth
Protective gloves Safety when handling chemicals
Eye protection Prevents splash irritation
Watering can or sprayer Applies treatment evenly
The most important component in long-term removal is the biocide treatment, as it prevents regrowth after cleaning.

Step-by-Step Guide to Removing Lichen From Patios

A structured process is essential when dealing with lichen because incomplete removal often leads to rapid regrowth.

Step 1: Clear and prepare the patio

Remove furniture, pots and any loose objects. Sweep the entire area thoroughly to remove leaves, soil and surface debris. This ensures cleaning products can reach the lichen directly.

Step 2: Apply biocide treatment

A specialist outdoor biocide should be applied evenly across the patio surface.
  • Cover all affected areas
  • Ensure even distribution
  • Allow sufficient dwell time
This step is critical because it begins breaking down the lichen structure before any pressure is used.

Step 3: Allow treatment to work

Biocides need time to penetrate and kill the organism at its base. Depending on severity, this can range from several hours to a full day.

Step 4: Pressure wash the surface

Once the lichen has been weakened, use a pressure washer fitted with a surface cleaner.
  • Maintain consistent movement
  • Avoid concentrating on one spot
  • Use moderate pressure settings

Step 5: Target remaining patches

Any stubborn areas should be treated again with a brush and lightly rewashed.

Step 6: Final rinse and inspection

A full rinse removes any remaining residue and ensures the patio is evenly cleaned.

Recommended Pressure Settings for Patio Materials

Different patio materials respond differently to pressure washing, especially when lichen has been embedded for a long time.
Patio Material Recommended Pressure (PSI) Notes
Concrete slabs 2,000 – 3,000 PSI Can tolerate higher pressure
Natural stone 1,200 – 2,000 PSI Requires caution to avoid erosion
Sandstone 1,000 – 1,800 PSI Very porous, needs gentle approach
Limestone 800 – 1,500 PSI Easily damaged if over-washed
Block paving 1,500 – 2,500 PSI Joint sand may be affected
It is always safer to begin at a lower setting and increase gradually if needed.

Chemical Treatment vs Pressure Washing for Lichen

Both chemical and mechanical cleaning play a role, but neither is fully effective on its own.

Comparison of methods

Method Effectiveness Risk Level Best Use
Pressure washing only Moderate Medium Light surface growth
Chemical treatment only High (slow) Low Prevention and long-term control
Combined approach Very high Low to medium Heavy infestations
The most effective results always come from combining both methods in a controlled sequence.

Common Mistakes When Removing Lichen

Lichen removal is often done incorrectly, which leads to surface damage or quick regrowth.

Using pressure alone

High-pressure water may remove the visible layer but does not kill the organism beneath the surface.

Skipping biocide treatment

Without treatment, lichen often returns within weeks or months.

Using excessive pressure

Over-washing can erode stone surfaces, especially softer materials like sandstone.

Not allowing dwell time

Rushing the chemical process significantly reduces effectiveness.

Ignoring joints and edges

Lichen often spreads from shaded joints where moisture collects.

Surface-Specific Considerations for Patio Cleaning

Different patio materials require different handling techniques.

Natural stone patios

Natural stone is porous and delicate in many cases.
  • Requires low to moderate pressure
  • Benefits from longer biocide treatment
  • Can lose surface texture if over-cleaned

Concrete patios

Concrete is more durable but still porous.
  • Handles higher pressure
  • May show streaking if unevenly cleaned
  • Often benefits from surface cleaner attachments

Block paving patios

Block paving requires special attention to joint sand.
  • Pressure washing may dislodge jointing material
  • Re-sanding may be required afterwards
  • Even coverage is essential to avoid patchy results

Long-Term Prevention of Lichen Regrowth

Once lichen has been removed, preventing its return is just as important as the cleaning itself.

Preventative strategies

  • Regular biocide application
  • Keeping the patio clear of organic debris
  • Improving drainage to reduce standing water
  • Trimming back overhanging trees and shrubs
  • Routine light cleaning to prevent build-up

Seasonal Influence on Lichen Growth

Lichen does not grow evenly throughout the year. Seasonal changes significantly affect how quickly it spreads.

Seasonal growth patterns

Season Growth Activity Notes
Spring High Moist conditions encourage spread
Summer Moderate Slower growth due to drying
Autumn Very high Falling leaves increase organic matter
Winter High Damp, low sunlight conditions
Autumn and winter are typically the most problematic periods.

Professional Lichen Removal Services

In cases where lichen has become deeply embedded, professional treatment is often more effective and safer for the patio surface. Pureseal Services carries out lichen removal using controlled pressure systems combined with specialist treatments that are adjusted based on the type of stone and severity of growth. The focus is not just on removing visible patches, but on treating the root structure to reduce regrowth over time. Professional cleaning is particularly useful for:
  • Older patios with long-term build-up
  • Natural stone surfaces requiring careful handling
  • Large outdoor areas with extensive coverage
  • Patios previously damaged by incorrect DIY pressure washing

Cost of Professional Lichen Removal From Patios

Professional cleaning costs vary depending on patio size, material type and level of infestation. Lichen-heavy surfaces typically require more time and treatment, which affects pricing. Pureseal Services positions its work at the premium end of the market, reflecting the level of detail and care involved.

Typical pricing structure

Service Type Average Price Range
Small patio lichen removal £250 – £400
Medium patio deep clean £400 – £650
Large patio restoration £650 – £1,200
Heavy lichen infestation treatment £700 – £1,500
Patio cleaning + preventative treatment £900 – £1,800
Higher pricing reflects extended treatment time, specialist chemical use and controlled cleaning methods designed to protect the surface while delivering long-lasting results.

Behaviour of Patios After Lichen Removal

After lichen has been removed, patios often go through a short adjustment period as the surface settles.
  • Colour may appear brighter as embedded growth is removed
  • Slight texture changes may be visible in heavily affected areas
  • Drying patterns may highlight previous growth zones temporarily
  • Remaining spores may still exist but are inactive due to treatment
This is why preventative treatment plays such an important role in long-term results.

Advanced Methods for Removing Stubborn Lichen From Patios

Once lichen has been established for a long time, standard pressure washing and a single chemical treatment are often not enough. Older infestations tend to root deeper into the surface of stone or concrete, which means a more structured, multi-stage approach is needed to fully break it down.

Repeated biocide cycling

One of the most effective advanced methods is repeated biocide application over a controlled period. Instead of relying on a single treatment, the process is repeated in cycles:
  1. First application kills surface-level organisms
  2. Second application targets deeper root structures
  3. Third application prevents regrowth spores from activating
Cycle Stage Purpose Expected Outcome
Initial treatment Surface breakdown Visible softening of lichen
Secondary treatment Deeper penetration Reduced adhesion to stone
Final treatment Prevention Long-term suppression
This staged approach is particularly effective on patios that have been untreated for several years or have heavy shading and moisture retention.

Steam-assisted cleaning

In more delicate situations, low-pressure steam cleaning can be used as an alternative or supplement to traditional pressure washing. Steam helps loosen biological material without relying on high force. Benefits include:
  • Reduced risk of surface erosion
  • Better penetration into porous stone
  • Improved removal of fine lichen remnants
  • Lower water usage compared to full pressure washing
Steam is particularly useful for natural stone patios where preserving surface integrity is more important than aggressive cleaning.

Mechanical agitation techniques

In some cases, lichen forms a crust that cannot be removed with water pressure alone. Mechanical agitation is then used after chemical treatment has softened the growth.
Tool Type Use Case
Nylon brushes General surface agitation
Stiff bristle brushes Thick lichen patches
Scraper blades Heavy crust removal
Rotary brushes Large area uniform cleaning
The key is to avoid excessive force. The goal is to lift the weakened lichen rather than scrape the stone itself.

Deep Cleaning Different Patio Surface Conditions

Not all patios are in the same condition, and lichen behaves differently depending on age, exposure and material wear. Adjusting technique based on condition is essential for achieving a consistent finish.

Newly installed patios with early lichen growth

Early-stage lichen is easier to manage but still requires proper treatment.
  • Light biocide application is usually sufficient
  • Low-pressure washing removes surface growth quickly
  • Prevention is more important than restoration
If treated early, lichen rarely becomes a long-term issue on newer patios.

Moderately aged patios with established growth

This is where most residential patios fall. Lichen has usually been present for multiple seasons. Typical characteristics:
  • Visible crusting in shaded areas
  • Patchy distribution across slabs
  • Some surface pitting or porosity increase
Treatment approach:
  • Full biocide saturation
  • Medium-pressure surface cleaning
  • Focus on joints and edges where moisture collects

Heavily neglected patios

These require a far more intensive restoration process. Signs include:
  • Thick crusted lichen covering large areas
  • Deep discolouration of stone
  • Slippery surfaces due to biological build-up
  • Blocked drainage between slabs
In these cases, multiple cleaning passes are usually needed, often combined with restoration techniques to bring the patio back to a usable condition.

How Patio Material Age Affects Lichen Removal

The age and wear of patio materials directly influence how easily lichen can be removed.

Material porosity over time

Material Age Porosity Level Effect on Lichen
New (0–3 years) Low Limited penetration
Mid-age (3–10 years) Moderate Increasing adhesion
Old (10+ years) High Deep root embedding
Older patios are more absorbent, which means lichen can penetrate deeper into the structure, requiring longer treatment times and more careful pressure control.

Surface erosion considerations

Over time, patio surfaces naturally wear down due to weather exposure. This creates small grooves and pits where lichen can anchor more firmly. Excessive pressure washing on older stone can:
  • Widen surface cracks
  • Remove fine surface texture
  • Expose aggregate in concrete
  • Accelerate future biological growth
This is why controlled cleaning methods are essential rather than aggressive high-pressure blasting.

Environmental Factors That Influence Lichen Regrowth

Even after successful removal, environmental conditions will determine how quickly lichen may return.

Moisture retention patterns

Areas that remain damp for long periods are most at risk. Common causes include:
  • Poor drainage beneath slabs
  • Overhanging vegetation
  • North-facing garden layouts
  • Lack of airflow around patio edges
Reducing moisture retention is one of the most effective long-term prevention strategies.

Sunlight exposure levels

Lichen thrives in shaded environments.
Sun Exposure Lichen Risk
Full sun Low
Partial shade Moderate
Heavy shade High
Patios that receive limited direct sunlight will always require more frequent maintenance.

Organic debris accumulation

Leaves, soil and pollen act as a nutrient source for lichen. If left untreated:
  • Organic matter traps moisture
  • Microbial activity increases
  • Lichen colonies expand more rapidly
Regular sweeping and seasonal cleaning significantly reduce this risk.

Long-Term Patio Maintenance Strategy

Once a patio has been fully cleaned, maintaining it properly reduces the likelihood of lichen returning to the same severity.

Routine maintenance schedule

Frequency Maintenance Task Purpose
Weekly Light sweep Remove debris build-up
Monthly Water rinse Prevent surface contamination
Quarterly Spot biocide treatment Control early regrowth
Annually Full clean Reset surface condition
Every 2–3 years Protective treatment Long-term prevention
Consistency is more important than intensity when it comes to preventing lichen.

Preventative biocide application

Applying a preventative treatment after cleaning is one of the most effective ways to slow regrowth.
  • Keeps spores inactive
  • Reduces adhesion of new growth
  • Extends time between deep cleans
  • Improves overall patio appearance longevity
This is especially important in shaded or damp gardens.

Safety Considerations When Removing Lichen

Lichen removal involves both chemical and mechanical processes, so safety must be considered throughout.

Chemical handling safety

Biocides are effective but must be used responsibly.
  • Always avoid skin contact
  • Prevent runoff into plant beds where possible
  • Store chemicals securely away from children and pets
  • Follow controlled dilution ratios
Overuse of chemical products does not improve results and can damage surrounding landscaping.

Slip hazard risks during cleaning

Wet lichen becomes extremely slippery when loosened. Precautions include:
  • Working in small sections
  • Avoiding walking on treated areas
  • Using stable footing at all times
  • Keeping children and pets away during cleaning
Even after removal begins, surfaces can remain hazardous until fully rinsed.

Equipment handling risks

Pressure washers and surface cleaners require careful handling.
  • Maintain steady grip during operation
  • Avoid directing jets toward joints or weak stone edges
  • Ensure electrical safety with outdoor-rated equipment
  • Check hose connections regularly to prevent bursts

Professional Restoration Approach for Severe Lichen Cases

In more advanced cases, especially where patios have not been maintained for many years, a structured restoration approach is required rather than simple cleaning. Pureseal Services uses a methodical process designed to bring heavily affected patios back into usable condition without unnecessary surface damage. This typically includes:
  • Initial assessment of stone condition and porosity
  • Multi-stage biocide treatment over extended periods
  • Controlled pressure washing using surface cleaners
  • Targeted spot restoration for deep crust areas
  • Optional sealing to reduce future absorption
Each stage is adjusted depending on how the patio responds, rather than using a single fixed method. This tailored approach is particularly important for natural stone patios, where material variation can be significant even within the same installation.

Behaviour of Patios After Deep Lichen Removal

Once lichen has been removed, patios often continue to change slightly over the following weeks as they fully dry and settle. Common post-cleaning effects include:
  • Gradual colour lightening as moisture evaporates
  • Remaining faint marks from previous growth areas
  • Increased surface uniformity after drying
  • Improved slip resistance once fully dry
These changes are normal and often indicate that the cleaning process has successfully removed both surface and embedded growth.

Managing Expectations With Lichen Removal

One of the most important aspects of lichen treatment is understanding that results are influenced by the age, depth and environment of the growth. In some cases:
  • Deep staining may not fully disappear in one treatment
  • Heavily eroded stone may retain some visual marking
  • Shaded areas may require ongoing maintenance
  • Regrowth prevention is an ongoing process rather than a one-off fix
This is why structured cleaning combined with preventative care is far more effective than isolated treatments.

Practical Considerations for Long-Term Patio Care

Maintaining a patio after lichen removal is not just about cleaning, but about managing the conditions that allow it to form in the first place. Key practical measures include:
  • Improving drainage around slab edges
  • Reducing constant shade where possible
  • Keeping joints free from organic matter
  • Scheduling periodic preventative treatments
  • Avoiding long gaps between maintenance cycles
When these factors are controlled properly, patios remain cleaner for longer periods and require less intensive restoration work in the future.

Final Conclusion

Removing lichen from patios is never just a straightforward cleaning job. It sits somewhere between surface restoration and biological control, which is why results depend so heavily on the method used rather than just the equipment. What looks like a simple patch of discolouration is actually a living organism that has bonded itself into the texture of the stone over time, and that distinction changes how it needs to be treated. The most important point is that lichen cannot be properly dealt with using pressure alone. Water pressure will remove the visible surface layer, but the organism itself often remains embedded beneath, ready to reappear once conditions become damp again. This is why chemical treatment plays such a central role. Biocides are not an optional extra in this process, they are what actually breaks the biological cycle and prevents regrowth from taking hold immediately after cleaning. Equally important is patience in the process. Lichen does not develop overnight, and it does not disappear instantly either. The most effective results come from allowing treatments time to work, rather than rushing into aggressive cleaning too early. When biocide is given time to penetrate properly, the structure of the lichen weakens significantly, which means less reliance on pressure and a lower risk of damaging the patio surface. The condition and age of the patio also play a major role in the final outcome. Newer surfaces tend to respond well to treatment and return to a near-original finish fairly quickly. Older patios, especially those that have been exposed to years of moisture and organic build-up, behave differently. Their surfaces are more porous, which allows lichen to root deeper, and that often means a staged approach is needed rather than a single clean. In those cases, expectations need to be realistic, because while dramatic improvement is achievable, some degree of surface marking can remain where the stone itself has been weathered over time. Material type is another factor that should never be ignored. Natural stone, sandstone and limestone are particularly sensitive to both pressure and chemical strength, while concrete and block paving offer more flexibility but still require control to avoid joint damage or surface streaking. A one-method-fits-all approach simply does not work effectively across all patio types, which is why adjustment during the process is so important. Long-term results depend just as much on what happens after cleaning as the cleaning itself. Without preventative treatment, patios that are prone to shade, damp conditions or poor drainage will almost always begin to show regrowth again. This is not a failure of the cleaning process, it is a reflection of the environment. Lichen spores exist naturally in outdoor spaces, so the goal is not to eliminate them completely but to keep the surface conditions unfavourable for them to establish again quickly. Maintenance is often underestimated but makes a significant difference. Simple habits like regular sweeping, removing organic debris and occasional light biocide application can extend the time between deep cleans considerably. In many cases, patios that receive consistent light maintenance remain in good condition far longer than those left until heavy build-up returns. Safety also plays a bigger role than people expect. Once lichen becomes wet or partially lifted, it can create a surprisingly slippery surface, especially on sloped patios or areas with limited drainage. This is why controlled cleaning in sections and careful rinsing is important, not just for appearance but for usability of the space afterwards. From a professional perspective, the most reliable results come from a structured and controlled process rather than aggressive cleaning. Pureseal Services approaches lichen removal in this way, using staged treatment methods combined with carefully adjusted pressure levels to ensure that the biological growth is fully addressed while protecting the integrity of the patio surface underneath. This becomes particularly important in more severe cases where multiple years of build-up have occurred or where natural stone requires careful handling to avoid long-term wear. Ultimately, effective lichen removal is about balance. Enough treatment to fully break down and kill the organism, enough pressure to clear away the residue, and enough restraint to avoid damaging the surface in the process. When those elements are aligned properly, patios do not just look cleaner, they return to a more stable condition that is easier to maintain and far less likely to deteriorate quickly again.

Continue Reading

How to Pressure Wash a Garage Floor

Why Pressure Washing a Garage Floor Matters

A garage floor takes far more punishment than most people realise. Even if the space is used just for parking a car, it is constantly exposed to oil drips, tyre residue, road salt, mud, brake dust and general grime brought in from outside. Over time, these build up into stubborn layers that are difficult to remove with standard cleaning methods. Pressure washing offers one of the most effective ways to restore a garage floor to a clean, usable condition. It cuts through ingrained dirt, lifts stains from porous concrete and removes contamination that ordinary scrubbing simply cannot shift. However, garage floors are not all the same. Some are bare concrete, others are sealed or painted, and some are finished with epoxy coatings. Each surface reacts differently to water pressure and cleaning products, which means the correct approach is essential if you want to avoid damage while achieving a deep clean. Pureseal Services provides a professional exterior cleaning service that includes garage floor restoration, using controlled pressure systems designed to clean thoroughly without weakening the surface or protective coatings.

Understanding Garage Floor Types Before Cleaning

Before using a pressure washer, it is important to identify what type of floor you are working with. This determines both the pressure level and cleaning method required.

Bare concrete floors

Bare concrete is the most common garage flooring type. It is strong but highly porous, which means it absorbs oil, water and chemicals easily.
  • Highly absorbent
  • Prone to staining
  • Can withstand moderate pressure
  • Often requires degreasing before washing

Sealed concrete floors

Sealed concrete has a protective layer applied to reduce staining and moisture absorption.
  • More resistant to oil and water
  • Easier to clean
  • Sealant can degrade under excessive pressure
  • Requires gentle but effective washing

Painted garage floors

Painted floors are often decorative or used for light protection.
  • Sensitive to high pressure
  • Paint can peel or flake
  • Requires low-pressure cleaning only
  • May need touch-up after cleaning

Epoxy-coated floors

Epoxy floors are the most durable and visually polished option.
  • Highly resistant to chemicals and stains
  • Smooth, non-porous surface
  • Can be damaged if edges are lifted
  • Requires careful pressure control

Essential Equipment for Pressure Washing a Garage Floor

Using the right equipment is critical for achieving a clean finish without damaging the surface. A basic hose is not sufficient for deep cleaning embedded stains.

Core equipment list

Equipment Purpose
Pressure washer Main cleaning tool for removing dirt and stains
Surface cleaner attachment Ensures even cleaning on flat floors
Degreaser solution Breaks down oil and grease
Stiff-bristle brush Agitates stubborn stains
Protective gloves Safety when handling chemicals
Eye protection Prevents splash injuries
Wet vacuum or squeegee Removes excess water
A surface cleaner attachment is particularly important as it ensures consistent cleaning pressure across the entire floor, avoiding streaks and patchy results.

Recommended Pressure Levels for Garage Floors

Using the correct pressure setting is one of the most important factors in avoiding damage while still achieving a deep clean.
Floor Type Recommended PSI Range Notes
Bare concrete 2,000 – 3,000 PSI Can tolerate higher pressure
Sealed concrete 1,500 – 2,500 PSI Avoid sealant damage
Painted floors 1,000 – 1,800 PSI Use caution around edges
Epoxy floors 1,200 – 2,000 PSI Keep consistent distance
Starting at a lower pressure and increasing gradually is always safer than beginning at full power.

Cleaning Products and Degreasers

Garage floors often require more than water pressure to fully clean. Oil and grease stains need chemical breakdown before they can be removed.

Common cleaning solutions

Product Type Best For Notes
Heavy-duty degreaser Engine oil, grease Essential for automotive stains
Alkaline cleaner General dirt and grime Safe for most surfaces
Enzyme-based cleaner Organic stains Useful for long-standing contamination
Mild detergent Light cleaning Suitable for sealed or painted floors
Allowing cleaning products to sit on the surface before pressure washing significantly improves results.

Step-by-Step Guide to Pressure Washing a Garage Floor

A structured approach ensures effective cleaning while preventing damage.

Step 1: Clear the garage

Remove all vehicles, storage boxes, tools and loose items. A completely clear floor allows even cleaning and prevents obstacles from interfering with the pressure washer.

Step 2: Sweep the surface

Before applying water, remove dust, gravel and debris. This prevents scratching and helps cleaning products work more effectively.

Step 3: Apply degreaser

Focus on areas with oil stains, tyre marks or heavy grime. Allow the product to sit for 10 to 15 minutes without drying out.

Step 4: Pre-rinse the floor

Use a low-pressure rinse to remove loose dirt and activate the cleaning solution.

Step 5: Pressure wash using a surface cleaner

Move slowly and evenly across the floor. Avoid lingering in one area too long to prevent uneven cleaning patterns.

Step 6: Target stubborn stains

For persistent marks, switch to a narrow spray setting and treat individually.

Step 7: Final rinse

Remove all detergent residue thoroughly to prevent slippery surfaces or streaking.

Step 8: Dry the floor

Use a squeegee or wet vacuum to remove standing water. Allow natural drying for remaining moisture.

Common Garage Floor Stains and How to Remove Them

Garage floors typically contain a mixture of automotive and environmental stains that require different treatment methods.

Stain removal guide

Stain Type Cause Removal Method
Engine oil Vehicle leaks Degreaser + hot pressure wash
Tyre marks Rubber friction Alkaline cleaner + scrubbing
Rust stains Metal contact Rust remover + light agitation
Paint spills DIY or repairs Solvent-based cleaner
Mud and dirt Foot traffic Standard pressure wash
Brake dust Vehicle particles Detergent + rinse cycle
Oil stains often require multiple treatments due to absorption into concrete pores.

Common Mistakes When Pressure Washing Garage Floors

Even experienced users can make mistakes that reduce effectiveness or cause damage.

Using too much pressure on sealed floors

Excess pressure can strip protective coatings, making the surface more vulnerable to future staining.

Skipping degreasing

Water alone cannot break down oil-based stains, leading to poor results.

Cleaning too quickly

Rushing leads to uneven cleaning patterns and missed areas.

Ignoring drainage

Poor water management can result in pooling and extended drying times.

Using the wrong nozzle

A concentrated jet can etch concrete or damage coatings if used incorrectly.

Drying and Post-Cleaning Treatment

Once the garage floor has been pressure washed, proper drying and aftercare are essential.

Drying methods

Method Effectiveness Notes
Natural air drying Moderate Depends on ventilation
Squeegee removal High Prevents water spots
Wet vacuum Very high Best for enclosed garages

Optional sealing

Applying a sealant after cleaning helps protect the floor from future staining.
  • Reduces oil absorption
  • Makes future cleaning easier
  • Extends floor lifespan
  • Improves appearance

Professional Garage Floor Cleaning Services

While DIY pressure washing is possible, professional cleaning provides a higher level of consistency and protection, particularly for heavily stained or older garage floors. Pureseal Services carries out garage floor cleaning using commercial-grade pressure systems and controlled cleaning techniques that are adjusted depending on the condition of the surface. The benefit of professional cleaning is not just in appearance, but in reducing long-term surface degradation caused by incorrect pressure or unsuitable chemicals.

Cost of Professional Garage Floor Pressure Washing

Pricing varies depending on floor size, level of contamination and whether additional treatments such as sealing are required. Pureseal Services operates in the premium market, offering detailed cleaning rather than quick surface washes.

Typical pricing guide

Service Type Average Price Range
Small single garage floor clean £180 – £280
Standard single garage deep clean £250 – £400
Double garage floor cleaning £350 – £550
Heavily stained restoration clean £400 – £750
Clean + sealing treatment package £600 – £1,200
Higher pricing reflects the level of detail involved, including stain treatment, controlled pressure application and finishing protection.

Maintenance Schedule for Garage Floors

Regular maintenance helps reduce the need for intensive deep cleaning.

Suggested schedule

Frequency Task Purpose
Weekly Sweep debris Prevent dirt build-up
Monthly Light rinse Remove surface dust
Quarterly Spot degreasing Treat oil stains early
Annually Deep pressure wash Full restoration clean
Every 2–3 years Sealant reapplication Long-term protection
Preventing build-up is far easier than removing long-term contamination.

Troubleshooting Common Issues After Cleaning

Sometimes results may not be perfect after the first wash. Understanding why helps correct the issue.

Patchy cleaning results

Usually caused by uneven movement of the surface cleaner. Solution:
  • Rewash affected areas
  • Maintain consistent speed

Persistent oil stains

Deep-set oil may not lift in a single wash. Solution:
  • Reapply degreaser
  • Allow longer dwell time
  • Repeat pressure washing

White residue on concrete

Often caused by detergent drying on the surface. Solution:
  • Increase rinse time
  • Use wet vacuum for removal

Surface etching

Caused by excessive pressure or incorrect nozzle use. Solution:
  • Reduce PSI
  • Avoid concentrated jets

Improving Long-Term Garage Floor Condition

Keeping a garage floor in good condition goes beyond occasional cleaning. It requires consistent care and protection.

Protective strategies

  • Apply sealants after deep cleaning
  • Address oil spills immediately
  • Avoid storing leaking vehicles or equipment
  • Keep tyres clean before parking indoors

Routine care habits

  • Regular sweeping prevents abrasive scratching
  • Prompt stain treatment reduces long-term absorption
  • Seasonal deep cleaning maintains appearance

Final Practical Considerations Before Pressure Washing

Before starting any pressure washing work on a garage floor, it is worth considering a few final practical points that affect both safety and outcome.
  • Ensure adequate drainage to avoid flooding
  • Check electrical points are protected from water exposure
  • Confirm the surface type to avoid incorrect pressure settings
  • Work in sections to maintain control and consistency
  • Avoid washing in freezing conditions where water can refreeze
Garage floor cleaning is highly effective when done properly, but it requires attention to detail, the correct tools and an understanding of how different surfaces react to pressure and cleaning agents.

Advanced Techniques for Garage Floor Pressure Washing

Once the basic cleaning process is understood, there are several advanced techniques that can significantly improve the final result, especially on older or heavily stained garage floors. These methods focus on precision, chemical dwell time and controlled pressure application rather than simply increasing power.

Hot water pressure washing

Cold water pressure washing is effective for general dirt removal, but hot water systems are far more efficient when dealing with oil and grease. Hot water helps to:
  • Break down petroleum-based stains faster
  • Loosen ingrained grime in porous concrete
  • Reduce the need for harsh chemical use
  • Improve overall cleaning speed
In professional environments, hot water systems are often preferred for garage floors that have long-term oil contamination. This is especially useful in residential garages where vehicles may have been parked for many years without any deep cleaning.

Detergent dwell time control

One of the most overlooked aspects of garage floor cleaning is how long the cleaning product is left on the surface before rinsing.
Dwell Time Effectiveness
2–5 minutes Light surface cleaning
10–15 minutes Standard degreasing
20–30 minutes Heavy oil breakdown
30+ minutes Deep stain lifting (controlled use only)
Allowing degreaser to work properly reduces the need for excessive pressure. However, it is important that the solution does not dry on the surface, as this can leave residue or streaking.

Sectional cleaning method

Instead of attempting to clean the entire garage floor in one continuous process, professional-level results are achieved by working in sections. This approach:
  • Prevents cleaning solution from drying out
  • Ensures even coverage
  • Makes stain treatment more manageable
  • Improves consistency of finish
A typical garage floor might be divided into four or more zones depending on size, with each section fully completed before moving on.

Cross-hatching technique

For large flat areas of concrete, a cross-hatching method improves uniformity. This involves cleaning in one direction first, then repeating the process at a perpendicular angle. This helps to:
  • Remove striping patterns
  • Lift embedded dirt from different directions
  • Ensure even pressure distribution
  • Improve visual consistency
This technique is particularly effective when using surface cleaner attachments.

Deep Stain Restoration for Garage Floors

Some garage floors require more than standard cleaning. Years of oil, chemicals and tyre residue can create deep staining that needs a staged restoration process.

Multi-stage oil stain removal

Oil stains often sit below the surface of concrete rather than just on top of it. A single wash rarely removes them completely. A structured approach is more effective:
  1. Apply heavy-duty degreaser
  2. Agitate with stiff brush
  3. Allow extended dwell time
  4. Pressure wash at controlled PSI
  5. Repeat if necessary
In severe cases, poultice treatments may be used where a cleaning compound is left on the stain for an extended period to draw oil out of the concrete.

Rust stain treatment

Rust stains often appear where metal tools, shelving or vehicle components have been left in contact with damp concrete.
Rust Severity Treatment Method
Light surface rust Acid-based cleaner + rinse
Moderate staining Repeated chemical application
Deep rust penetration Professional restoration treatment
Rust is one of the more difficult stains to remove completely, especially on older porous concrete, and often requires multiple treatments rather than a single wash.

Paint spill removal

Garage floors often contain old paint spills from DIY work. These behave differently depending on whether the paint is water-based or oil-based.
  • Water-based paint: usually responds to pressure washing with detergent
  • Oil-based paint: may require solvent treatment before washing
  • Dried paint layers: often need mechanical scraping before cleaning
Pressure alone is rarely enough for fully cured paint stains.

Surface Protection After Pressure Washing

Once a garage floor has been cleaned, protecting the surface is just as important as the cleaning process itself. Without protection, stains will return much faster and may become more difficult to remove over time.

Concrete sealing options

Sealing creates a protective barrier that reduces absorption of liquids and contaminants.
Sealant Type Protection Level Lifespan
Acrylic sealers Basic protection 1–2 years
Penetrating sealers Medium protection 2–5 years
Epoxy coatings High protection 5–10 years
Penetrating sealers are often preferred for residential garages because they maintain the natural appearance of concrete while improving resistance to staining.

Anti-slip treatments

After pressure washing, some garage floors can become slightly smoother, especially if they were previously rough or weathered. Anti-slip additives can be applied to improve safety. These treatments are particularly useful for:
  • Sloped garage floors
  • Areas exposed to water runoff
  • Homes where children or elderly individuals may walk on the surface

Dust reduction coatings

Unsealed concrete tends to release fine dust over time. After a deep clean, dust reduction treatments can be applied to stabilise the surface and reduce ongoing maintenance. This helps to:
  • Improve air quality in enclosed garages
  • Reduce dirt tracking into the home
  • Maintain a cleaner appearance for longer periods

Seasonal Impact on Garage Floor Cleaning

Garage floors behave differently depending on the time of year, and seasonal conditions play a significant role in both contamination levels and cleaning effectiveness.

Winter challenges

Winter introduces several issues:
  • Road salt accumulation
  • Increased moisture levels
  • Higher risk of staining from wet vehicles
  • Reduced drying times
Salt is particularly damaging as it can accelerate surface degradation in concrete if not removed regularly.

Spring cleaning requirements

Spring is the ideal time for a full deep clean because:
  • Winter residue has built up
  • Temperatures are suitable for drying
  • Sealants can be reapplied effectively
  • Outdoor cleaning conditions are more stable

Summer considerations

During warmer months:
  • Detergents may dry too quickly
  • Hot surfaces can affect cleaning performance
  • Increased evaporation reduces rinse efficiency
Shaded cleaning or early-day work is often more effective.

Autumn preparation

Autumn cleaning focuses on:
  • Removing organic debris
  • Preparing for wet conditions
  • Preventing algae formation
  • Clearing drains and edges
This helps reduce winter contamination build-up.

Health and Safety in Garage Floor Pressure Washing

Garage floor cleaning involves more than just water and detergent. There are several safety considerations that should always be taken seriously.

Slip hazards

Wet concrete becomes extremely slippery, especially when combined with detergents. Precautions include:
  • Wearing non-slip footwear
  • Working in controlled sections
  • Avoiding unnecessary movement across wet areas

Chemical handling

Degreasers and cleaners can be strong and should be handled carefully.
Safety Measure Purpose
Gloves Skin protection
Eye protection Prevent irritation
Ventilation Reduce fume build-up
Dilution control Prevent surface damage

Electrical safety

Garages often contain sockets, lighting and extension leads.
  • Ensure all electrics are isolated before cleaning
  • Avoid directing water near power sources
  • Use outdoor-rated equipment only

Equipment Wear and Maintenance After Cleaning

Pressure washing is not only about cleaning the floor but also about maintaining the equipment properly afterwards.

Pressure washer care

After use:
  • Flush clean water through the system
  • Clear nozzle blockages
  • Drain hoses to prevent internal damage
  • Store in a dry environment

Surface cleaner maintenance

Surface cleaner attachments should be checked regularly for:
  • Blocked jets
  • Uneven spray patterns
  • Worn internal bearings
Well-maintained equipment ensures consistent results over time and reduces the risk of surface damage during future cleaning.

Professional Standards in Garage Floor Cleaning

High-quality garage floor cleaning is not just about removing visible dirt. It is about achieving a uniform, controlled finish that preserves the integrity of the surface while improving its long-term condition. Pureseal Services applies a structured process that focuses on:
  • Surface assessment before any cleaning begins
  • Adjusting pressure settings to match material type
  • Targeted stain treatment rather than blanket washing
  • Controlled detergent application
  • Detailed finishing and edge cleaning
This level of attention is particularly important in garages where flooring has been exposed to years of vehicle use, chemical spills and environmental contamination. Unlike basic pressure washing, professional cleaning takes into account how the floor will continue to perform after treatment, not just how it looks immediately afterwards.

Long-Term Behaviour of Concrete After Pressure Washing

Concrete is a living material in the sense that it continues to react to moisture, temperature changes and chemical exposure long after cleaning. After pressure washing:
  • Pores in concrete may be more open temporarily
  • Drying patterns can highlight previous staining
  • Surface texture may feel slightly different
  • Absorption rates may change before sealing
This is why protective sealing or ongoing maintenance becomes an important part of long-term care rather than an optional extra. Properly cleaned and treated garage floors not only look better but also resist future contamination more effectively, reducing the need for intensive cleaning cycles in the future.

Final Conclusion

Pressure washing a garage floor is one of those jobs that looks simple on the surface but quickly becomes more technical once you actually start dealing with different materials, stain types and surface conditions. What separates a basic clean from a proper restoration is not just the machine being used, but the decisions made before and during the process. The condition of the floor is always the starting point. Bare concrete behaves very differently from sealed, painted or epoxy-coated surfaces, and each one reacts differently to both water pressure and cleaning chemicals. Getting this wrong is where most damage tends to happen. Too much pressure on a sealed or painted surface can strip protection, while too little effort on porous concrete will leave oil and grime sitting deep in the surface where it continues to show through over time. Equally important is preparation. A garage floor that is properly cleared, swept and pre-treated with degreaser will always clean more effectively than one that is rushed into straight away. The dwell time of cleaning products, in particular, plays a much bigger role than most people expect. Allowing chemicals to work into oil and dirt reduces the need for force and helps avoid unnecessary wear on the surface. Technique also makes a significant difference. Using a surface cleaner attachment rather than a narrow jet creates a far more even finish and reduces the risk of streaking or patchy results. Working in controlled sections rather than attempting the whole floor at once improves consistency and ensures cleaning products do not dry prematurely. These small adjustments in approach often determine whether the final result looks patchy or professionally restored. Stain removal is another area where expectations need to be realistic. Light surface dirt will usually lift easily, but oil, rust and long-term chemical stains behave differently. Concrete is porous, so some contamination will naturally sit below the surface. In these cases, repeated treatment or specialist products are often required rather than simply increasing pressure. Understanding this prevents unnecessary damage and avoids the common mistake of over-cleaning in one attempt. Once the cleaning is complete, the condition of the floor becomes just as important as the cleaning itself. Drying, residue removal and optional sealing all play a role in how long the results will last. A properly sealed floor is significantly more resistant to future staining and is far easier to maintain, especially in garages where vehicles regularly bring in oil, water and road debris. Without protection, even a perfectly cleaned floor will gradually return to a stained condition more quickly than expected. Safety is another factor that should never be overlooked. Wet concrete becomes extremely slippery, and garages often contain electrical points, stored chemicals and confined spaces that require careful handling. Using the correct protective equipment and working methodically reduces risk and makes the entire process more controlled. From a long-term perspective, garage floor maintenance is far more effective when treated as an ongoing process rather than a one-off deep clean every few years. Light maintenance cleaning, prompt stain treatment and occasional deep pressure washing create far better results than allowing heavy build-up to form before addressing it. This approach also reduces the likelihood of permanent staining and surface wear. For more complex cases, particularly older floors with deep oil penetration or damaged coatings, professional treatment becomes a more practical option. Pureseal Services works with controlled pressure systems and material-specific cleaning methods designed to restore garage floors without causing unnecessary wear. The focus is always on achieving a clean, even finish while preserving the integrity of the surface underneath, which is especially important for floors that have already been exposed to years of use. Ultimately, a well-cleaned garage floor changes how the entire space feels and functions. It improves appearance, reduces long-term maintenance and helps protect the surface from ongoing damage. The key is not just the pressure washer itself, but how it is used, what it is combined with, and the level of care taken throughout the process.

Continue Reading

Why Cleaning Garden Furniture With a Pressure Washer Matters

Why Cleaning Garden Furniture With a Pressure Washer Matters

Garden furniture takes a lot more punishment than most people realise. Even when it looks like it’s just sitting there unused for months, it’s constantly exposed to rain, UV rays, bird droppings, pollen, algae growth and general dirt carried through the air. Over time, this builds up into layers that are not only unsightly but can also shorten the lifespan of the furniture itself. A pressure washer offers one of the most effective ways to restore outdoor furniture quickly and efficiently. Instead of scrubbing for hours with limited results, controlled high-pressure water can lift away grime, moss and stubborn stains in a fraction of the time. That said, using a pressure washer correctly is important. Too much pressure can damage wood, strip paint, or weaken plastic and resin furniture. When done properly, though, it can completely transform the appearance of a garden space. For homeowners who want a professional finish without the risk, Pureseal Services provides a high-standard exterior cleaning service that ensures garden furniture is cleaned safely and thoroughly using the correct techniques for each material.

Types of Garden Furniture and How They Respond to Pressure Washing

Different materials react differently to pressure washing. Understanding what you’re working with is the first step to achieving good results without causing damage.

Wooden garden furniture

Wood is one of the most common materials used outdoors, but also one of the most sensitive. Teak, oak and pine all react differently to water pressure.
  • Softwoods (like pine) can splinter easily
  • Hardwoods (like teak) are more durable but still prone to surface erosion
  • Painted or stained wood may lose its finish under high pressure

Plastic garden furniture

Plastic furniture is generally the easiest to clean. It is resistant to water damage and can handle moderate pressure levels. However, older plastic can become brittle and may crack if too much force is applied.

Metal garden furniture

Metal furniture includes aluminium, wrought iron and steel.
  • Aluminium is lightweight and corrosion-resistant
  • Wrought iron is strong but prone to rust
  • Steel often has protective coatings that can be damaged if pressure is too high

Rattan and synthetic weave

Synthetic rattan is popular in modern gardens. It requires a gentler approach as high pressure can damage the weave or force water into the internal frame, leading to mould growth.

Essential Equipment Needed for Cleaning Garden Furniture

Before starting, it’s important to have the right tools. Using inappropriate equipment can lead to poor results or even damage.

Core equipment list

Equipment Purpose
Pressure washer Main cleaning tool for removing dirt and algae
Variable nozzle attachment Controls spray intensity
Soft washing brush Helps loosen stubborn dirt
Mild detergent Breaks down grease and organic build-up
Protective gloves Safety during cleaning
Eye protection Prevents splash injuries
Microfibre cloths Drying and finishing
A pressure washer with adjustable PSI (pounds per square inch) is essential. Domestic models typically range from 1,300 to 2,500 PSI, which is more than enough for garden furniture when used correctly.

Recommended Pressure Settings for Different Materials

Using the correct pressure level is the most important part of the process. Too little pressure will not clean effectively, while too much can cause permanent damage.
Furniture Type Recommended PSI Range Notes
Hardwood (teak, oak) 500 – 1,200 PSI Keep nozzle at a distance to avoid stripping fibres
Softwood (pine) 500 – 900 PSI Use wide spray setting
Plastic furniture 800 – 1,500 PSI Safe but avoid concentrated jets
Aluminium 800 – 1,200 PSI Prevent paint stripping
Wrought iron 1,200 – 2,000 PSI Avoid prolonged focus on joints
Synthetic rattan 500 – 1,000 PSI Use low pressure only
When in doubt, it is always safer to start at a lower setting and increase gradually.

Step-by-Step Guide to Cleaning Garden Furniture With a Pressure Washer

A structured approach ensures consistent results and reduces the risk of damage.

Step 1: Prepare the area

Move furniture onto a solid surface such as patio slabs or concrete. Avoid cleaning on soil or grass as runoff water can create muddy patches. Remove cushions, fabric covers and any detachable parts. These should be cleaned separately using appropriate methods.

Step 2: Pre-rinse the furniture

Before applying any detergent, rinse the furniture with plain water. This removes loose debris such as dust, leaves and surface dirt.

Step 3: Apply cleaning solution

Use a mild detergent designed for exterior cleaning. Apply evenly across the surface and allow it to sit for 5 to 10 minutes. Avoid letting the solution dry out, especially on hot days.

Step 4: Pressure wash the furniture

Begin cleaning using a wide spray pattern. Keep the nozzle at least 30–50 cm away from the surface. Work in smooth, consistent motions rather than focusing on one spot for too long.

Step 5: Target stubborn areas

For built-up grime, algae or bird droppings, slightly increase pressure or use a soft brush attachment. Avoid aggressive spraying on joints or decorative details.

Step 6: Rinse thoroughly

Once cleaning is complete, rinse all detergent off completely. Leftover soap can attract dirt more quickly.

Step 7: Dry the furniture

Allow furniture to air dry naturally. If needed, use microfibre cloths to speed up the process, especially on metal surfaces where water spots may form.

Cleaning Different Types of Garden Furniture in Detail

Cleaning wooden furniture safely

Wood requires a careful balance between cleaning effectiveness and preservation.
  • Always follow the grain of the wood
  • Avoid direct close-range spraying
  • Do not linger in one area
  • Consider applying a protective oil after cleaning
Wood is porous, so it can absorb water easily. Over-saturation may lead to swelling or cracking if not dried properly.

Cleaning plastic furniture efficiently

Plastic is the most forgiving material.
  • Moderate pressure is usually sufficient
  • Use detergent to lift grease stains
  • Focus on mould-prone areas such as undersides and joints
Plastic often discolours over time due to UV exposure. While pressure washing improves cleanliness, it will not fully restore faded colour.

Cleaning metal furniture without causing corrosion

Metal furniture requires attention to detail.
  • Avoid stripping protective coatings
  • Dry thoroughly after washing
  • Check for rust spots and treat them early
For wrought iron furniture, extra care is needed around welded joints where water can collect.

Cleaning synthetic rattan furniture

This material looks strong but is surprisingly delicate.
  • Use low pressure only
  • Avoid forcing water into the weave
  • Clean gently between strands using a soft brush
Internal frames can trap moisture, so drying is particularly important.

Common Mistakes When Pressure Washing Garden Furniture

Even a simple job can go wrong if rushed or done incorrectly.

Using too much pressure

The most common mistake is assuming higher pressure means better cleaning. In reality, excessive force can permanently damage surfaces.

Holding the nozzle too close

Close-range spraying increases the risk of stripping paint, splintering wood or damaging joints.

Skipping detergent

Water alone often struggles with grease, algae and organic staining. Detergent plays a key role in breaking down grime.

Not rinsing properly

Leftover detergent can leave streaks or sticky residue that attracts dirt quickly.

Cleaning in direct strong sunlight

Hot surfaces can cause cleaning solutions to dry too quickly, reducing effectiveness and leaving marks.

Safety Considerations When Using a Pressure Washer

Pressure washers are powerful tools and should always be handled carefully.
  • Always wear protective eyewear
  • Use gloves to protect hands from debris
  • Never point the jet at people or pets
  • Avoid electrical outlets and cables outdoors
  • Ensure stable footing to prevent slipping
Even domestic machines can cause injury if misused.

Cost of Professional Garden Furniture Cleaning Services

For those who prefer a professional finish, Pureseal Services provides a high-quality cleaning service that ensures furniture is treated correctly based on material type and condition. Professional cleaning is particularly useful for large sets of furniture, heavily soiled items, or delicate materials that require specialist care.

Typical pricing overview

Below is an example of typical pricing for professional garden furniture cleaning services in the UK, reflecting a premium-level service:
Service Type Average Price Range
Small garden furniture set (table + 4 chairs) £120 – £180
Medium furniture set (6–8 seats) £180 – £280
Large dining set with multiple pieces £280 – £420
Deep restoration clean (heavily soiled items) £350 – £600
Full patio + furniture package £500 – £900
Pureseal Services operates at the higher end of the market, focusing on detailed cleaning, safe pressure control, and long-lasting results rather than quick low-cost washes.

What affects the cost

Factor Impact on Price
Material type Delicate materials require more care
Level of dirt build-up Heavy algae or staining increases time
Number of items Larger sets take longer
Access to water supply Limited access can increase setup time
Additional treatments Protective coatings or sealing

Maintenance Tips After Pressure Washing Garden Furniture

Keeping furniture clean after pressure washing helps extend results and reduces future cleaning effort.

Apply protective treatments

Wood benefits from oiling or sealing after cleaning. This helps reduce moisture absorption and slows down weathering.

Store furniture properly

If possible, store furniture indoors or under cover during winter months. This significantly reduces algae and mould growth.

Use furniture covers

Breathable waterproof covers protect against rain while preventing condensation build-up.

Regular light cleaning

Instead of waiting for heavy build-up, rinse furniture lightly every few weeks during warmer months.

Check for early signs of damage

Look for:
  • Rust spots on metal
  • Cracks in wood
  • Loose joints
  • Mould forming in shaded areas
Addressing small issues early prevents larger repairs later.

When Professional Cleaning Becomes the Better Option

There are situations where using a pressure washer yourself may not deliver the best outcome.
  • Antique or high-value wooden furniture
  • Severe algae or mould infestation
  • Painted or lacquered surfaces in poor condition
  • Large outdoor sets requiring extensive cleaning time
  • Lack of suitable equipment or experience
In these cases, Pureseal Services provides a controlled cleaning process that reduces risk while achieving a more consistent finish across all items. The approach used is not simply high-pressure washing, but a tailored method based on surface type, contamination level and structural condition, ensuring the furniture is cleaned without unnecessary wear.

Final Conclusion

Cleaning garden furniture with a pressure washer is one of the most effective ways to bring tired, weathered outdoor spaces back to life, but it is not simply a matter of pointing a jet of water at dirt and hoping for the best. The difference between a good result and a damaged piece of furniture usually comes down to understanding materials, controlling pressure, and taking a methodical approach rather than rushing the job. Wood, plastic, metal and synthetic rattan all behave differently under pressure, and each one has its own limits. What works perfectly on a plastic chair can easily damage softwood or force water into woven rattan where it becomes trapped. That trapped moisture is often what leads to long-term issues like mould, swelling or internal corrosion. Because of that, the most important part of the entire process is restraint. Lower pressure, correct distance, and the right cleaning products consistently outperform aggressive washing. Preparation also plays a much bigger role than most people expect. Simply rinsing off loose debris, applying a suitable detergent, and allowing it to work before any pressure is used dramatically improves the final outcome. It reduces the need for force and allows grime, algae and organic build-up to release naturally. In practice, this makes cleaning safer, quicker, and far more consistent. Another key factor is timing and routine maintenance. Garden furniture that is cleaned lightly throughout the year rarely needs heavy restoration. On the other hand, furniture left for long periods without care can develop layers of contamination that require repeated cleaning cycles and careful attention. Seasonal maintenance, particularly in spring and autumn, makes a noticeable difference in both appearance and longevity. Where many people run into problems is assuming that more pressure equals better results. In reality, most damage from pressure washing happens when the machine is used too aggressively or too close to the surface. Raised wood fibres, stripped paint, water ingress into joints, and weakened coatings are all avoidable when the correct technique is used. The goal is controlled cleaning, not force. Restoration is another important consideration. Cleaning alone often reveals the true condition of furniture, especially wood that has faded or metal that has started to corrode. Once cleaned properly, furniture can be treated, sealed, oiled or protected to significantly extend its lifespan. This step is what separates a short-term clean from a longer-term improvement in condition. While DIY cleaning is achievable with the right equipment and care, there is a clear difference in outcome when the process is handled professionally. Services delivered by Pureseal Services focus on material-specific methods, controlled pressure levels and detailed finishing work that ensures every piece is cleaned thoroughly without unnecessary wear. This becomes particularly valuable for larger sets, delicate materials or furniture that has been neglected for a long period. In many cases, the real value of professional cleaning is not just in the appearance of the furniture afterwards, but in the reduced risk of long-term damage. Incorrect pressure settings or unsuitable cleaning methods can shorten the lifespan of garden furniture significantly, especially when repeated over time. A careful, experienced approach helps avoid that entirely while still achieving a deep, even clean across all surfaces. Ultimately, garden furniture cleaning with a pressure washer is about balance. Enough power to remove stubborn dirt, but not so much that it compromises the integrity of the material. When that balance is achieved, outdoor spaces feel refreshed, furniture looks closer to new, and the overall garden environment becomes far more enjoyable to use throughout the year.

Continue Reading

The Best Way to Clean Fencing

Understanding Why Fencing Needs Regular Cleaning

Fencing is often one of the most overlooked parts of a property when it comes to exterior maintenance. Whether it is timber panels, closeboard fencing, picket styles, or composite materials, fences are constantly exposed to the elements. Unlike walls or driveways, they take the full impact of wind, rain, frost, sunlight, and organic debris without much protection. Over time, this exposure leads to a build-up of algae, moss, lichen, mould, and general dirt. Wooden fences in particular are highly vulnerable because they are porous and absorb moisture easily. Once moisture gets into the surface, it encourages biological growth and gradual discolouration. Even composite fencing, which is more resistant, will eventually lose its colour vibrancy if it is not cleaned properly. The result is a dull, aged appearance that reduces the overall look of the garden or property boundary. Regular cleaning restores appearance, prevents long-term deterioration, and helps extend the lifespan of the fencing.

Why Cleaning Fencing Is Important

Fencing is not just decorative. It provides privacy, security, and structure to outdoor spaces. When it becomes dirty or neglected, it affects both appearance and performance.

Common Issues Found on Dirty Fencing

Problem Cause Effect
Green algae Damp conditions and shade Slippery, discoloured surface
Black mould Moisture absorption Dark staining and decay risk
Lichen growth Long-term neglect Hard, crusty surface damage
Dirt build-up Weather exposure Dull and aged appearance
Wood rot Persistent moisture Structural weakening
Ignoring these issues often leads to faster deterioration, especially with timber fencing where moisture retention is a major concern.

Types of Fencing and How They React to Cleaning

Not all fencing materials should be cleaned in the same way. The approach depends heavily on what the fence is made from and its current condition.

Fencing Material Comparison

Fence Type Durability Cleaning Sensitivity Recommended Method
Softwood timber Medium High Gentle cleaning required
Hardwood timber High Moderate Controlled washing suitable
Painted fencing Medium High Careful low-pressure cleaning
Composite fencing High Low Moderate pressure safe
Vinyl fencing Very high Low Standard wash acceptable
Understanding the material is essential before any cleaning begins, as incorrect methods can cause permanent damage.

Best Time of Year to Clean Fencing

Timing plays a major role in achieving good results. Cleaning fencing in the wrong conditions can reduce effectiveness or encourage faster regrowth of algae and moss.

Ideal Conditions

  • Dry weather with no rain forecast
  • Mild temperatures between 10°C and 20°C
  • Low humidity where possible
  • Calm wind conditions
Spring and early autumn tend to be the best times, as conditions are generally stable and allow surfaces to dry properly.

Preparation Before Cleaning Fencing

Preparation is essential to ensure the cleaning process is both effective and safe for the material.

Step 1: Inspect the Fence

Before cleaning begins, the fencing should be checked for:
  • Loose or broken panels
  • Rotten timber sections
  • Weak posts or fixings
  • Flaking paint or coatings
Any structural issues should be addressed before cleaning starts to avoid worsening damage.

Step 2: Clear Surrounding Areas

The area around the fence should be cleared to allow safe and effective cleaning. This includes:
  • Moving garden furniture
  • Protecting plants and shrubs
  • Removing debris at the base of the fence
  • Ensuring clear access along the full length

Step 3: Dry Brushing

Loose dirt, cobwebs, and surface debris should be removed using a soft or medium bristle brush. This helps cleaning solutions penetrate more effectively and reduces streaking during washing.

The Best Way to Clean Fencing

Cleaning fencing properly is about balance. Too much pressure can damage the surface, while too little effort may leave stains behind. The most effective approach combines cleaning solutions with controlled washing techniques.

Applying a Cleaning Solution

A specialist exterior cleaning solution is applied to the fencing before any rinsing takes place. This helps break down:
  • Algae and moss
  • Surface dirt and grime
  • Organic staining
  • Atmospheric pollutants
The solution is left to dwell on the surface for around 10–20 minutes depending on contamination levels.

Pressure Washing Technique

Pressure washing fencing requires careful control. Unlike driveways or patios, fencing is more delicate and can be easily damaged if water pressure is too strong or too concentrated.

Recommended Pressure Levels

Condition Pressure Range
Light dirt 40–80 bar
General cleaning 80–120 bar
Heavy algae 120–150 bar
Delicate timber Under 80 bar
Wide spray patterns are always preferred over concentrated jets to avoid surface damage.

Cleaning Timber Fencing

Wooden fencing requires extra care due to its porous nature. Key considerations include:
  • Avoiding direct close-range pressure
  • Working with the grain of the wood
  • Preventing water saturation in one area
  • Allowing sufficient drying time
Over-wetting timber can lead to swelling, cracking, or accelerated rot.

Cleaning Composite and Vinyl Fencing

Composite and vinyl fencing are more resistant to moisture and pressure, making them easier to clean. However, they still require care to avoid:
  • Surface scratching
  • Colour fading from harsh chemicals
  • Water ingress into joints
Moderate pressure combined with a suitable cleaning solution is usually sufficient.

Treating Stubborn Stains

Some stains require additional treatment beyond standard washing. Common difficult issues include:
  • Deep algae staining
  • Black mould patches
  • Tree sap residue
  • Rust marks from fixings
These are treated with targeted applications of specialist solutions rather than excessive pressure.

Final Rinse

Once cleaning is complete, the fencing is thoroughly rinsed to remove any remaining residue. Proper rinsing ensures:
  • No chemical residue remains
  • Even finish across all panels
  • Reduced risk of streaking
  • Cleaner drying results

Cleaning Products Used on Fencing

The choice of cleaning product is just as important as the washing method.

Types of Cleaning Solutions

Product Type Purpose Best For
Biocidal wash Algae and moss removal Timber and composite fencing
Neutral detergent General cleaning Light dirt and dust
Stronger exterior cleaner Heavy staining Weathered fencing
Eco-safe solutions General maintenance Sensitive garden environments
Using the wrong product can cause discolouration or damage to protective coatings.

Common Mistakes When Cleaning Fencing

Fencing is often damaged during cleaning due to incorrect technique or overuse of pressure.

Using Too Much Pressure

High-pressure washing can strip paint, damage wood fibres, and reduce the lifespan of timber fencing.

Holding the Jet Too Close

This creates uneven cleaning patterns and can gouge softer materials like wood.

Ignoring Drying Time

Trapping moisture in timber fencing can lead to rot and fungal growth.

Using Harsh Chemicals

Strong chemicals can bleach wood or damage protective coatings, leaving fencing vulnerable to weathering.

Safety Considerations

Even though fencing is not a structural building surface, safety is still important during cleaning.

Key Risks

  • Splashback from pressure washing
  • Slips on wet ground
  • Damage to nearby plants or surfaces
  • Electrical hazards from outdoor fittings
Careful setup and controlled operation reduce these risks significantly.

Cost of Professional Fencing Cleaning in the UK

Professional cleaning services vary depending on fence length, condition, and material type. Pureseal Services operates at the higher end of the market, focusing on premium results and long-lasting protection.

Typical Pricing Guide

Service Type Estimated Cost (UK £)
Small garden fencing section £150 – £300
Full garden boundary clean £300 – £800
Heavy restoration cleaning £600 – £1,200
Large or commercial fencing £1,000+
Higher pricing reflects the level of care required to clean without damaging the material and to achieve a consistent finish across all panels.

Professional Cleaning vs DIY Cleaning

While DIY pressure washers are widely available, fencing is one of the areas where results can vary significantly depending on experience.

Comparison Table

Factor DIY Cleaning Professional Cleaning
Equipment quality Domestic units Industrial systems
Risk of damage High for timber Low and controlled
Finish quality Uneven Consistent
Knowledge of materials Limited Experienced assessment
Time efficiency Slower Faster and more precise
Professional cleaning reduces the risk of long-term damage, especially on older or weathered fencing.

Weather Impact on Fencing

Weather conditions play a major role in how quickly fencing deteriorates and how well it responds to cleaning.

Seasonal Effects

Season Impact on Fencing
Winter Moisture absorption and frost damage
Spring Rapid algae and moss growth
Summer UV fading and drying cracks
Autumn Leaf staining and damp accumulation
Understanding these effects helps determine the best cleaning schedule.

Maintenance After Cleaning

Once fencing has been properly cleaned, maintaining it becomes much easier and more effective.

Recommended Routine

  • Light cleaning every 12–18 months
  • Regular brushing to remove debris
  • Treating shaded areas with preventative solutions
  • Checking for early signs of rot or damage

Signs Your Fencing Needs Cleaning

Fencing often deteriorates gradually, making it easy to overlook early warning signs.

Key Indicators

  • Green or black staining
  • Dull or grey appearance on timber
  • Visible moss growth
  • Sticky or rough surface texture
  • Uneven colour patches
Addressing these signs early helps maintain both appearance and structural integrity.

Long-Term Benefits of Proper Fence Cleaning

Regular and correct cleaning improves more than just appearance. It also contributes to the long-term durability of the fencing. Well-maintained fencing:
  • Lasts significantly longer
  • Requires fewer repairs
  • Maintains property value and kerb appeal
  • Resists moisture-related damage more effectively
When carried out properly using controlled methods and suitable products, fencing cleaning becomes a key part of exterior property care rather than just a cosmetic improvement.

Deep Cleaning Methods for Heavily Weathered Fencing

When fencing has been left uncleaned for several years, surface washing alone is not enough. Dirt becomes embedded, algae roots into the grain of timber, and black mould can spread across entire panels. At this stage, a deeper cleaning approach is required, combining chemical treatment with controlled pressure washing and longer dwell times. Heavily weathered fencing often looks beyond repair, but in most cases it can be significantly improved without replacement if the correct method is used.

Step 1: Intensive Pre-Treatment

For older or heavily stained fencing, pre-treatment becomes the most important stage. A stronger, professional-grade cleaning solution is applied and allowed to soak for longer than usual. This process targets:
  • Deep-set algae within timber fibres
  • Long-standing black mould patches
  • Weather staining from years of exposure
  • Organic build-up in joints and overlaps
The solution is typically left for 20 to 40 minutes depending on severity. In colder weather, dwell time may be extended to allow the product to fully activate.

Step 2: Agitation for Embedded Dirt

In some cases, particularly on rough-sawn timber, gentle agitation is used to help lift ingrained dirt. This is done with soft to medium bristle brushes to avoid damaging the surface. This step helps:
  • Break surface tension in stubborn grime
  • Lift biological growth from wood grain
  • Improve effectiveness of pressure washing
It is especially useful for fences that have not been maintained for long periods.

Step 3: Controlled Multi-Pass Cleaning

Instead of one aggressive wash, heavily soiled fencing benefits from multiple controlled passes at lower pressure.

Cleaning Approach Comparison

Method Result Risk Level
High single-pass pressure wash Fast but uneven cleaning High risk of damage
Multi-pass low pressure cleaning Even and controlled results Low risk
Chemical-only cleaning Safe but slower Very low risk
The multi-pass method is preferred because it reduces stress on the material while achieving a more uniform finish.

Step 4: Secondary Treatment for Persistent Staining

Some stains, particularly black mould or long-term algae penetration, require a second application of cleaning solution after the initial wash. This is left to dwell again before a final rinse is carried out. This layered approach is what separates surface cleaning from full restoration cleaning.

Restoring Colour and Appearance of Fencing

Cleaning fencing is not just about removing dirt. It also plays a role in restoring the natural tone and visual consistency of the material. Wooden fencing in particular tends to fade over time, especially under UV exposure. This results in a grey or washed-out appearance even when the surface is clean.

Colour Restoration Process

After cleaning, timber fencing can be treated to enhance its natural colour. This is not paint, but rather a restorative treatment that helps bring back a richer tone.

Typical Effects of Restoration Treatment

Condition Before Result After Treatment
Grey weathered wood Warmer natural brown tones
Patchy staining More uniform appearance
Faded sections Improved colour consistency
Dull surface Enhanced grain definition
This step is particularly useful for properties where fencing plays a major role in garden presentation.

Protective Treatments After Cleaning

Once fencing has been cleaned and restored, applying a protective treatment can significantly extend the lifespan of the surface. These treatments help reduce moisture absorption, slow down algae growth, and protect against UV damage.

Types of Protective Treatments

Treatment Type Purpose Longevity
Water-repellent sealers Prevent moisture absorption 1–3 years
Anti-fungal coatings Reduce mould and algae growth 12–24 months
UV protection oils Reduce fading 2–4 years
Natural wood oils Nourish timber and improve appearance 1–2 years

Application Considerations

Protective treatments should only be applied once the fencing is completely dry. Applying them too early can trap moisture, which defeats the purpose and may lead to rot or staining beneath the surface. Drying time can vary, but in typical UK conditions, timber fencing may take 48 to 72 hours to fully dry after washing.

Environmental Factors That Affect Fence Cleaning Results

External conditions have a major influence on both cleaning effectiveness and how long results last.

Shade and Moisture Retention

Fences located in shaded areas tend to stay damp for longer periods. This encourages faster regrowth of algae and moss, meaning these areas may require more frequent cleaning.

Proximity to Trees and Vegetation

Overhanging branches and nearby shrubs can:
  • Drop sap and organic debris onto fencing
  • Block sunlight, increasing moisture retention
  • Encourage moss growth due to shade and humidity
Regular maintenance in these areas is especially important.

Coastal Exposure

Fencing in coastal regions is exposed to salt in the air. This can accelerate weathering and cause surface breakdown over time. More frequent cleaning and protective treatments are often required in these environments.

Maintenance Frequency for Different Fence Conditions

Not all fencing requires the same level of maintenance. The condition, material, and location all influence how often cleaning should take place.

Recommended Cleaning Schedule

Fence Condition Cleaning Frequency
Newly installed fencing Every 18–24 months
Lightly weathered fencing Every 12–18 months
Heavily shaded fencing Every 6–12 months
Coastal or high-moisture areas Every 6–12 months
Neglected or aged fencing Initial deep clean, then annual maintenance
Regular maintenance reduces the need for intensive restoration work later on.

Professional Cleaning Approach and Why It Matters

While fencing can technically be cleaned using DIY equipment, achieving a consistent, long-lasting result requires experience and controlled methods. Professional cleaning focuses on:
  • Matching pressure to material type
  • Using correct chemical concentrations
  • Avoiding surface damage
  • Ensuring even finish across all panels
  • Extending lifespan through protective treatments
This level of care is particularly important for older or higher-quality fencing where damage is not easily reversible.

Cost Considerations for High-Quality Fence Cleaning

The cost of professional fencing cleaning varies depending on length, condition, and access. Pureseal Services operates at the higher end of the market, focusing on detailed restoration rather than quick surface cleaning.

Typical Pricing Overview

Service Type Estimated Cost (UK £)
Small garden section £150 – £350
Full perimeter clean £400 – £900
Heavy restoration and treatment £800 – £1,500
Large estate or commercial fencing £1,200+
Higher pricing reflects the time taken, product quality, and attention to preserving the condition of the fencing rather than simply washing it.

Long-Term Value of Proper Fence Cleaning

When fencing is cleaned and maintained correctly, it delivers long-term benefits beyond appearance alone. Properly maintained fencing:
  • Lasts significantly longer before replacement is needed
  • Maintains structural integrity for longer periods
  • Improves overall garden presentation
  • Reduces moisture-related damage risks
  • Requires fewer costly repairs over time
In many cases, regular professional cleaning can extend the usable life of fencing by several years.

When Cleaning Alone Is Not Enough

There are situations where cleaning will improve appearance but will not fully restore structural condition. These include:
  • Severely rotten timber
  • Broken or unstable posts
  • Deep structural cracking
  • Extensive fungal decay
In these cases, cleaning is still beneficial for appearance and assessment purposes, but replacement or repair may also be required alongside it.

Seasonal Maintenance Strategy for Fencing

Planning maintenance around seasonal changes helps maximise results and reduce regrowth of algae or moss.

Seasonal Breakdown

Season Recommended Action
Spring Full inspection and light cleaning
Summer Protective treatment application
Autumn Clean debris and prepare for wet conditions
Winter Minimal intervention, monitor condition
Spring and summer are generally the best times for full cleaning and restoration work due to improved drying conditions.

Final Observations on Fence Cleaning Approach

Cleaning fencing properly is a balance between effectiveness and protection. The goal is not to strip the surface aggressively, but to restore appearance while preserving the integrity of the material underneath. With the right approach, even heavily weathered fencing can be brought back to a much cleaner, more uniform finish, while also improving its resistance to future weathering and biological growth. Pureseal Services focuses on this level of detailed, high-quality treatment, ensuring fencing is not only cleaned but also better protected for the long term.

Final Conclusion

Cleaning fencing properly is about more than just improving how it looks on the surface. It directly affects how well the material holds up over time, especially in a UK climate where moisture, shade, and seasonal changes constantly work against it. When done correctly, cleaning removes the build-up that accelerates wear, restores a more even finish, and helps prevent issues like algae growth and timber decay from taking hold. The key is using the right level of care for the material. Timber fencing, in particular, needs a controlled approach that avoids forcing water into the grain or stripping away the natural surface. Composite and vinyl options are more forgiving, but they still benefit from structured cleaning and the right treatments rather than quick, high-pressure washing. Where fencing has been neglected for some time, deeper restoration methods combined with protective treatments can make a significant difference to both appearance and lifespan. This is where professional attention becomes especially valuable, as it ensures the surface is cleaned thoroughly without causing unnecessary damage. Pureseal Services focuses on this type of careful, high-end approach, prioritising long-lasting results and proper surface protection rather than short-term cosmetic fixes.

Continue Reading

How to Clean Brick Walls With a Pressure Washer

Understanding Brick Walls and Why They Need Cleaning

Brick walls are one of the most common exterior features across UK homes and commercial buildings. They are known for their strength, character, and long lifespan. However, while brick is durable, it is not maintenance free. Over time, dirt, algae, moss, pollution, and weather exposure all start to affect the surface. In many parts of the UK, constant rain and damp conditions accelerate organic growth on brickwork. You often see green staining on shaded walls, black streaks from pollution, and general dulling of the original brick colour. Left untreated, this build-up can start to affect not just appearance but also the condition of the mortar joints. Pressure washing is one of the most effective ways to clean brick walls, but it needs to be done correctly. Brick is porous, and using the wrong pressure or technique can cause permanent damage.

Why Cleaning Brick Walls Matters

Cleaning brick walls is not just about making a property look better. It also plays a role in preserving the structure itself.

Common Problems Caused by Dirty Brickwork

Issue Cause Impact
Algae and moss growth Moist, shaded areas Slippery surfaces and staining
Black staining Air pollution and soot Dull and aged appearance
Efflorescence Salt deposits from moisture White powdery residue
Dirt build-up Rain and environmental exposure Loss of original brick colour
Mortar erosion Long-term moisture retention Weakening of wall structure
A clean brick surface helps maintain both the appearance and longevity of the building exterior.

Understanding Different Types of Brick

Not all bricks react the same way to pressure washing. Some are dense and highly resistant, while others are softer and more porous.

Brick Type Comparison

Brick Type Density Cleaning Sensitivity Recommended Pressure
Engineering brick Very high Low sensitivity Higher pressure suitable
Facing brick Medium Moderate sensitivity Controlled pressure
Handmade brick Low to medium High sensitivity Low pressure required
Reclaimed brick Variable High sensitivity Very cautious approach
Knowing the type of brick is essential before starting any cleaning work.

Choosing the Right Pressure Washer Settings

Using a pressure washer on brick is not about maximum force. It is about control, consistency, and the right balance between pressure and cleaning solution.

Recommended Pressure Levels

Condition Pressure Range
Light dirt 50–100 bar
General cleaning 100–150 bar
Heavy staining 150–200 bar (carefully controlled)
Delicate brickwork Under 100 bar
Higher pressure does not always mean better results. In many cases, lower pressure combined with specialist detergents gives a far cleaner and safer finish.

Preparing Brick Walls for Pressure Washing

Preparation is one of the most important stages of cleaning brickwork. Skipping this step often leads to uneven results or unnecessary damage.

Step 1: Inspect the Wall

Before any cleaning begins, the wall should be checked for:
  • Cracked or loose bricks
  • Weak or crumbling mortar
  • Existing repairs or patchwork
  • Heavy biological growth
Any structural issues should be addressed before cleaning starts.

Step 2: Protect Surrounding Areas

Pressure washing creates runoff and spray. Surrounding areas need to be protected, including:
  • Windows and frames
  • Doors
  • Electrical fittings
  • Plants and landscaping

Step 3: Dry Brushing

Loose dirt, cobwebs, and surface debris should be removed using a stiff brush. This improves the effectiveness of the pressure wash and prevents dirt from spreading unevenly.

Step-by-Step Process for Cleaning Brick Walls With a Pressure Washer

Cleaning brick properly is a structured process that balances pressure, water flow, and cleaning solutions.

Applying a Cleaning Solution

A specialist brick-safe detergent is applied first. This helps break down algae, moss, and embedded dirt before pressure washing begins. The solution is left to soak into the surface for a set dwell time, usually between 10 and 20 minutes depending on conditions.

Controlled Pressure Washing Technique

The pressure washer should be used in steady, even passes. Spraying too close to the wall or holding the nozzle in one place can damage the surface.

Best Practice Guidelines

  • Keep nozzle at least 30–50 cm from surface
  • Use wide spray patterns, not narrow jets
  • Work from top to bottom to control runoff
  • Avoid concentrating on mortar joints

Removing Stubborn Stains

Some stains require additional attention, especially:
  • Oil marks
  • Deep algae growth
  • Smoke or soot stains
These are treated with repeat applications of cleaning solution rather than increasing pressure.

Final Rinse

Once cleaning is complete, the entire wall is rinsed thoroughly. This removes any remaining detergent and lifted debris. The wall is then left to dry naturally, which can take between 24 and 72 hours depending on weather conditions.

Cleaning Products Used on Brickwork

Using the right cleaning solution is just as important as the pressure washer itself.

Types of Cleaning Solutions

Solution Type Purpose Suitability
Alkaline cleaners General dirt removal Most brick types
Biocide treatments Algae and moss removal Damp environments
Acid-based cleaners Heavy staining removal Specialist use only
Neutral cleaners Light maintenance cleaning Delicate brickwork
Incorrect chemical use can cause discolouration or long-term damage.

Common Mistakes When Pressure Washing Brick Walls

Many issues with brick cleaning come from incorrect technique rather than equipment failure.

Using Too Much Pressure

Excess pressure can erode the brick face and damage mortar joints. This is one of the most common and costly mistakes.

Holding the Jet Too Close

This can create visible striping or uneven cleaning marks on the surface.

Ignoring Mortar Condition

Weak mortar can be washed away if not carefully treated, leading to structural concerns over time.

Skipping Pre-Treatment

Without detergent pre-treatment, pressure washing alone often fails to remove deep staining.

Safety Considerations

Pressure washing brick walls involves working with high-pressure water systems, which can be hazardous if not handled correctly.

Key Safety Risks

  • High-pressure water injury
  • Slipping from wet surfaces
  • Electrical hazards near external fittings
  • Falling debris from older walls
Proper protective equipment and controlled working methods are essential.

Cost of Cleaning Brick Walls in the UK

Pricing depends on wall size, condition, access, and level of staining. Pureseal Services operates at the higher end of the market, focusing on detailed, careful cleaning rather than quick low-cost washes.

Typical Price Guide

Service Type Estimated Cost (UK £)
Small wall section clean £200 – £400
Full house exterior clean £600 – £1,500
Heavily stained brick restoration £1,200 – £2,500
Large commercial brick cleaning £2,000+
Higher pricing reflects the level of care required to protect brick integrity while achieving a high-quality finish.

Professional Cleaning vs DIY Pressure Washing

While DIY pressure washers are widely available, they are not always suitable for brick cleaning.

Comparison Table

Factor DIY Cleaning Professional Cleaning
Equipment quality Basic consumer units Industrial systems
Risk of damage High if inexperienced Controlled and low
Cleaning results Inconsistent Even and thorough
Knowledge of brick types Limited Experienced assessment
Time required High Efficient process
Professional cleaning reduces the risk of irreversible surface damage.

Why Brick Walls Require a Gentle but Effective Approach

Brick is strong but also absorbent. This means it can take in moisture, dirt, and cleaning chemicals if not handled properly. A balanced approach ensures:
  • Surface dirt is removed effectively
  • Brick face remains intact
  • Mortar joints are preserved
  • No long-term water retention issues develop
This balance is what separates basic cleaning from proper restoration work.

The Role of Weather in Brick Cleaning

Weather conditions significantly impact both the cleaning process and results.

Ideal Conditions

  • Dry weather
  • Mild temperatures between 10°C and 20°C
  • No strong wind
  • No rain during or immediately after cleaning
Cleaning in poor weather can reduce effectiveness and extend drying time.

Maintenance After Pressure Washing

Once brickwork has been professionally cleaned, maintaining it becomes much easier.

Recommended Maintenance Routine

  • Inspect walls annually for moss or algae
  • Light washdowns every 12–24 months
  • Treat shaded areas with preventative biocide
  • Keep gutters and drainage systems clear

Signs Brick Walls Need Cleaning

It is not always obvious when brickwork needs attention. Some early signs include:
  • Dark streaks running down walls
  • Green patches in shaded areas
  • White powdery residue forming on surfaces
  • General dullness compared to untreated sections
Addressing these early prevents deeper staining.

Long-Term Benefits of Proper Brick Cleaning

A correctly cleaned brick wall does more than improve appearance. It helps preserve the material and reduces long-term maintenance costs. Over time, regular professional cleaning helps:
  • Extend brick lifespan
  • Maintain structural integrity
  • Reduce moisture retention
  • Improve overall property appearance
For properties where presentation matters, especially in competitive housing markets, clean brickwork makes a noticeable difference in overall kerb appeal.

Understanding Brick Walls and Why They Need Cleaning

Brick walls are one of the most common exterior finishes across homes and commercial buildings in the UK. They’re valued for their durability, natural appearance, and ability to last for decades with relatively low maintenance. That said, “low maintenance” doesn’t mean “no maintenance”. Over time, brickwork is constantly exposed to rain, wind, pollution, algae spores, moss, and general airborne dirt. In shaded or north-facing areas, this build-up happens even faster. What starts as a slight darkening of the surface can develop into green algae growth, black staining, or a patchy, neglected appearance. Pressure washing is one of the most effective ways to restore brickwork, but it needs to be handled carefully. Brick is porous, and the mortar between bricks is often even more vulnerable. Incorrect technique or excessive pressure can lead to long-term damage rather than improvement.

Why Cleaning Brick Walls Is Important

Cleaning brickwork is not just about appearance. It also plays a role in maintaining the condition of the structure over time.

Common Issues on Unclean Brickwork

Problem Cause Effect
Algae growth Damp conditions and shade Slippery, green surface and staining
Black staining Pollution and soot Dull, aged appearance
Moss build-up Moisture retention Surface deterioration over time
Efflorescence Salt deposits from moisture White powdery marks on bricks
Dirt accumulation Weather exposure Loss of original brick colour
If left untreated, these issues can become more stubborn and harder to remove, often requiring stronger treatments or repeated cleaning.

Choosing the Right Approach for Pressure Washing Brick

Not all brickwork can be cleaned in the same way. The age of the building, type of brick, and condition of the mortar all influence how pressure washing should be carried out.

Brick Type Sensitivity Guide

Brick Type Strength Cleaning Risk Recommended Approach
Engineering brick High density Low risk Higher pressure can be used safely
Facing brick Medium density Moderate risk Controlled pressure required
Handmade brick Softer structure High risk Low pressure only
Older or reclaimed brick Variable Very high risk Specialist careful cleaning
Older properties in particular require a much more cautious approach due to weakened mortar and more absorbent brick surfaces.

Preparing Brick Walls Before Pressure Washing

Preparation is a key part of achieving a clean, even finish without causing damage.

Step 1: Full Inspection

Before any cleaning starts, the entire wall should be checked for:
  • Cracked or missing mortar
  • Loose or damaged bricks
  • Existing repairs or patching
  • Heavy biological growth
Any structural issues should be addressed before water pressure is applied.

Step 2: Protect Surrounding Areas

Pressure washing creates spray and runoff that can affect nearby surfaces. Proper protection should be put in place for:
  • Windows and doors
  • Electrical fittings
  • Painted surfaces
  • Plants and landscaping
This prevents unwanted staining or water ingress.

Step 3: Dry Surface Cleaning

Loose dirt, cobwebs, and debris should be removed with a stiff brush before washing begins. This helps the pressure washer work more effectively and prevents smearing.

Step-by-Step Brick Cleaning Process

Cleaning brickwork properly is about control, not force. The best results come from combining specialist cleaning solutions with carefully managed pressure washing.

Applying a Pre-Treatment Solution

A brick-safe cleaning solution is applied across the surface before pressure washing begins. This helps break down:
  • Algae and moss
  • General grime
  • Atmospheric pollution
  • Organic staining
The solution is left to dwell for around 10–20 minutes, depending on the level of contamination.

Controlled Pressure Washing Technique

Once the treatment has had time to work, pressure washing begins. The key is consistency and distance.

Recommended Practice

  • Keep nozzle 30–50 cm from the surface
  • Use a wide fan spray, not a concentrated jet
  • Work in even, overlapping passes
  • Clean from top to bottom to control runoff

Pressure Guidelines

Condition Pressure Level
Light dirt 50–100 bar
General cleaning 100–150 bar
Heavy staining Up to 200 bar (carefully controlled)
Delicate brickwork Under 100 bar
Increasing pressure is not always the answer. In many cases, better chemical treatment reduces the need for force.

Treating Stubborn Stains

Some stains require additional attention, especially older or deep-set marks. Common difficult stains include:
  • Oil marks
  • Long-term algae growth
  • Smoke and soot staining
These are treated with repeated applications of specialist cleaning products rather than excessive pressure, which could damage the surface.

Final Rinse and Drying

Once cleaning is complete, a full rinse is carried out to remove any remaining residue. The wall is then left to dry naturally. Drying times vary depending on weather conditions, typically ranging from 24 to 72 hours.

Cleaning Products Used on Brickwork

The type of cleaning solution used is just as important as the pressure washer itself.

Types of Cleaning Solutions

Solution Type Purpose Suitable For
Alkaline cleaners General dirt removal Most modern brickwork
Biocides Algae and moss treatment Damp or shaded walls
Specialist detergents Deep cleaning Heavily soiled surfaces
Mild neutral cleaners Delicate surfaces Older brickwork
Using the wrong product can lead to discolouration or long-term surface damage.

Common Mistakes When Cleaning Brick Walls

Brick cleaning is often done incorrectly when approached without experience.

Using Too Much Pressure

Excessive pressure can damage the brick face and erode mortar joints, leading to long-term structural concerns.

Holding the Nozzle Too Close

This can leave visible marks or strip patterns across the surface.

Skipping Pre-Treatment

Without chemical pre-treatment, pressure washing alone often fails to fully remove deep staining.

Ignoring Mortar Condition

Weak mortar can be washed away, especially in older properties.

Safety Considerations During Pressure Washing

Pressure washing brickwork involves both height work and high-pressure equipment.

Key Risks

  • High-pressure water injury
  • Slips from wet surfaces
  • Damage to nearby fittings
  • Falling debris from weakened areas
Proper handling and control are essential to avoid accidents.

Cost of Brick Wall Cleaning in the UK

Pricing varies depending on size, condition, and accessibility. Pureseal Services operates at the higher end of the market, focusing on detailed cleaning and long-lasting results rather than quick surface washes.

Typical Pricing Guide

Service Type Price Range (UK £)
Small wall section £200 – £400
Full house exterior £600 – £1,500
Heavy restoration cleaning £1,200 – £2,500
Large commercial walls £2,000+
Higher pricing reflects the level of care required to clean brick safely without causing damage.

Professional vs DIY Pressure Washing

While DIY pressure washers are widely available, brickwork is one of the more difficult surfaces to clean safely without experience.

Comparison Table

Factor DIY Professional Service
Equipment quality Consumer-grade Industrial systems
Risk of damage High Controlled and low
Finish quality Inconsistent Even and detailed
Knowledge of materials Limited Experienced assessment
Time efficiency Slow Efficient process
Professional cleaning reduces the risk of permanent damage and delivers a more consistent finish.

Weather Conditions and Their Impact

Weather plays a major role in both cleaning effectiveness and drying time.

Ideal Conditions

  • Dry weather
  • Mild temperatures between 10°C and 20°C
  • Low wind conditions
  • No rain during or immediately after cleaning
Poor weather can dilute cleaning products and extend drying times significantly.

Maintenance After Cleaning

Once brickwork has been professionally cleaned, ongoing maintenance becomes much easier.

Recommended Routine

  • Inspect walls annually for moss or algae
  • Light cleaning every 12–24 months
  • Treat shaded areas with preventative solutions
  • Keep gutters clear to prevent overflow staining
Regular maintenance helps preserve the appearance for longer and reduces the need for intensive cleaning in the future.

Signs Brick Walls Need Cleaning

Brickwork does not always look obviously dirty at first glance. Subtle signs include:
  • Gradual darkening of colour
  • Green patches forming in shaded areas
  • White powdery deposits
  • Uneven surface staining
Addressing these early helps maintain a cleaner finish and avoids deeper staining becoming permanent.

Final Conclusion

Cleaning brick walls with a pressure washer can deliver excellent results, but only when it’s done with the right balance of control, preparation, and technique. Brickwork is tougher than it looks, yet still vulnerable to damage if too much pressure is used or if unsuitable products are applied. The key is understanding that effective cleaning is not about force. It comes from proper pre-treatment, careful washing, and respecting the condition and age of the brick and mortar. When these steps are followed correctly, the surface can be restored to a much cleaner, more consistent finish without compromising its structure. Ongoing maintenance also plays a big part in keeping brickwork looking its best. Regular light cleaning, managing moisture exposure, and dealing with early signs of algae or staining all help prevent the need for more intensive restoration work later on. For properties where appearance and long-term protection matter, professional cleaning provides a more controlled and reliable approach. Pureseal Services focuses on delivering that level of care, using methods designed to clean effectively while protecting the integrity of the brickwork itself.

Continue Reading